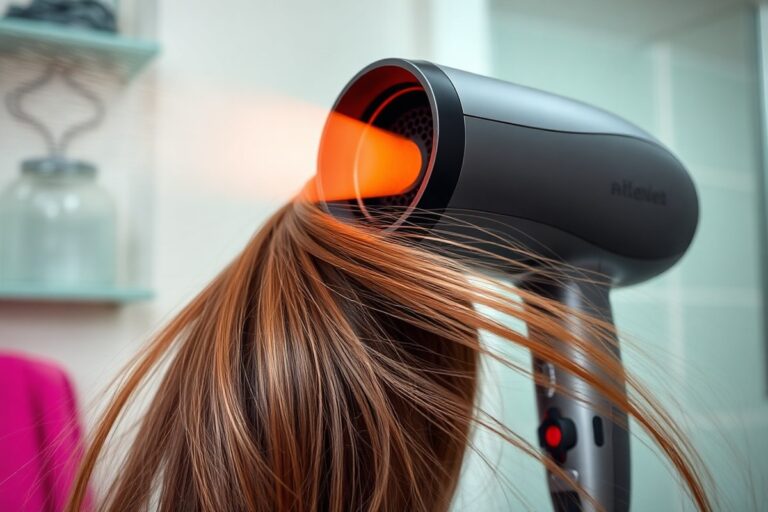
How to Use Airwrap for Perfect Hair: Complete Guide for Best Results
Learning how to use Airwrap starts with drying your hair the right way. You want your hair about 80% dry before styling. Using the dryer attachment first helps get your hair damp, not wet or dry.
Make sure to detangle your hair gently before drying to avoid breakage. Sectioning your hair can speed up drying and give better control. Work in small sections for even heat distribution.
The last bit of drying with the Airwrap is where it really styles your hair. Overdry hair won’t hold curls well, and soaking wet hair won’t shape properly. Taking your time during this stage makes all the difference.
Switch to the styling attachments once your hair reaches that perfect dampness. This way, the Airwrap uses airflow to shape hair without extreme heat. It gives you curl, volume, or smooth styles with less damage.
Key Takeaways
- Start by drying your hair to about 80% damp with the Airwrap dryer attachment.
- Use damp hair because fully wet or dry hair won’t style well with barrels.
- The last 15% of drying is key to letting the Airwrap shape your hair.
- Switch to proper attachments depending on your style: barrel for curls, brush for volume.
- Hold hair for at least 10 to 15 minutes after styling for best curl set.
- Avoid using the Airwrap straight on soaking wet hair to prevent weak curls.
How to Use the Dyson Airwrap Step-by-Step

Your hair should be damp, not wet, before using the Airwrap. Aim for about 70% to 80% dry by using the pre-styling dryer or towel drying. This helps the tool wrap and style your hair smoothly without soaking it.
Sectioning is key for even styling. Smaller sections work better, around one to two inches wide.
Start curling from the front, switch directions for each side to get a natural look. Let the Airwrap do the work as airflow wraps your hair around the barrel.
Hold each section on the barrel for about 15 seconds. This timing sets the curl without overheating or drying the hair too fast.
Right after, press the cool shot button and hold for 5 to 10 seconds. Cooling locks the curl in place and helps it last longer.
- Dry your hair to 70-80% damp: Use the pre-styling dryer or towel-dry. Avoid completely wet hair to help styling hold better.
- Divide your hair into small sections: Work with 1-2 inch sections. Separate sides clearly to control curl direction.
- Attach the barrel of the size you want: Choose 30mm or 40mm. Click it until it fits tightly on the device.
- Place a hair section near the barrel: The airflow will wrap your hair automatically. Keep the tool vertical for best results.
- Hold your hair on the barrel for 15 seconds: This sets the curl right. Avoid overheating your hair by timing it.
- Use the cool shot right after curling: Hold it for 5 to 10 seconds. This keeps the curl shape in place.
- Release the curl gently: Avoid pulling it to keep the curl intact. Repeat until all sections are styled.
Use mousse or styling cream on damp hair for better hold, especially with finer strands. The 20mm barrel fits better for tighter curls or fine hair. For smoother results, finish with a brush attachment to shape and add shine.
Remember, rushing heat time can cause frizz or uneven curls. So take your time sectioning and cooling.
Choosing the Right Attachments and Settings

Attachments do different jobs based on your hair type and style goals. The curling barrels shape curls or waves, while brushes smooth hair or add volume. You lock each attachment by pressing it on and twisting clockwise until it clicks.
Pick your barrel size by the curl shape you want and your hair length. The 40mm barrel works for loose waves or longer hair.
The 30mm barrel makes classic curls and suits medium hair lengths. The 20mm barrel, which you buy separately, is for tight curls or short hair.
| Attachment | Use | Hair Length | Effect |
|---|---|---|---|
| 40mm Curling Barrel | Loose waves | Medium to long | Soft, flowing waves |
| 30mm Curling Barrel | Classic curls | Short to medium | Defined, bouncy curls |
| 20mm Curling Barrel | Tight curls | Short | Small, springy curls |
| Volume Brush | Add volume, slight curl | All lengths | Lifted roots, natural body |
| Smoothing Brush | Reduce frizz, smooth strands | All lengths | Sleek, polished look |
| Dryer Attachment | Dry hair to damp | All lengths | Prepares hair for styling |
For fine or thin hair, use low heat and airflow to avoid damage. Thick or curly hair benefits from higher heat and airflow settings for faster drying.
Adjust airflow based on how much dampness remains. Aim to style when hair is about 80% dry for best hold.
Choose brushes for specific effects: pick the volume brush to lift your roots and add bounce. Use the smoothing brush for a sleek finish or to calm frizz around your crown. The dryer attachment works best before styling to get hair damp but not dripping wet.
Always style hair when it’s slightly damp to help the heat shape your hair evenly.
The Airwrap lets you control airflow and heat settings easily. You can adjust drying speed to your liking. The style hold happens without using extreme heat.
Smaller hair sections dry and style more evenly. So work in thin pieces for a polished look. Larger sections risk uneven drying and take longer.
Preparing Your Hair for Best Airwrap Results
For best Airwrap styling, your hair needs to be damp, not wet or dry. You also want to detangle it well and use protective products to avoid heat damage. These steps help the Airwrap work smoothly and create lasting styles.
Ideal Moisture Level for Airwrap Use
Your hair should be about 80% dry before styling with the Airwrap. This means it still feels slightly damp but no water drips from it. Dry your hair with the Coanda smoothing dryer attachment until it reaches this level.
This moisture level helps the Airwrap curl and style hair well. It uses airflow and heat without needing soaking wet hair. Soaked hair can block the styling effect.
Too dry, and the tool won’t work as well. Too wet, and your hair can take longer to set and may feel heavy.
Recommended Pre-Styling Products
Start with a heat protectant spray to shield your hair from damage. For example, Color Wow’s Dream Coat spray protects against humidity and heat for 3, 4 washes. It’s a reliable choice that also smooths your hair.
You can add a frizz control spray for extra shine. Try Moroccanoil Frizz Shield to make hair easier to manage.
This helps keep your style neat for longer. Applying it evenly on damp hair while sectioning helps keep frizz away.
- Heat protectant spray to block damage
- Humidity-resistant smoothing spray for frizz control
- Light styling mousse or volume spray for extra hold if desired
- Leave-in conditioner if your hair tends to be dry
- A moisture spray to refresh curls mid-style if needed
Using these products prepares your hair to respond well to the Airwrap’s styling tools. Avoid heavy oils or creams that weigh hair down and prevent curls from holding.
Detangling and Sectioning Techniques
Gently detangle your hair before styling. Use a wide-tooth comb or a Wet Brush.
This brush costs about £8 and works well. This reduces breakage and helps products spread evenly.
Work with small, manageable sections to let the Airwrap barrels grab the hair properly. Larry King, Dyson’s Hair Ambassador, advises styling small sections for better curl shape and hold.
- Detangle hair from ends to roots carefully
- Divide hair into 1- to 2-inch sections
- Clip sections out of the way while styling
- Use clips or hair ties for neat, separate sections
- Start at the bottom layers and work upward
Small sections make the airflow work better, giving you curls that last. Larger chunks won’t attach well to the barrels, causing lifeless curls that fall out fast.
Techniques for Curling and Styling Hair with Barrels
To get curls with the Airwrap, use small hair sections. Wrap hair around the barrel in the right direction. Hold for 15 seconds, then use the cool shot to lock the style.
Picking the right section size and alternating curl direction helps curls look natural and last longer. Brushing the curls out gently creates waves or smooth finishes, depending on the look you want.
Wrapping Hair Around the Barrel
Start by dividing your hair into small, manageable sections. Pick a hair section no wider than one inch. This helps heat reach and dry the hair evenly.
Pinch the section about four inches from the ends, leaving the ends free. Wrap the free ends around the barrel following the arrow direction. The airflow will help curl your hair.
Holding too large a section means the middle stays damp longer and curls fall quicker. Small sections dry and set better, producing firmer curls or waves.
Choosing Curl Direction by Side
Wrap hair so the curls are always facing away from your face. On the left side, curl hair toward the left. On the right side, curl hair toward the right.
Alternate curl directions on each section for a natural, tousled look. Avoid curling all sections in the same direction because that can look unnatural and stiff.
For bangs or face layers, wrap curls toward your face. This gives a softer look. Adjust curls if you want.
Setting Time and Using Cool Shot
Hold the barrel steady with your wrapped hair for about 15 seconds. This time lets heat set the curl deep inside the hair strand.
After heating, press and hold the cool shot button. Keep hair on the barrel for 5 to 10 seconds. The cold air locks in the curl shape and makes it last longer.
Don’t rush this step. Skipping the cool shot means curls may fall faster or lose their bounce.
Brushing and Styling Finished Curls
When curls are dry and cool, use a round brush or wide-tooth comb to style. Brushing curls gently smooths them into soft waves or volume without frizz.
To keep curls defined and bouncy, finger-comb or lightly shake them instead of brushing. For looser waves, run the brush through curls a few times softly.
Finish with medium hold hairspray for longer style life. Use just enough to avoid stiffness.
- Divide dry or mostly dry hair into one-inch sections.
- Pinch each section about four inches from the ends.
- Wrap the free ends around the barrel, following the arrow direction.
- Hold the wrapped hair on the barrel for 15 seconds.
- Press the cool shot button and hold for 5, 10 seconds.
- Release the curl gently without pulling it.
- Alternate curl directions for a natural look.
- Brush or finger-style curls once cooled to finish the look.
Using Brushes for Volume and Smoothing Styles
Start with your hair rough-dried to about 80% using the pre-styling dryer. Then, pick the right smoothing brush. Use the firm smoothing brush for thick or coarse hair to control texture and shape better.
Choose the soft smoothing brush for fine or easily flattened hair. It smooths gently without adding weight. This brush helps keep your hair light and soft.
Work in small sections, brushing each from root to tip until dry and flat. This method locks in a sleek finish while drying. The brushes reduce frizz by smoothing strands as you dry them.
This is better than towel-drying roughly or over-drying later. You get smoother hair right from the start.
The round volumizing brush is your tool for lift and bounce. Hold it under roots for a few seconds, then slowly draw it through to the ends. Use the cool shot on your Airwrap to set volume.
This helps your style last longer through the day. It makes roots look fuller and hair more vibrant.
Avoid brushing damp hair aggressively; it causes breakage and frizz. Be gentle and patient for the smoothest finish.
- Work on 1-inch sections for better control
- Use the soft brush on fine, straight, or wavy hair
- Use the firm brush on thick or coarse hair types
- Hold the round brush under roots and hold for 3, 5 seconds for lift
- Combine the smoothing brush then switch to the round brush for volume
- Finish with the cool shot to lock styles in place
- Apply light serum after styling to reduce flyaways and add shine
Combining brushes with other attachments can refine your style. For extra sleekness on wavy hair, try the soft smoothing brush. Use it right after the Coanda dryer.
This combo gives a smooth, polished look. Then switch to the round brush to add volume if desired. The firm brush works best for a straighter finish with dense hair.
It provides more tension while styling. This helps achieve the look you want.
Keep each hold to about 15, 20 seconds per section for a long-lasting, polished look. The brushes work while drying by creating the tension needed to mimic a professional blowout. Skipping this step can make your styles fall flat or frizz all day.
Setting your style is key to keeping it fresh. Use the cool shot to lock it in.
Maintaining Curls and Blowouts for Longer Wear
To make curls last all day, stop drying your hair when it’s about 80% dry. Water breaks the bonds that shape your hair, so the final dry spot matters.
After curling with the Airwrap, blast cold air on each curl. This locks in your style and helps it cool fast.
Products help a lot with keeping styles fresh and frizz-free. Use a heat protectant spray before airwrapping to shield your hair. Finish with a flexible-hold hairspray to keep curls just bouncy, not stiff.
Hair oils like 14th Night Hair Oil add shine when applied. Gently rub a little on your ends to tame flyaways.
Don’t touch your hair much during the day. Running fingers through curls breaks them down and causes frizz. For extra hold, coil curls onto your head with clips.
Leave them until your hair cools completely. This works well if your hair is fine or slippery.
For refreshing second-day curls, lightly mist dry hair and run the Airwrap over small sections again. Use creaseless clips to hold styled pieces, like bangs, without dents.
Sleep on a silk pillowcase to protect your blowout. You can also wear a loose bun with a silky scrunchie.
Smooth hair well on both sides before styling by brushing sections completely. This helps curls set better and last longer. Adding rollers right after curling can also help curls hold their shape as hair cools down.
Common Beginner Mistakes and How to Fix Them
Using the Airwrap on hair that’s too wet or too dry can cause weak curls. The hair should be about 80% dry before styling.
Fully wet hair struggles to dry fully on the barrel and slips off. Very dry hair doesn’t hold curls well.
Wrong barrel size can also cause limp styles or uneven curls. Choose smaller barrels for tighter curls and larger barrels for loose waves. Using a barrel too big for your hair length will make the style flat or uneven.
Sectioning your hair poorly often leads to tangles and uneven curl patterns. Divide your hair into clean, manageable sections before starting. Hold hair sections by the middle.
Place the barrel near the ends. Let hair catch and wrap smoothly.
- Don’t start on soaking wet hair; towel dry until 80% dry.
- Choose barrel sizes that match your hair length and curl style.
- Section hair into 1-2 inch parts for better control.
- Hold hair wrapped on the barrel for 10 to 15 seconds.
- Use the smoothing setting on curly hair for straighter curls.
- Wrap hair by hand for looser, natural-looking curls.
- Use the flyaway attachment to smooth frizz and flyaways after styling.
Frizzy curls happen when hair isn’t fully dry on the barrel. Using wrong heat can also cause frizz. Hold the hair wrapped for at least 15 seconds or until it feels dry.
For curly or coily hair, use the smoothing setting. Move airflow down the hair. This helps hair lie flat on the barrel.
Tangling can occur when too much hair is wrapped at once or when sections aren’t clean. Keep sections small and neat. Hold hair in the middle when wrapping.
Avoid holding too close to roots or ends. This stops pulling and tangles.
Flat or limp styles need bigger barrel sizes. Let hair air dry more before styling.
Avoid holding the barrel for too short a time because curls won’t set. Proper sectioning and barrel choice make a big difference in volume and shape.
Cleaning and Maintaining Your Dyson Airwrap
Cleaning your Dyson Airwrap regularly keeps it working well and lasting longer. Focus on cleaning the attachments, filter, and main unit at least once a month. Watch for flashing lights or the tool cutting out as signs to clean sooner.
Cleaning Attachments and Filter
Detach all styling attachments before cleaning to avoid damage. Use a dry cloth to wipe down barrels, brushes, and combs after every use. Dyson suggests cleaning the filter about once a month or when the light flashes.
Follow these simple steps to clean the filter and attachments properly:
- Turn off and unplug the Airwrap from the power source.
- Remove the filter cage from the main unit by twisting it counterclockwise.
- Use a dry brush or cloth to clear dust and debris from the filter mesh.
- Rinse the filter cage under warm water if needed, then dry completely.
- Wipe attachments with a damp cloth; avoid soaking or harsh chemicals.
- Reattach the filter securely to the main unit after drying.
- Store attachments in a clean, dry place to avoid buildup.
Never let water enter the main motor or controls to prevent damage.
Safe Handling and Storage
Handle the Airwrap gently to avoid dropping or knocking it against hard surfaces. Heat can damage plastic parts, so let the unit cool before storing. Keep the tool and attachments away from moisture and direct sunlight.
Store the Airwrap in its original case or a soft pouch to protect it. Avoid wrapping the cord tightly around the unit, as this can cause wear or breakage. Check the cord regularly for any signs of fraying or damage.
Troubleshooting Performance Issues
If the Airwrap cuts out or loses suction, first check and clean the filter. A blocked filter often causes power interruptions during styling. Make sure all attachments are correctly clipped on before use to ensure airflow.
Look for unusual sounds or overheating, which may require professional repair. Dyson offers service options if your Airwrap malfunctions beyond simple cleaning steps. Avoid opening the main unit yourself to prevent voiding the warranty.
Your First Steps: Quick-Start Action Plan
Use this plan to start styling with your Dyson Airwrap. Follow the steps to get great curls, waves, or smooth hair fast.
- Before You Start: Wash and towel-dry your hair until damp but not dripping. This helps the Airwrap style your hair better and finish faster.
- Day 1: Choose the barrel size that fits your curl goal (1.2-inch for loose waves, 1-inch for tighter curls). Test on a small section.
- Day 2: Use the pre-styling heat setting to warm your hair. Check it feels comfortably warm, not hot, to avoid damage.
- Day 3: Practice wrapping hair around the barrel away from your face for even curls. Notice the airflow sucking the hair smoothly.
- Week 1: Try the smoothing brushes for blowouts. Run the brush through your hair while moving the Airwrap downwards slowly.
- Week 2: Hold each curl for about 10 seconds before releasing. Let curls cool before touching to keep the shape longer.
- Week 3: Clean the brushes and barrels after use. Remove hair strands, and wipe any product build-up to keep styling consistent.
- Week 4: Use your Airwrap on dry hair again to refresh curls or smoothness without heat. See how quick and easy it stays.
Frequently Asked Questions
How Long Should I Dry My Hair Before Using the Airwrap?
Dry your hair until it’s about 80% dry before using the Airwrap. This helps the styling finish smoothly without causing heat damage.
Can I Use the Airwrap on All Hair Types?
The Airwrap is designed to work on many hair types, but results vary. You might need different settings or attachments for fine, thick, or curly hair.
How Do I Lock Attachments Securely on the Airwrap?
Click the attachment onto the Airwrap, then turn it counterclockwise to lock. This keeps the tool steady for safe, effective styling.
What’s the Difference Between the 30mm and 40mm Curling Barrels?
The 30mm barrel creates tighter curls, while the 40mm makes loose waves. Choose based on the curl size you want.
Can I Use the Airwrap on Dry Hair?
Yes, but it’s best on damp hair for best curl and style hold. Dry hair may need more heat for styling and can feel drier.
Is the Airwrap Worth the $799 Price?
The Airwrap is pricey but combines drying and styling in one tool. Its technology minimizes heat damage compared to standard tools.
Before You Go
Getting the best from your Dyson Airwrap takes a bit of practice, but it’s worth it. Start with small steps and use the right attachments. Try styling today, and notice how your hair changes for the better.