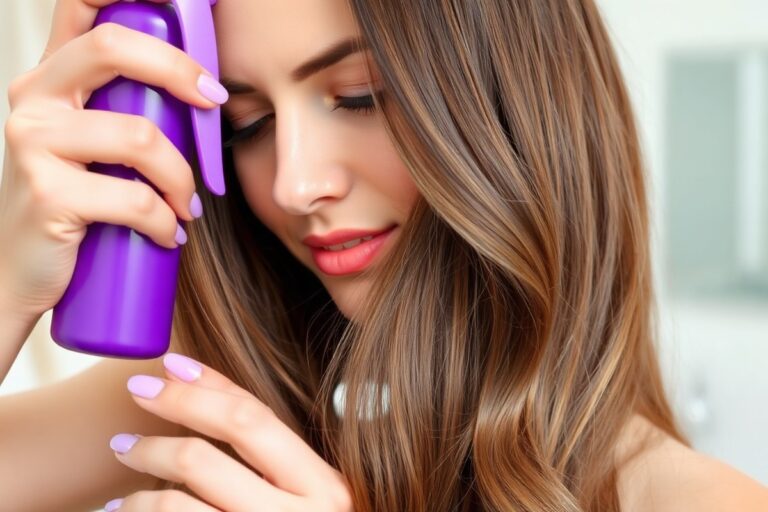
How to Wave Your Hair with a Straightener: Simple Steps for Perfect Waves
Creating waves with a straightener is simpler than most expect. Grab a quality straightener and try a basic twisting move. Slide tiny hair sections in an S-shaped curve for soft waves.
Make sure your straightener is hot enough and your hair is completely dry first. Use a heat protectant spray to avoid damage.
Pull the hair slightly away from your face and twist as you clamp the straightener. This helps set the waves better for longer-lasting curls.
Leaving the ends out gives you a beachy, relaxed finish. For tighter waves, clamp closer to the roots.
Alternating the wave directions for each section creates a more natural look. With some practice, you can nail soft waves even with basic tools.
Key Takeaways
- Use a flat iron with 1-inch plates set at your hair’s tolerable heat level.
- Always work on dry hair to avoid damage and get better wave hold.
- Saturate dry strands with a heat protectant before styling.
- Pinch 1-inch sections of hair into an S shape before clamping.
- Pull hair gently away from your face while twisting for defined waves.
- Alternate the wave direction in each section for a natural, beachy look.
How to Wave Your Hair with a Straightener in Easy Steps

Creating waves with a straightener is easier than it seems. You’ll twist and glide small sections of hair to bend them into soft waves. Alternating the direction of your twists helps the waves look natural and beachy.
Follow these simple steps to get a nice wave pattern, even if you’re new to it. Start with dry hair that feels smooth to the touch. Run your straightener on a medium heat, about 300°F to 350°F. This helps avoid damage while styling your hair.
- Divide your hair into manageable sections, about 1-inch wide each. Smaller sections create tighter waves, while larger ones give loose waves.
- Clamp the straightener near the roots of a section, holding the hair perpendicular to the plates. This position helps start the wave high for a natural look.
- Twist the straightener away from your face one full turn. This turn shapes the hair into a wave as you move down.
- Slowly glide the straightener down the hair, keeping the twist. Hold for 2 to 4 seconds before releasing to set the wave.
- Alternate the twist direction with each section. Twist the first section away from your face. Then, twist the next section toward your face.
- Run your fingers gently through the waves to separate them. This adds volume and keeps them from looking too uniform.
- Spray a light hairspray for hold if you want your waves to last longer. Use a flexible formula for a natural, touchable finish.
For long hair, holding each twist a little longer helps the wave last. For a messier look, slide the straightener faster. Pull your hair a little taut as you slide.
Be careful not to clamp too hard. Pressing too tight can leave dents or crimps instead of smooth waves. Also, keep your sections even for a balanced style.
Preparing Your Hair for Heat Styling and Waves

Before using your straightener to wave your hair, your strands must be completely dry. Wet or damp hair can get damaged with high heat and won’t hold waves well. Many people air dry their hair to avoid frizz.
Some use Ionic Technology hair dryers. These dry hair gently without causing damage.
Detangling is the next step after drying. Use a wide-tooth comb to remove knots gently. You can also use a brush for wet or dry hair.
This helps prevent breakage. This helps your waves form evenly and prevents snagging or breaking during styling.
Applying a heat protectant spray is essential. It coats each strand with a layer that reduces heat damage.
Sprays like Philip B or Magical Quick Dry Potion also keep hair smooth and avoid dryness. Let the protectant dry fully before heat styling.
- Dry hair completely with air drying or a gentle blow dryer
- Detangle hair using a wide-tooth comb or soft brush
- Spray heat protectant evenly from roots to tips
- Allow the heat protectant to dry naturally for a few minutes
- Work in sections to control waves more easily
- Use a straightener with adjustable heat suited for your hair type
Taking these preparation steps matters because straighteners operate at temperatures up to 450°F. Even healthy hair can suffer from burning or dryness without protection. Protectants slow heat penetration and prevent split ends. Dry hair holds waves better; moisture inside strands causes uneven styling.
Never use a straightener on damp hair. It can cause steam damage and weaken your strands.
Good results mean smooth, shiny waves that hold shape. The waves should feel soft to the touch. Poorly prepped hair may appear frizzy, dry, or limp afterward.
Let your heat protectant dry completely before styling. Use the right tools to make waves last longer. This keeps your hair healthy and strong.
Choosing the Right Straightener and Heat Settings
Choosing the right straightener and heat settings depends on your hair texture and length. Pick plates sized for your hair length and a heat setting that fits your hair type. This helps create even, natural waves without damage.
Plate Size Options and Hair Suitability
Smaller plates, around 1 inch wide, work best for short or fine hair. They give precise control and help form smaller, tighter waves. For longer hair, wider plates up to 1.5 inches cover more strands, making waves quicker to create.
Materials matter too. Ceramic plates distribute heat evenly and are gentle on fine or damaged hair. Titanium plates heat up quickly and stay hot longer.
This makes them good for thick or coarse hair. But using them wrong can cause damage.
| Plate Size | Hair Length | Hair Texture | Material |
|---|---|---|---|
| 0.75 to 1 inch | Short to medium | Fine | Ceramic or Tourmaline |
| 1 to 1.5 inches | Medium to long | All textures | Ceramic, Tourmaline |
| 1 to 1.5 inches | Medium to long | Thick or coarse | Titanium |
For short hair, narrow plates help isolate small sections. Thick hair benefits from titanium plates because they reach high heat fast. Use ceramic if your hair is fine or damaged to avoid hot spots.
Recommended Heat Settings by Hair Type
Set your straightener temperature to avoid damaging your hair. Fine or damaged hair needs under 300°F. Medium thickness does well at 300°F to 365°F. Thick or coarse hair can handle 365°F to 410°F.
Temperatures that are too high can burn fine hair or cause frizz. Too low and thick hair won’t hold waves. Use adjustable heat straighteners so you can match your hair type precisely.
| Hair Type | Heat Setting |
|---|---|
| Fine or damaged | 250°F – 300°F |
| Medium thickness | 300°F – 365°F |
| Thick or coarse | 365°F – 410°F |
Adjust based on how your hair reacts. Start low and increase heat if waves don’t last or hair feels limp. Always use a heat protector spray first.
Corded vs Cordless Straighteners
Corded straighteners offer steady heat and power. So waves last longer and styling is consistent. Cordless versions give freedom to move but usually have shorter runtimes and lower max temperatures.
High-quality cordless straighteners like the Dyson Corrale have smart heat control and flexible copper plates. They let you set three temperature levels and avoid hot spots. These cost more but suit travel or quick touch-ups.
For daily, full styling, choose corded models. For quick fixes on second-day hair or short sessions, cordless straighteners work well. Check battery life and heat ranges before buying cordless.
Techniques for Different Wave Styles with a Straightener
You can create several stylish waves with a hair straightener. Beach waves look loose and natural, while S-waves form smooth curves. Twisted and crimped waves add texture and volume, perfect for variety.
Each style has a slightly different method. It’s simple once you try. You get the hang of it quickly.
Beach Waves Step-by-Step
Beach waves give your hair soft, tousled looks like you just spent time at the shore. This style works for most hair lengths, especially medium to long. It looks best with hair that has some natural texture or light product for hold.
- Divide your hair into medium-sized sections.
- Clamp the straightener near the roots of one section.
- Twist the straightener away from your face while pulling it down slowly.
- Release the hair and move to the next section.
- Repeat until all sections have loose waves.
- Run your fingers gently through your hair to separate waves.
- Finish with a light spray of salt spray or flexible hold hairspray.
Use plates that aren’t too hot, around 300°F to 350°F, to avoid sharp creases. Pull the straightener with a bit of force so the wave forms naturally. The waves should be loose, soft, and have a slight bend instead of tight curls.
S-Waves with Twisting Technique
S-waves create flowing S-shaped curves, great for long hair. The plates on wider straighteners make this easier. This style isn’t recommended for short hair because the waves need length to bounce properly.
- Section your hair into strips about 1 inch wide.
- Clamp the straightener towards the top of a section.
- Press the straightener and twist it in one direction to create half the ‘S’ shape.
- Move the straightener a few inches down and twist in the opposite direction.
- Continue this pattern until the whole length has S-shaped waves.
- Release and gently brush through with your fingers for softer waves.
You want a smooth motion with the twisting to avoid lines. The waves will look natural and curved, not tightly curled. This style adds volume and suits events where you want polished but relaxed hair.
Creating Twisted and Crimped Waves
Twisted waves add a spiral effect that’s tighter than beach waves. Crimped waves can mimic textured hair with a zigzag look. Both styles work well on any hair type if you control the straightener well.
- Take small sections of hair, about half an inch wide.
- Twist each section gently before clamping them with the straightener.
- Pull the twisted section slowly through the straightener, twisting away from the face.
- To create crimped waves, braid small sections and press the straightener over the braids.
- Let hair cool completely before releasing braids for crimped texture.
- Spray light hairspray for hold without stiffness.
Twisting your hair with the straightener gives spiral waves that add bounce. The braid-and-press method creates crimped waves, perfect for adding texture without heat damage on every strand. Don’t rush pulling the straightener down; a slow glide locks in the wave better.
Adapting Waving Techniques for Short and Long Hair
Short hair waves need smaller hair sections to look natural. Clamp about half-inch sections near the roots and twist the straightener away from your face.
Use sectioning clips to hold back the rest. Work from the bottom layer up for even wave coverage.
For short hair, pick a straightener with curved plates and adjustable heat settings. The Cloud Nine Original Contouring Iron fits well. Its Sericite®-infused plates protect hair.
It helps create waves easily. Smaller plates, about one inch wide, give you better control and fit shorter strands comfortably.
Long hair takes larger sections, around one inch across. But keep the same twisting motion. Big sections save time and create loose, natural waves.
Work carefully through the lower layers first. Then do the upper layers.
Use clips to keep hair separated. Curled waves on long hair give volume but take more time, roughly 20 to 30 minutes.
Wave styles inside short hair look best with tighter curls. Beach waves add volume and texture. These styles lift your hair.
Long hair lets you try looser, flowing waves and more complex styles like S-waves. Braids or twists add extra pattern to long hair.
They take longer to finish though. They might feel heavy on fine strands.
Most flat irons or curling wands work for any hair length. You must use the right section size. This matters for even waves.
For short hair, heating time per section is about 5 to 7 seconds to avoid damage. Long hair might need 8 to 10 seconds per section because of thickness. But pay attention to heat settings above 350°F which can cause breakage.
Always use a heat protectant spray before styling. Pick a straightener with temperature control. This protects both short and long hair from damage.
Avoiding Common Mistakes and Troubleshooting Waves
Uneven waves often happen because your straightener isn’t hot enough or you skip preheating. When the plates aren’t ready, you’ll need more passes on your hair. That extra heat raises the chance of damage and leaves limp or inconsistent waves.
Using too large hair sections can also cause uneven waves. Smaller sections allow heat to spread evenly.
This creates crisp, defined waves instead of patchy spots. Try taking thinner sections, about 1 inch wide, for better results.
Dryness or static cause frizz and flyaways after waving hair. Spray shine-boosting products like Sexy Hair Vibrant Rose Elixir for quick help. Gently comb your hair to smooth flyaways without ruining your waves.
Heat damage shows up mostly from using too much heat on fine hair. It also happens when you style hair that is still damp.
Wet hair plus hot plates leads to breakage and split ends. Always dry your hair fully before using your straightener.
To prevent heat damage, use the lowest effective temperature for your hair type. Fine hair often needs less than 300°F. Thick or coarse hair can handle higher heat but don’t go beyond 400°F. Also, always apply heat protectant spray before waving.
- Preheat the straightener for at least 2 minutes to avoid uneven heat
- Work with 1-inch wide sections for consistent waves
- Use shine spray to tame frizz and flyaways after styling
- Never use a straightener on wet or damp hair
- Set heat below 300°F for fine hair to prevent damage
- Apply heat protectant spray every time before styling
- Use fewer passes to minimize heat exposure and protect hair
A common slip-up is rushing through styling without cooling and setting each wave. Give your hair a moment to cool and hold the shape after each section. Avoid touching your waves right after styling to keep them from getting limp.
Maintaining and Refreshing Waves Throughout the Day
Use a light hair oil to keep your waves hydrated and shiny. Apply it sparingly to avoid weighing down your hair. This helps your waves look smooth and healthy all day.
To add volume, try a root-lifting spray like the one from Color Wow. Spray it directly at your roots, then gently lift your hair with your fingers. This gives your waves extra bounce without flattening the rest.
Refreshing waves without washing is easy. Lightly mist your hair with a water spray bottle, then scrunch your waves using your hands. Let your hair air-dry or use a diffuser on low heat to reactivate the wave pattern.
Wide-tooth combs are best for maintaining waves. Use one to gently detangle your hair without breaking the wave shape. Avoid brushes that can flatten your waves or cause frizz.
You can protect waves overnight by loosely tying your hair up. Use a high but loose ponytail. This is called a pineapple style.
This keeps the hair from getting crushed and helps waves stay intact. Use a silk or satin pillowcase to reduce friction that causes frizz.
A cooling period is important after heat styling to lock in your waves. Let your hair cool down with air or a cool dryer setting.
Do this for five minutes before touching it. This sets the wave pattern and helps them last throughout the day.
Avoid applying too much product at once if your waves fall flat. Use small amounts to keep your hair flexible. Too much oil or spray can make hair greasy or weigh it down.
To revive waves, carefully reheat them with your straightener. Use the lowest heat setting for best results.
Use a heat protectant spray first and focus only on pieces that need reshaping. This avoids extra heat damage while refreshing your look.
Safety Tips and Heat Protection When Using a Straightener
You can wave your hair with a straightener safely. Use proper heat protection and control the temperature. Watch for signs of damage while styling.
Protecting your hair from heat stops dryness and breakage. Use the right methods every time to keep your hair healthy and shiny.
Applying Heat Protectant Correctly
Heat protectants create a shield that reduces heat damage. Apply the product evenly on damp or dry hair before using the straightener. This helps seal moisture inside and lowers the chance of split ends.
Spray or cream protectants typically cost between $8 and $20, lasting for many uses. Use about a nickel-sized amount, spreading it from roots to tips. Comb through your hair to distribute the product evenly.
- Use a heat protectant designed for temperatures above 400°F (204°C)
- Apply on damp hair first for better absorption
- Work through hair with fingers or a comb for full coverage
- Wait 3 to 5 minutes for the product to dry before styling
- Reapply if you touch up waves after washing or water exposure
Never skip heat protectant; it cuts down damage even at low heat.
Recognizing Heat Damage Early Signs
Your hair shows signs when it’s overheating or damaged. Look for dryness, unusual brittleness, or more breakage than usual. Rough texture and loss of shine mean your hair’s suffering under the heat.
Hair that feels mushy or stretches more than usual could indicate heat damage inside the strands. Checking your hair often helps catch these signs early before serious damage forms. Stop using heat for a few days if you see these problems and use deep conditioners.
Safe Temperature Ranges to Use
Keep the straightener below 350°F (177°C) for fine or damaged hair to avoid burns. For thick or coarse hair, 350°F to 410°F works well. This range prevents excessive damage.
Stick to these temperatures for better results. Higher heat isn’t better; it burns hair quickly and dries it out.
Set your iron to the lowest effective temperature for your hair type and style. Test a small section first, watching how your hair responds. Reduce the temperature immediately when you see smoke or smell burning.
- Fine or fragile hair: 300°F to 350°F (149°C to 177°C)
- Normal hair: 350°F to 390°F (177°C to 199°C)
- Thick or coarse hair: 390°F to 410°F (199°C to 210°C)
- Avoid using the highest heat for more than a few seconds
- Choose a straightener with an adjustable temperature control
Step-by-Step Action Plan to Wave Your Hair with a Straightener
Follow these simple steps to create natural waves using your straightener.
- Before you start: Wash and dry your hair completely, then apply a heat protectant spray. Your hair feels smooth and ready for styling.
- First pass: Section your hair into manageable parts, about 1-inch wide. Your hair should be untangled and easy to handle.
- Wave creation: Clamp the straightener close to your roots. Twist it 180 degrees. Then slowly slide it down the hair strand. You’ll see a soft wave form with each pass.
- Repeat: Continue on all sections until your head is fully waved. Waves should look natural and consistent across your hair.
- Second wave pass (optional): For tighter waves, repeat the waving on random strands. Waves will show added texture and body.
- Cool down: Let your waves cool before touching them. Cool hair holds style longer and reduces frizz.
- Finish: Lightly run your fingers or a wide-tooth comb through the waves. Your waves will look more relaxed and natural.
- Set the style: Spritz a flexible hold hairspray to keep waves in place without stiffness.
Frequently Asked Questions
How Do I Make a Beach Wave with a Flat Iron?
To make beach waves with a flat iron, clamp your hair. Twist the iron one full turn away from your face.
Then slowly glide down the strand. Glide the straightener down slowly to set the wave for a natural, wavy look.
How Do I Make My Straight Hair Wavy?
Section dry hair into parts. Twist a straightener around each section.
Glide the straightener slowly along the strands. Use heat protectant first and move slowly to get lasting waves.
How Can I Turn My Straight Hair into Waves?
Clamp sections of hair with a straightener. Twist the iron while pulling down.
This turns straight hair into waves. Adjust heat to your hair type and prep with protectant for best results.
How to Create Waves in Hair for Beginners?
Beginners clamp small sections of hair with a straightener. Twist the iron slightly as you pull down.
This creates gentle waves. Practice on dry hair with heat protectant to avoid damage.
What Heat Setting Should I Use to Wave My Hair with a Straightener?
Use the highest heat your hair can handle safely. This is usually 350-400°F. Always apply a heat protectant first. Higher heat sets waves better but avoid burning or damage.
Can I Wave My Hair with Any Straightener?
Most straighteners can make waves, but ones with 1-inch or wider plates work best. Slimmer irons create tight waves; wider plates give loose, beachy waves. Choose based on your wave style.
Key Points to Remember
You can create natural waves with your straightener by practicing these steps. Try waving a small section first to get comfortable with the technique. Keep exploring different wave sizes until you find the look that suits you best.