How to Wash Makeup Brushes at Home: Simple Steps for Fast, Safe Cleaning
Wondering how to wash makeup brushes at home without ruining them? The best way is to use a gentle cleanser and lukewarm water so bristles stay soft.
Rinse thoroughly to remove all makeup and soap residue. Harsh soaps or hot water can damage bristles or loosen adhesives.
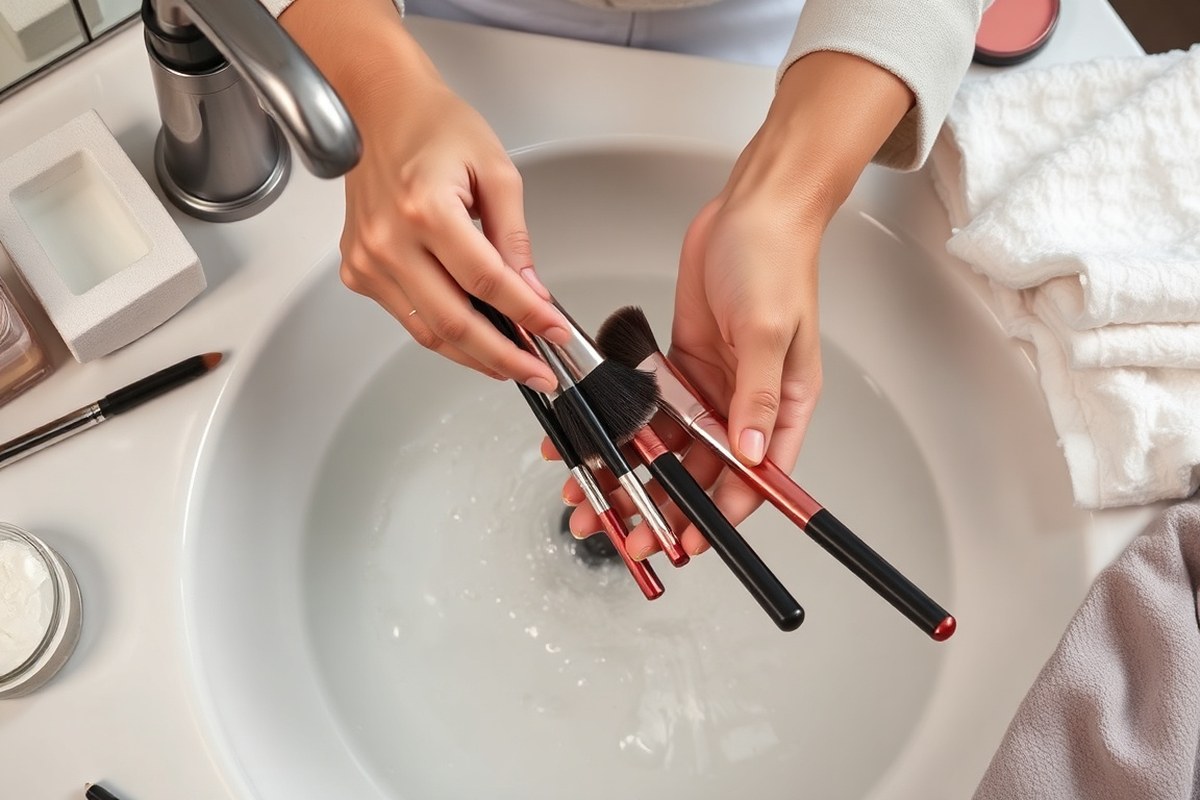
Start by running the brush tips under lukewarm water, avoiding wetting the handle to protect the glue. Apply a small amount of gentle cleanser, like baby shampoo or a brush cleaner. Swirl it gently on the bristles, focusing on the tips and avoiding the base to protect the brush.
Rinsing the brushes right away prevents soap buildup and keeps your brush fibers cleaner longer. Gently squeeze out excess water without pulling on the bristles. Lay brushes flat on a towel to dry, with the bristles hanging off the edge if possible.
This stops water from soaking into glue. Glue damage makes bristles fall out quickly.
Key Takeaways
- Clean makeup brushes every 7 to 10 days to prevent bacteria buildup.
- Use gentle soaps made for brush cleaning to protect bristles.
- Avoid soaking the brush handle to keep glue intact.
- Rinse brushes thoroughly to remove all soap and makeup.
- Dry brushes flat on a towel to maintain their shape.
- Synthetic and natural brushes need slightly different care when washing.
How to Wash Makeup Brushes at Home Step-by-Step

Washing makeup brushes at home is simple if you follow the right steps. Start by prepping your brushes and choosing a gentle cleanser. Then rinse thoroughly and reshape the bristles before drying.
Preparing Brushes for Cleaning
Begin by removing any excess makeup from the brush. Tap or wipe the brush on a clean tissue or cloth. This reduces heavy buildup and gets your brushes ready for deep cleaning.
Check the handle and ferrule for damages before washing. Damaged brushes may shed bristles or lose shape during cleaning. Avoid soaking the brush handle to protect glue and paint.
Choosing and Applying the Cleanser
Select a cleanser designed for makeup brushes or a mild shampoo. Look for plant-based or gentle formulas that rinse clean without residue. Dish soap can remove tough oils but may dry out bristles if used often.
Put a small amount of cleanser on your hand or mat. Using a brush cleaning mat under the sink can help loosen dirt. Gently massage and swirl the brush bristles to work in the cleanser, avoiding the ferrule area.
Rinsing and Removing Makeup Residue
Rinse the brush under lukewarm running water with the bristles pointing downward. Avoid wetting the brush handle, which can loosen glue or paint. Keep rinsing until the water runs clear and no makeup remains.
For stubborn foundation or waterproof makeup, repeat the cleansing process once or twice. You can also use a brush cleansing spray for quick daily cleans without water or rinsing. This keeps brushes ready to use and extends time between deep washes.
Squeezing and Reshaping Bristles
After rinsing, gently squeeze out excess water using a clean towel. Avoid pulling on the bristles to prevent damage. Reshape the brush head into its original form to keep its shape intact.
Lay the brushes flat or hang them with the bristles facing down to dry completely. Avoid drying them upright to stop water from seeping into the ferrule. Let your brushes dry for several hours before using again to prevent mildew.
- Tap or gently wipe brushes on a tissue to remove makeup.
- Wet bristles with lukewarm water, avoiding handles.
- Apply cleanser on hand, mat, or brush tips.
- Massage bristles gently to work in cleanser.
- Rinse under running water, pointing bristles downward.
- Repeat cleansing if stubborn residue remains.
- Squeeze out water carefully, reshape bristles.
- Lay flat or hang brushes to dry completely.
Best Soaps and Cleansers for Cleaning Brushes Safely
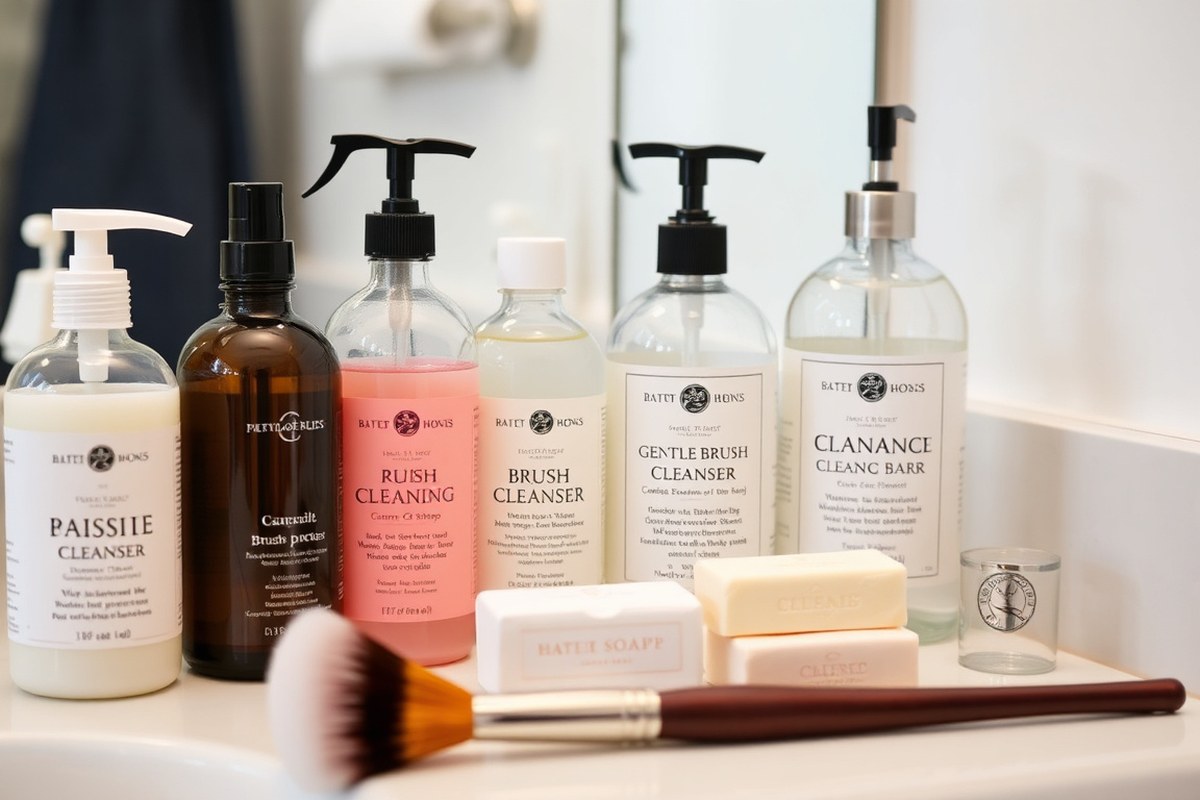
Using the right soap makes a big difference in cleaning makeup brushes. Baby shampoo gently removes makeup and dirt without hurting the bristles. It works especially well on natural brushes.
For thick foundation or cream buildup, dish soaps work well. Meyer’s Clean Day and Dawn are strong cleaners. They remove heavy makeup from brushes effectively.
You can mix dish soap with white vinegar and warm water to soak brushes. This mix breaks down oils and disinfects. Try soaking brushes for 10 to 15 minutes, then rinse well.
Adding olive oil to dish soap loosens creamy makeup. Use this mix just once a month.
It prevents buildup while protecting brush bristles. Always check if the ingredients suit your brush type before using this mix.
| Cleaner | Works Well On | Limit |
|---|---|---|
| Baby Shampoo | Routine washing on all brushes | May need repeated washing for heavy foundation |
| Dish Soap + Vinegar | Deep cleansing and disinfecting | Can dry bristles if used too often |
| Dish Soap + Olive Oil | Cream and liquid product buildup | Monthly deep clean only; watch ingredients |
| Dedicated Brush Cleanser | Weekly washing and deep cleaning | Sprays refresh but do not replace washing |
Eco-friendly soaps tend to be more gentle and plant-based. Meyer’s dish soap offers a natural option with strong cleaning power. Avoid vinegar if your skin is sensitive or brushes are delicate.
Vinegar is acidic and may dry out bristles over time. Use it sparingly to protect your tools.
While dish soap is handy, it can cause some brushes to lose softness if overused. Baby shampoo keeps brushes soft but takes more time for tough makeup. Dedicated brush cleansers balance cleaning ability and skin safety.
Brush cleaners come as bars, liquids, or sprays. They cost about $8 to $15. Each one lasts several months with regular use.
Always rinse your brushes thoroughly to remove all soap residue. Leftover suds can irritate your skin.
How Often to Clean Different Types of Makeup Brushes
Cleaning your makeup brushes depends on how you use them and their type. Brushes for foundation and concealer should be cleaned once a week to avoid bacteria buildup. These brushes touch liquid or cream makeup that can trap oils.
Oils and dirt get stuck in the brushes. This can lead to breakouts.
Eye brushes get less dirt and oil but still need attention. Cleaning eye brushes every two weeks works well for most people. Brushes for blush and bronzer land between face and eye brushes.
So clean them every one to two weeks depending on use. Lip brushes need extra care.
Clean them after every use. They touch your mouth bacteria directly.
Personal skin type also changes how often to wash. Washing face brushes twice a week helps if you have oily skin. It also helps with acne-prone skin.
Dry or sensitive skin may need less frequent washing if irritation happens. Washing brushes more often helps if you use liquid or cream makeup daily.
This stops buildup from forming. Your makeup routine affects how often to clean.
- Foundation and concealer brushes: clean once weekly
- Eye brushes: clean every two weeks
- Blush and bronzer brushes: clean every one to two weeks
- Lip brushes: clean after each use
- Oily or acne-prone skin: wash face brushes twice weekly
- Use liquid or cream makeup daily: increase cleaning frequency
Following these schedules takes just a few minutes but keeps brushes fresh and skin healthy. Skipping cleaning can cause makeup to apply unevenly and lead to skin irritation. Sticking to a routine also helps your brushes last longer and keeps your look flawless.
Proper Drying Techniques to Protect Brush Shape and Glue
Dry your makeup brushes properly to keep the bristles firm. This also stops the glue from breaking down. Good drying helps your brushes last longer.
Lay them at an angle or flat, never standing straight up. This stops water from seeping inside the ferrule and ruining the brush.
Ideal Brush Positioning for Drying
Place your brushes at about a 45-degree angle when drying. This lets water drip away from the metal ferrule and handle.
Keep the bristles from touching surfaces to keep their shape intact. Hanging them over a table edge or using a drying rack works great.
Brushes shouldn’t dry standing upright with bristles up. Water can then soak into the ferrule, loosening glue and causing bristles to shed.
Average Drying Times by Brush Type
Small brushes with dense bristles usually dry in 6 to 8 hours on a towel. Larger, fluffier face brushes can take 10 to 12 hours to dry completely.
A drying rack speeds airflow around the bristles and can reduce drying time. Expect around 6 to 10 hours depending on brush size and humidity.
Don’t rush the drying by using hair dryers or heaters. Heat damages bristle fibers and the glue inside the brush.
Avoiding Common Drying Mistakes
Never soak the entire brush. Soaking loosens handle glue and peels paint. Wet only the bristle tips during washing.
Don’t dry brushes standing upright with bristles up. Water settles in the ferrule, leading to shedding over time.
Avoid drying with leftover cleanser in the bristles. Always rinse thoroughly to keep brushes clean and skin-safe. Follow these exact steps to dry your makeup brushes right:
- Gently squeeze excess water from the bristles without twisting.
- Reshape the brush head with your fingers.
- Place the brush flat on a clean towel. Let the bristles hang off the towel’s edge. This helps them keep their shape as they dry.
- Alternatively, secure brushes on a drying rack angled at 45 degrees with bristles pointing down.
- Keep brushes away from direct heat and sunlight to protect bristles and glue.
- Let brushes air dry for 6 to 12 hours, depending on size and type.
- Keep your brushes stored with bristles facing up in a roll. Use brush guards to protect their shape. This keeps them ready for the next use.
Differences Between Cleaning Synthetic and Natural Bristle Brushes
Yes, you need to wash synthetic and natural brushes differently because of their bristle makeup. Natural bristles are porous and delicate.
So they benefit from mild, sulfate-free shampoos or gentle brush cleansers. Synthetic bristles handle regular washing better and can tolerate antibacterial soaps without damage.
Natural hair brushes need gentle care to avoid damage. Rough scrubbing or alcohol exposure can dry out the bristles and cause breakage.
Using a mild shampoo or special brush cleaner preserves their softness and flexibility. After washing, a conditioning rinse can help natural bristles stay pliable and last longer.
Synthetic brushes have fibers that sit on the surface, making oil and makeup easier to remove. You can clean them with a gentle antibacterial soap or a regular brush cleanser more often.
These brushes handle quick alcohol cleaning better than natural ones. Alcohol cuts germs without making the brush soft or weak.
Avoid harsh scrubs or alcohol on natural brushes to keep the bristles soft and damage-free.
Brushes with mixed fibers behave like natural hair. So treat them with mild cleaners as well. Clean your brushes regularly to stop buildup from forming.
Buildup can harm how makeup looks and your skin health. However, natural brushes require more patience and gentler handling during every step.
Proper care extends the life of both types. But synthetic bristles usually last longer under frequent use. Natural hair especially benefits from conditioning to prevent stiffness and splitting.
Taking the time to clean brushes correctly can keep them working smoothly for months. But replacing them every three months is a good idea to avoid bacterial buildup.
How to Clean Makeup Sponges Differently from Brushes
Makeup sponges need a gentler yet thorough cleaning method compared to brushes. You should wash sponges more often. Ideally, do it after each use.
They hold moisture and bacteria that way. Use a mild cleanser made for sponges or bar soap.
This helps break down makeup and oils. It cleans the sponge gently and well.
Rinsing and Applying Cleanser to Sponges
Start by rinsing your sponge under warm running water until fully soaked. This softens the material and opens its pores to accept the cleanser better. Use a gentle liquid or bar cleanser made for beauty sponges to avoid damaging the texture.
Apply a small amount of cleanser directly onto the damp sponge. Work the cleanser in by gently pressing and squeezing the sponge. Avoid scrubbing roughly, as it can tear the delicate surface.
Deep Cleaning and Soaking Techniques
To clean deeply, pour warm water in a bowl. Add a few drops of sponge cleanser.
Soak the sponge for 5 to 10 minutes to loosen makeup. Massage it gently in the water to clean faster.
This soaking technique helps remove buildup better than rinsing alone. Heavy liquid foundation or cream products need a longer soak. This helps get all the product out completely.
It ensures better cleanup of your sponge. Replace the water if it becomes too dirty before rinsing.
Squeezing and Drying Makeup Sponges
After soaking, press the sponge firmly but gently to squeeze out excess water. Repeat rinsing and squeezing until the water runs clear and no cleanser remains. Avoid wringing or twisting, as it can deform the sponge.
Place the sponge on a clean towel to air dry in a well-ventilated spot. Let it dry completely, which can take 12 to 24 hours depending on humidity. Never store damp sponges in closed containers since they grow bacteria quickly.
- Rinse the sponge under warm water to wet it completely.
- Apply a gentle cleanser or bar soap onto the damp sponge.
- Gently squeeze and press to work the cleanser inside.
- Fill a bowl with warm water and soak the sponge for 5 to 10 minutes.
- Massage the sponge lightly in the water to loosen makeup.
- Rinse the sponge thoroughly until water runs clear.
- Squeeze out excess water carefully without wringing.
- Air dry completely on a clean towel in open air.
Signs Your Makeup Brushes Need Replacing
Bristles that shed heavily during cleaning can’t hold makeup properly anymore. This shedding shows the glue loosening or the brush breaking down. Thorough washing won’t fix these issues, so it’s time to replace that brush.
Sometimes, no matter how much you clean, a brush won’t get fully clean. Your brushes might still have deep buildup if they feel grimy.
They may also smell bad even after washing thoroughly. Using those can spread oil and bacteria, which damages your skin.
Frayed, misshapen bristles are another sign of an old brush. When bristles lose shape or start to splay widely, the brush won’t apply makeup evenly. The bristle quality drops, making your makeup look patchy, even if the brush is spotless.
- Bristles fall out in clumps during or after washing
- Persistent bad smell or visible buildup after cleaning
- Brush shape changes, bristles fray or splay
- Brush feels stiff, dry, or rough despite conditioning
- Handle cracks or comes loose from the ferrule
- Brush irritates skin or causes breakouts after use
Experts recommend replacing key brushes every three months if you use them daily. This keeps your tools fresh and clean, reducing skin irritation and infection risks. Brushes used less often might last longer but check them often.
A broken handle or cracked ferrule usually means the brush won’t hold together well. This can cause uneven makeup and lost bristles. A dirty brush can cause skin breakouts.
It often holds bacteria or leftover product. This can harm your skin.
Common Mistakes When Cleaning Makeup Brushes and How to Fix Them
One common mistake is soaking brush handles in water. It can loosen the glue holding bristles, causing shedding. Keep water on just the bristles, tilting brushes downward when rinsing.
Using harsh soaps with sulfates may leave residue behind. This residue can irritate your skin or clog pores.
Pick gentle cleansers made for brushes. Use Cinema Secrets for tough buildup.
Not cleaning brushes often enough lets old makeup and oils build up. Gunk breaks down bristles and makes brushes less effective. Aim to wash your brushes weekly to keep them fresh and working well.
Some brushes stay stained or smell even after cleaning. For stains, use a deep brush cleanser or a mixture of gentle soap and water. To clear smells, soak bristles briefly in diluted vinegar, then rinse thoroughly and dry right away.
Rough scrubbing can damage bristles and make them shed. Instead, swirl brushes gently in your cleanser to loosen dirt. Use your fingers softly to help but avoid pulling on the bristles.
Drying brushes properly avoids warping and mold growth. Always shape the bristles and lay brushes flat on a towel to dry. Never stand them upright to dry, or water can seep into the handle and damage it.
Always keep brush handles dry while cleaning to avoid loosening the glue and shedding.
Your Step-by-Step Action Plan for Clean Makeup Brushes
This plan will help you keep your brushes in great shape and your skin healthy. Follow these steps to clean and care for your brushes correctly.
- Before You Start: Gather mild soap, lukewarm water, and a clean towel. This helps get everything ready for a smooth cleaning.
- Day 1: Wash makeup brushes using your chosen gentle cleanser. Rinse until water runs clear to confirm all makeup is gone.
- Right After Washing: Gently squeeze the bristles to remove excess water. Avoid pulling or twisting to protect the brush shape.
- Same Day Evening: Lay brushes flat on a clean towel to dry. Make sure the bristles hang off the counter edge to keep their form.
- Once a Week: Soak your makeup sponges in soapy water to deep clean. Use a different cleaning method than usual. This helps remove buildup and bacteria. This stops bacteria buildup.
- Every Two Weeks: Check for brush wear like shedding or misshapen bristles. Replace any that start to break down.
- Ongoing: Avoid using harsh soaps or hot water. Sticking to gentle care keeps brushes lasting longer.
Frequently Asked Questions
Can You Use Regular Shampoo to Clean Makeup Brushes?
Yes, gentle shampoo can clean brushes without harm. It removes dirt and oils safely, just like dish soap.
How Do You Remove Stubborn Makeup from Brushes?
Use a gentle cleanser with warm water and massage bristles. Avoid soaking the brush base to protect glue and paint.
Is It Safe to Use a Washing Machine to Clean Brushes?
No, washing machines can damage brush bristles and loosen glue. Hand washing is the safest way to clean makeup brushes.
Why Shouldn’t You Share Your Makeup Brushes with Others?
Sharing brushes can spread bacteria and fungus easily. Washing your brushes frequently helps reduce contamination risks.
Can You Use Dish Soap Instead of Makeup Brush Cleanser?
Yes, mild dish soap breaks down makeup and oils effectively. Just rinse well to avoid residue that could irritate skin.
What Happens If You Don’t Let Brushes Dry Properly?
Wet brushes that aren’t dried well lose shape and develop bacteria. Always dry them flat or upside down to protect bristles.
Final Thoughts
Clean brushes protect your skin and improve makeup results every day. Take a few minutes regularly to wash and dry them right. Start today by cleaning one brush and see the difference it makes.