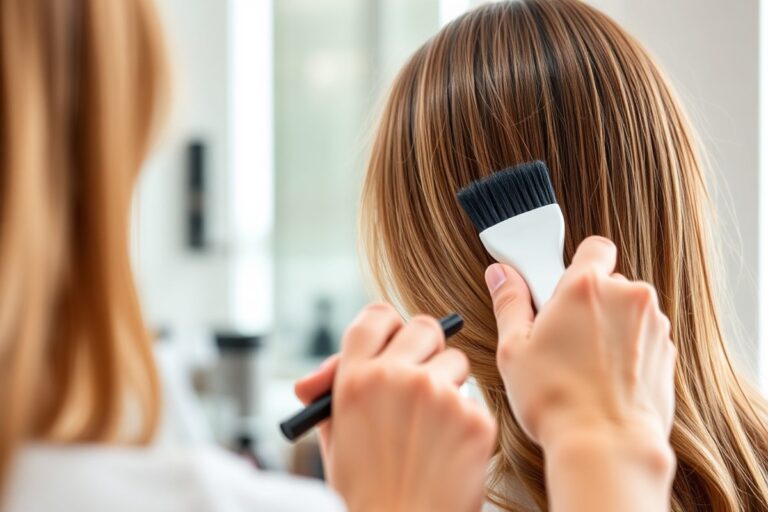
How to Cut One’s Own Hair: A Complete Guide for Perfect DIY Results
Wondering how to cut one’s own hair at home? You can do it right with the right tools and patience.
Start by choosing a quiet spot with good light and a mirror you trust. Expect your first few tries to look rough; haircuts take practice to master.
Use sharp, quality scissors made for hair, not regular office scissors. Cutting dry hair usually gives the best control, especially for straight or curly hair types. Always cut less than you think at first, trim more if you need to.
Stretch coily hair before cutting to avoid losing too much length from shrinkage. Set a timer before you start cutting your hair. Cutting can take 30 to 60 minutes.
It depends on your hair’s thickness and style. Take breaks to avoid rushing and uneven cuts.
Key Takeaways
- Start with a clean, dry, detangled hair for accurate cutting.
- Use a good pair of 6-inch hair shears for precise cuts.
- Trim coily hair stretched to avoid cutting too short.
- Cut little by little, checking length often with a mirror.
- Set up near a mirror with extra lighting to see clearly.
- Plan for 30 minutes or more; rushing causes mistakes.
How to Cut Your Own Hair at Home Step by Step

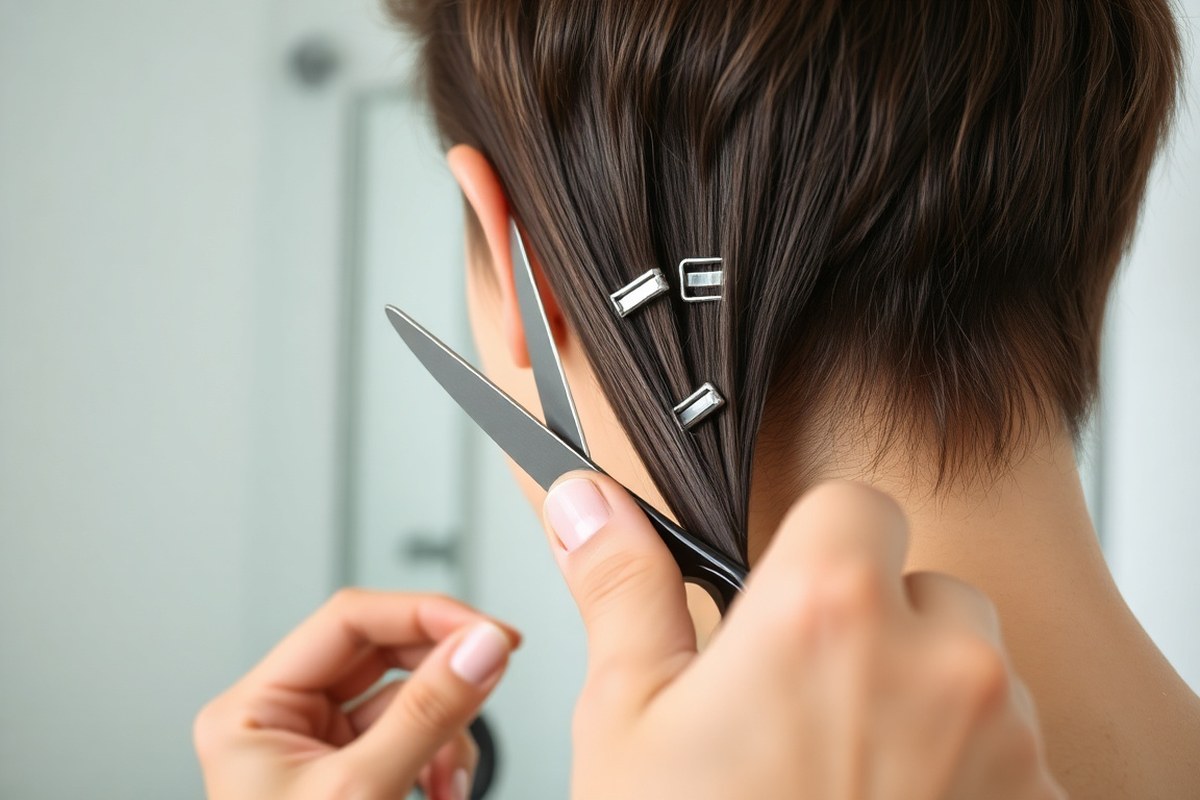
Cutting your own hair starts with good prep and careful sectioning. You need sharp hair cutting shears, clips, and a good comb. Clean sections make it easier to trim evenly and avoid mistakes.
Holding your scissors correctly improves control. Rest one finger on the bottom handle, and use the thumb on top.
Hold hair sections firmly with your fingers or a comb. Cut slowly and check angles often.
- Detangle and dampen your hair slightly. Use a wide-tooth comb or fingers if you have curls. Damp hair is easier to manage but avoid soaking it.
- Divide your hair into 4 to 6 clean sections. Use clips for top, sides, back, and middle. For bangs or front layers, create smaller subsections.
- Choose a guide strand to set your length. Start with a small trim of ¼ to ½ inch off the ends. Use this as a reference for the rest.
- Comb each section smooth before cutting. Hold the hair between your fingers or on the comb evenly. Cut straight across for blunt trims; point cut vertically for layers or texture.
- Trim from one side to the other in small steps. Keep your scissors parallel to your guide strand when cutting. Check your symmetry with a mirror.
- Cut bangs longer than your target length. Trim in tiny amounts to avoid accidental shortness. Let them dry before any touch-ups.
- Use a second mirror or your phone camera. This helps you see the back and sides clearly. Adjust any uneven spots.
- Finish with dry finger-combing or light shaping. For curls, snip lightly curl by curl to keep shape. Avoid cutting too much at once.
Essential Tools and How to Use Them Safely
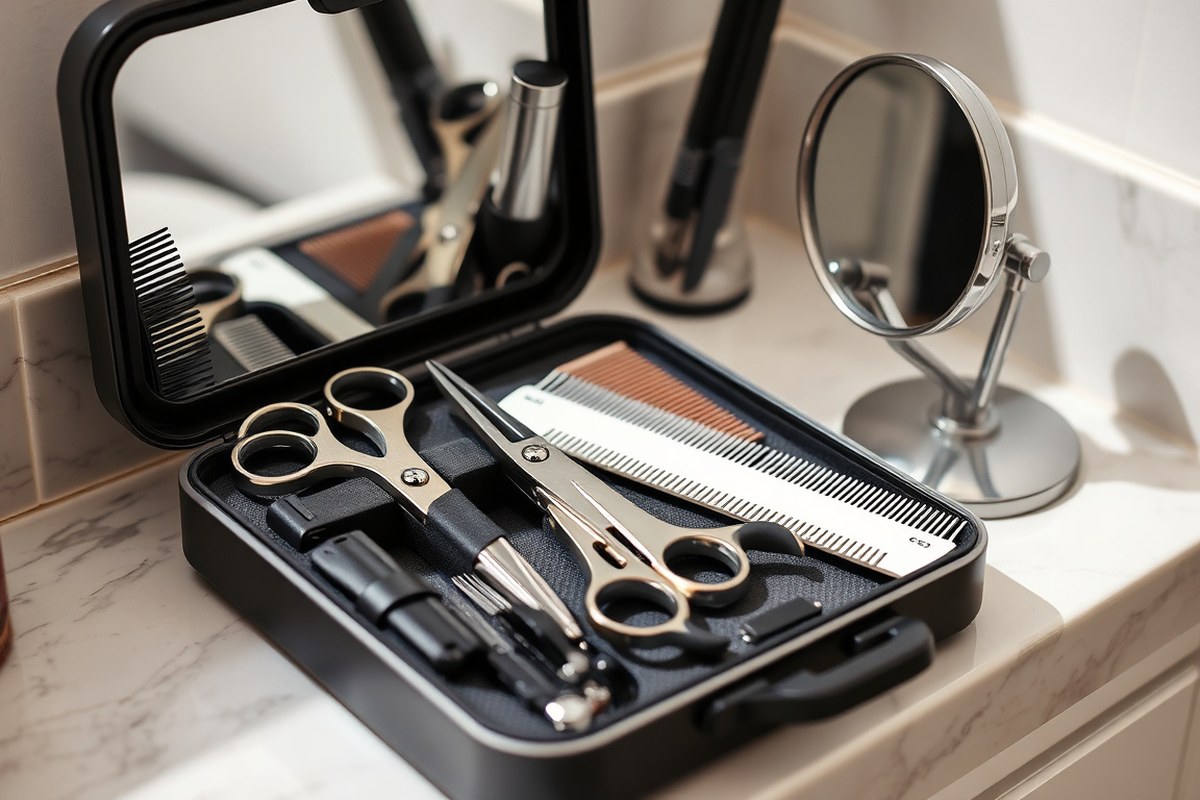
Good haircutting scissors are sharp, lightweight, and made for hair, not paper. Kitchen or craft scissors tend to tear hair and give uneven cuts.
Look for scissors around 5 to 7 inches long with stainless steel blades. Quality tools usually cost between $20 and $50 but last much longer and trim cleaner.
Clippers aren’t necessary for all cuts but help with fades and buzz styles. Choose clippers with multiple guards to control length safely. Guards protect against cutting too short and help even up the cut.
Men wanting a style more than a buzz cut need clippers. Use them for trimming the sides and back. This tool helps shape the haircut neatly.
Handle scissors carefully by closing them with control, never force them shut. Keep scissors and clippers clean and dry to avoid rust and dull blades.
Use a drop of clipper oil on moving parts monthly or after each use. Store scissors in a safe place and use a blade guard for clippers.
- Haircutting scissors, 5 to 7 inches, stainless steel
- Clippers with a set of guards for length control
- A comb for sectioning and smoothing hair
- A handheld mirror to check the cut behind your head
- Hair clips or elastics to hold hair sections
- Spray bottle with water if cutting dry hair
Using the comb and mirror helps you see uneven spots slowly. Sectioning the hair with clips or elastics keeps control and avoids uneven cuts. For curly or coily hair, stretch strands before cutting.
This shows the hair’s real length clearly. Cutting like this gives a better result. Cutting curled hair without stretching can leave hair much shorter than expected.
Never rush your cut or try to force scissors through thick hair quickly.
Wet hair is easier to control and cut for most straight or wavy hair types. For curly hair, dry cutting or stretching hair can prevent cutting too much length.
Clean your tools and check guard fittings before every cut to keep everything safe and tidy. Following these steps keeps your haircut looking neat and your tools lasting longer.
Choosing the Right Method for Your Hair Type
Your hair type changes how you should cut it. Straight hair is easiest to cut when damp because it lies flat and shows length clearly. Cut curly or coily hair when it is dry.
Wet curls stretch and hide the true length. The real length shows only when the hair is dry.
Cutting curly hair curl by curl helps keep its natural shape. Don’t cut curly hair in large sections like you do with straight hair.
For coily hair, stretch each section first because it can shrink up to 75%. This step avoids cutting too much off by mistake.
| Hair Type | Cutting Condition | Technique | Tip |
|---|---|---|---|
| Straight | Damp or wet | Cut in sections, blunt straight lines | Use sharp scissors and hold hair taut |
| Wavy | Damped but not soaked | Trim in larger sections, layer gently | Use point-cutting to soften edges |
| Curly | Dry | Cut curl by curl | Work with small sections; trim ends individually |
| Coily | Dry and stretched | Stretch each coil and cut at natural shape | Account for up to 75% shrinkage |
Layering curls works best with point-cutting on dry hair. This technique avoids harsh lines and keeps curls bouncy. Straight hair layers better with blunt cuts and edges.
Cut it on damp strands for better accuracy. This helps achieve a cleaner look.
For coily hair, trimming while stretched is key to avoid a too-short look. Use small elastics to pull hair forward. This makes cutting lengths even easier.
It works well for bob or lob styles. Trying to cut coily hair like straight hair often leads to uneven length and missed shaping.
Techniques for Popular DIY Haircuts and Styles
Cutting your own hair is possible for many styles like buzz cuts, trims, and layers. Using clear, simple steps helps you avoid uneven cuts and uneven lengths. You can safely cut bangs at home with care.
Using the right tools helps. You can also try a blunt bob if you’re cautious.
Uniform Buzz Cut with Clippers
A buzz cut is one of the easiest self haircuts using electric clippers. It gives a clean, uniform look by cutting hair very short all over. Choose a guard length based on how short you want the cut.
Follow these steps to get a consistent buzz cut:
- Start with clean, dry hair and detangle any knots carefully.
- Attach the clipper guard you want, usually between #1 (1/8 inch) and #4 (1/2 inch).
- Turn on the clippers before you start cutting. Move the clippers upward from your neck to your crown. Cut against the direction your hair grows.
- Use slow and controlled strokes, overlapping each pass slightly for evenness.
- Switch to a shorter guard for the sides and back if desired, blending carefully.
- Check for any missed spots or uneven areas and go over them gently.
- Finish by trimming around ears and neckline carefully with a bare blade or trimmer.
A uniform buzz cut should feel smooth and look the same length everywhere. Avoid pressing clippers too hard, which can cause uneven spots or skin irritation.
Layering with the Ponytail Method
The ponytail method is the simplest way to cut long layers by yourself. You tie all hair into one ponytail and trim the end to create natural layers. This works best on straight or slightly wavy hair.
Follow these steps to create layers with the ponytail method:
- Brush your dry hair straight and pull it into a tight ponytail at the front hairline.
- Secure the ponytail tightly with a hair tie so it won’t slip while you cut.
- Decide how much length to remove, starting with no more than one inch.
- Use sharp hair shears to cut straight across the ponytail end in small amounts.
- Release the ponytail and check how the layers fall around your face.
- For softer edges, twist small sections and point cut the ends carefully at an angle.
- Repeat point cutting through the ponytail lightly to create gradual layers if needed.
Cutting too much at once can create too short or uneven layers. Keep checking length by releasing the ponytail often to see the effect.
Cutting Bangs in Small Increments
Cutting bangs yourself requires patience and small snips to avoid mistakes. Start with a narrow front section and cut gradually. Using sharp scissors helps create clean edges that won’t fray.
Use these steps to cut your own bangs safely:
- Section off the hair you want for bangs, using the natural part and hairline.
- Comb the bangs straight down and hold them between your index and middle finger.
- Trim the bangs a little below your target length to leave room for mistakes.
- Cut straight across or at a slight angle depending on the style you want.
- Work in small cuts, about 1/4 inch at a time, and frequently comb bangs down.
- Point cut upward into the ends carefully to soften a blunt cut if desired.
- Check bangs in natural light and adjust length slowly over several trimming sessions.
Cutting too much at once can ruin the bangs’ shape, leaving awkward length. Take your time and trim less than you think is needed.
Creating a Blunt Bob at Home
A blunt bob means hair cut in a single straight line, usually around chin length. It’s one of the trickier DIY cuts but possible with steady hands and sharp scissors. Keeping hair dry helps maintain the even shape.
Follow this sequence for a blunt bob:
- Wash and dry your hair all the way through. Comb your hair straight back or part it in the middle. Make sure your hair is smooth and ready.
- Divide hair into two or four equal sections and secure with clips.
- Start at the back, releasing a thin horizontal section at neck level.
- Use a comb as a guide for a straight line and cut slowly across the section.
- Work around the head section by section, matching the back length exactly.
- Comb hair straight down and check length, touching up any uneven ends carefully.
- Use point cutting on the ends only if you want a slightly softened edge. But keep cut mostly straight.
Cutting a bob too short or uneven can lead to unbalanced looks hard to fix. Take your time and trim little at a time to stay safe.
Managing Curly and Coily Hair Shrinkage While Cutting
Cutting curly and coily hair means planning for shrinkage so you don’t trim too much. Stretch curls before cutting and cut them dry to see their natural length. Trim curl by curl to keep the shape even and avoid surprises.
Stretching Natural Curls Before Cutting
Curls shrink after drying because the hair coils tightly. Coily hair can shrink as much as 75%. Stretching curls gently helps you see the true length before cutting.
Use your fingers to stretch curls gently. You can also use a blow dryer on low heat. This keeps curls stretched without changing their shape.
Work on clean, detangled hair to prevent uneven cuts. Avoid pulling hard to keep curls healthy and prevent breakage.
- Wash and gently detangle your hair using a wide-tooth comb.
- Dry hair until damp but not soaking wet for best stretch control.
- Section your hair into manageable parts using hair clips.
- Take a small section and hold it between your fingers.
- Gently pull downward or away from the scalp to stretch the curl.
- Optionally, use a blow dryer on low heat to hold the stretch.
- Keep hair stretched while trimming each curl to the desired length.
Never cut hair when soaking wet; shrinkage can make hair look shorter than expected.
Curl-By-Curl Cutting Technique
Cutting each curl individually helps you keep the curl pattern intact. It also prevents uneven ends that blunt chopping causes.
Trim just above where the curl naturally bends to keep the style soft and defined. Use sharp scissors and snip small amounts at a time for control.
- Work on dry, stretched curls for better accuracy.
- Pick one curl at a time and follow its natural shape.
- Cut just above the curve of the curl to preserve its bounce.
- Repeat on every visible curl to balance the shape evenly.
- Step back often to check for uniform length and overall shape.
Cutting curls bluntly across will make uneven strands stand out more.
Avoiding Shrinkage Pitfalls
Cutting hair wet or in ponytails causes major shrinkage surprises later. Hair that looks even wet can become very uneven when dry.
Avoid pulling curls tight before cutting or trimming large sections in bulk. This often leads to uneven lengths and visible mismatched curls after drying.
Take time with small sections and dry hair; it adds time but improves results. Perfecting your technique usually takes several tries, so be patient.
- Never cut your hair while it is soaking wet or tied up tight.
- Separate hair into small sections before trimming to control shrinkage.
- Cut on dry hair to see natural length and curl patterns.
- Avoid cutting large sections at once; it risks unevenness after shrinkage.
- Fix uneven spots by trimming selectively after hair fully dries.
Don’t rush; shrinkage means slow, precise cutting leads to the best look.
Setting Up Your Home Haircut Station for Best Results
Good lighting makes a huge difference when cutting your own hair. Work close to a bright window with natural light. Or use a daylight-balanced lamp behind your head.
Good lighting helps you see hair better. This cuts shadows on your hair and scalp so you see what you’re doing clearly.
Mirrors let you check every angle to avoid uneven spots. Use a dual-mirror setup: one large mirror in front and a smaller one behind your head.
Angle the back mirror so you see your crown and nape without moving around too much. Avoid holding a hand mirror, it can throw off your view.
Organizing your tools on a stable surface keeps you efficient. Place scissors, combs, and clippers within arm’s reach in the order you’ll use them. Keep a small towel close for trimmed hair.
It catches hair and keeps your space clean. This also helps stop slipping on cut strands.
- Choose a chair at a comfortable height to avoid neck strain.
- Arrange tools from left to right if you are right-handed, and reverse if left-handed.
- Have a handheld spray bottle filled with water to dampen hair as needed.
- Lay down a sheet or newspaper under your chair to catch cut hair.
- Keep a trash bin nearby for easy disposal.
- Use a mirror light or extra lamp if your bathroom lighting is insufficient.
Hair on the floor creates a slipping hazard and mess that’s hard to clean. Place a washable cloth or plastic mat under your haircut station to catch clippings.
Sweep or vacuum after cutting to avoid buildup. This preparation speeds up cleanup so you can enjoy your fresh cut sooner.
Comfort and visibility help prevent errors like uneven lines or missed spots. Having everything ready and tidy lets you focus on getting precise cuts.
It may take an extra 10 minutes to set up. But it saves frustration and fixes later.
Common Mistakes and How to Fix Them
Cutting your own hair can cause mistakes like uneven lengths or jagged lines. You might also cut off too much. These problems are common when you do it alone.
These problems happen if you rush through your haircut. Dull scissors can push hair instead of cutting it cleanly.
This also leads to uneven haircuts. Fixing these problems is often about patience and gradual trimming.
Uneven cuts usually happen because you cut large sections without checking lengths against other parts. After cutting a section, stop and compare it to a nearby section before moving on. This helps catch inconsistencies early.
Using sharp scissors designed for hair is important. So the blades don’t push and distort the hair.
| Common Mistake | Cause | How to Fix or Avoid It |
|---|---|---|
| Uneven lengths or jagged lines | Cutting large sections without comparing | Cut small sections, check frequently, use sharp scissors |
| Cutting bangs too short | Rushing or cutting dry hair | Trim bangs slowly on damp hair, cut a little at a time |
| Cutting too much accidentally | Trying to fix a mistake by cutting more | Wait for hair to grow, blend with point cutting |
| Crooked lines | Dull scissors pushing hair while cutting | Use sharp hair scissors, cut slowly and steadily |
| Uneven patches from clippers | Moving clippers too fast or unevenly | Go slow with clippers, cover every hair |
Trimming bangs usually goes wrong by cutting them too short. You can avoid this by snipping a small bit at a time.
Keep the hair slightly damp so you can see its natural fall. Instead of aiming for a perfect straight line, cut curves that follow the hair’s shape.
Cutting off too much hair is frustrating but rushing to fix it makes things worse. When that happens, wait for a few weeks.
Hair that’s just a bit shorter can be blended with light point cutting later. This softens the edge without removing more length right away.
Checking your work often during the cut helps you spot errors early. Hold your hair in sections and look at how they compare side to side. Cutting slowly and in small pieces takes only a few extra minutes.
It helps you avoid big mistakes. This careful approach saves you time fixing errors later.
When to Skip DIY and See a Professional
Complex haircuts like blunt bobs or major makeovers usually need a professional. These styles require precise angles and smooth, even cuts that are hard to achieve alone. Trying them yourself can lead to uneven or choppy results that cost more to fix later.
Seeing uneven layers, scalp irritation, or big damaged spots means visit a pro. Damaged hair with lots of breakage can get worse if cut wrong. Cutting split ends badly can make problems bigger.
Take care with tricky hair damage. Professionals can handle these without making hair look worse or thinning it too much.
Avoid cutting very thick, curly, or shrinking hair unless you have experience. These types are harder to cut right at home. Incorrect cuts can cause more damage.
These types often need special techniques to avoid uneven lengths. A hairstylist knows how to adjust for curls or wavy hair to keep the shape consistent.
Virtual consultations can help for minor trims or style advice before a cut. Some places offer 20-minute sessions costing around £10 where you get professional feedback. This helps if you’re unsure about DIY cuts or want to prep for a salon visit.
Getting ready can make the salon trip easier. Preparation helps you get the style you want.
Always check your hair style goals and damage level before cutting. Saving money on a DIY cut won’t help if you end up with a botched style. Professionals have tools and skills for complex cuts, a better long-term look, and hair health.
Start small with trims. Remember hair looks shorter when dry, even if you cut it damp.
Tips for Maintaining Healthy Ends Between Cuts
To keep your hair healthy, trim small amounts regularly. Dust split ends often to prevent damage. This helps maintain your hair’s condition.
Work on dry hair to spot damage better and avoid surprises from shrinkage. Add hydration routines with conditioners and oils to prevent breakage and maintain shine.
Signs You Need a Trim
Your ends might look frayed or split. You see tiny branches or splits at hair tips when dry. Hair feels rough, tangles easily or looks dull between washes.
Split ends often cause hair breakage if left too long. Dryness and frizz show damage has spread past just the ends. When ends look unhealthy, trimming can prevent further damage up the hair shaft.
Dusting Split Ends Technique
Dusting means cutting off just tiny bits of split ends without changing hair length. It gets rid of damage without losing your style shape. Dry hair shows these splits clearly, so trim on dry strands.
Twist a small subsection of hair and snip right below the broken tips. This twist and snip method quickly targets hidden split ends. Repeat curl by curl or section by section for natural hair textures.
Use sharp hair shears made for cutting hair, not regular scissors. Dull blades may cause new splits. Keep tension consistent but don’t stretch hair out while trimming, like trimming a hedge.
Trimming Frequency and Hair Care Tips
Trim ¼ inch or less every 6 to 8 weeks or sooner if hair feels dry. More frequent trims help if your hair tangles or frizzes a lot. Follow how you normally wear hair to decide whether dry or wet trimming fits best.
Wet hair stretches and shrinks when dry, causing uneven cuts. Cutting dry shows your hair’s real length and shape. Use your previously trimmed ends as a guide to keep lengths even.
Hydrate hair regularly to avoid split ends and breakage. Include a weekly deep conditioner or leave-in oil on the ends. Avoid harsh brushes and heat styling tools to protect your hair’s health.
- Start with dry, clean hair and detangle gently with fingers.
- Divide hair into manageable horizontal sections for control.
- Twist small subsections to reveal split ends.
- Use sharp hair-cutting shears to snip just below splits.
- Work curl by curl or strand by strand for natural textures.
- Check lengths regularly to avoid cutting too much.
- Apply a hydrating conditioner or oil after trimming.
Step-by-Step Action Plan to Cut Your Hair at Home
This plan helps you cut your hair with confidence and good results. Follow each step and check for evenness and shape as you go.
- Before You Start: Gather all your tools and set up your station in natural light. Make sure your scissors are sharp and hair is clean and damp.
- Step 1: Section your hair using clips to work in parts. Start with the bottom layers and cut small amounts first to control length.
- Step 2: Cut straight across or use point-cutting for a softer edge. Check in the mirror that both sides match as you trim.
- Step 3: Move to top layers, releasing sections and blending edges. Use a comb to keep the lines even.
- Step 4: Trim around the face carefully, using a small mirror to see your angles. Stop often to avoid cutting too much.
- After the Cut: Dry your hair and check for evenness in natural light. Touch up any uneven spots with small snips.
- After 1 Week: Wash and style your hair as usual to see how the cut settles. Trim any stray ends to keep the shape fresh.
- After 4 Weeks: Assess your hair’s growth and condition. Plan your next trim to maintain healthy ends and your style.
Frequently Asked Questions
How Often Should I Trim My Hair When Cutting It Myself?
Trim your hair every 6 to 8 weeks to keep it healthy. This timing prevents split ends and keeps your style fresh without big changes.
Can I Cut My Own Hair If I Have a Cowlick or Uneven Growth Patterns?
Yes, but be cautious around cowlicks to avoid uneven cuts. Trim small amounts and check your work often to balance the hair growth.
Is It Better to Cut Hair When It’s Dry or Damp for Most Hair Types?
It depends on your hair type and style. But slightly damp works for straight hair. Dry cutting often suits curls better to see the shape and length accurately.
How Do I Avoid the “Step Cut” or Uneven Layers When Cutting Myself?
Use consistent angle and tension on hair sections, then double-check symmetry. Cutting small bits at a time helps maintain control and avoids sudden length changes.
Can I Fix Mistakes on My Own Haircut Without Seeing a Professional?
Minor mistakes can be fixed by trimming or blending uneven spots carefully. If cuts are too drastic or uneven, a professional can save the style with shaping and layering.
What’s a Safe Way to Cut My Hair If I Want to Try Bangs at Home?
Start by cutting bangs longer than you want, about an inch at a time. Use small snips and trim vertically for a softer edge, then adjust as needed.
The Bottom Line
Cutting your own hair takes practice but saves time and money. Focus on small snips and checking your work often. Start with a simple trim today to build your skill and confidence.