How to Wash Cosmetic Brushes: Step-by-Step Guide for Fast, Safe Cleaning
Knowing how to wash cosmetic brushes correctly keeps your makeup looking fresh and your skin healthy. You want to use a gentle cleanser and lukewarm water to avoid damaging the bristles. Always rinse the bristles downward to prevent water from reaching the handle, which can cause loosening.
Start by swirling the brush in a mild soap or a brush cleaner designed for cosmetics. Rinse thoroughly until the water runs clear to remove all makeup residue. Avoid hot water since it can melt the glue that holds the bristles together and damage your brushes.
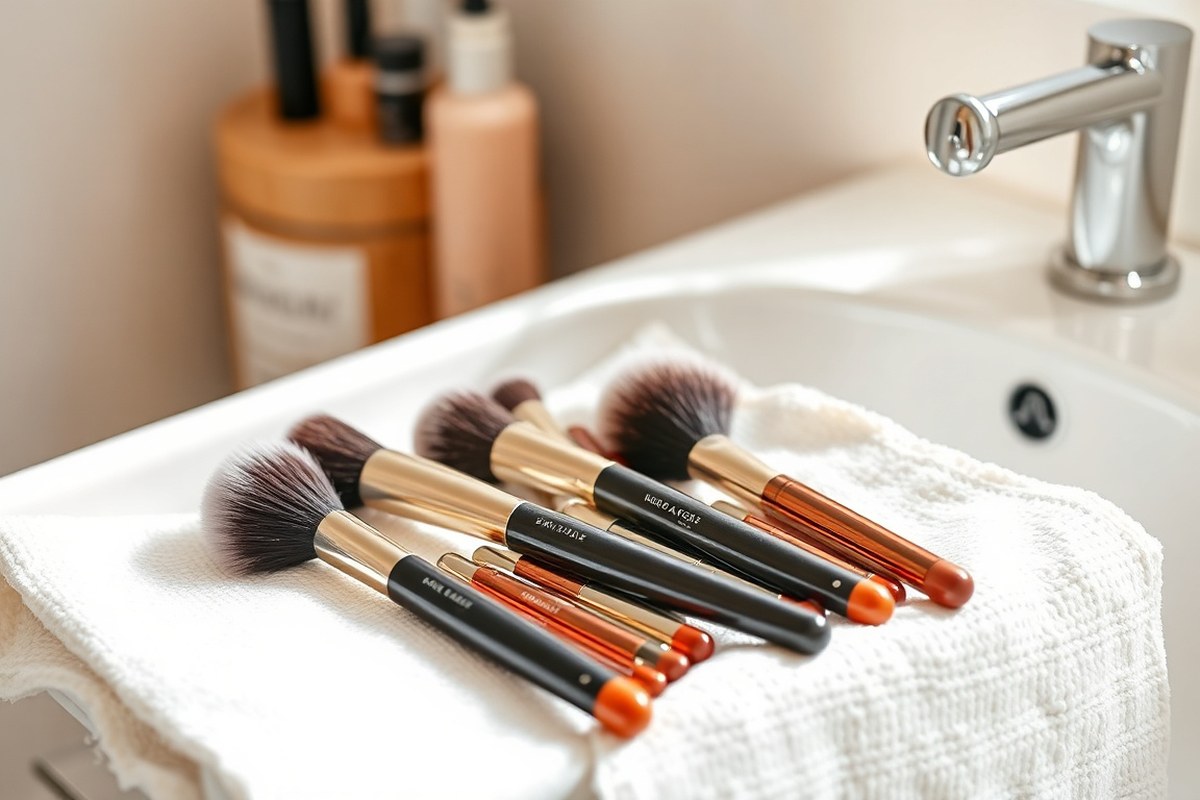
After washing, never dry brushes upright because water can collect inside and weaken the handle. Lay them flat on a clean towel, preferably with the head slightly hanging off the edge, so air flows freely.
Let them dry overnight. This keeps your brushes in good shape and stops bacteria buildup.
Key Takeaways
- Use lukewarm water and mild soap for safe, damage-free cleaning.
- Rinse bristles downward to avoid water seeping into the handle.
- Clean brushes until water runs clear to remove all residue.
- Lay brushes flat to dry, never stand them upright.
- Wash small eye brushes every 1 to 2 weeks for safety.
- Clean medium and dense face brushes every 7 to 10 days.
How to Wash Cosmetic Brushes Properly Step-by-Step

Cleaning your makeup brushes well takes the right steps and care. Wetting only the bristles helps avoid loosening the glue holding them. Using gentle pressure and the right angle when rinsing protects the bristles and the brush’s shape.
Follow these steps for the best results when washing your brushes. Taking time to reshape the bristles and drying flat stops damage and keeps brushes soft. It usually takes six to twelve hours for brushes to dry completely, so plan ahead.
- Wet the bristles only by holding the brush downward under lukewarm water. Keep water off the metal ferrule and handle to avoid weakening the glue.
- Apply cleanser gently using a small amount on your palm or a silicone cleaning mat. Swirl the brush bristles softly to work up a lather without pulling.
- Rinse at a 45-degree angle with gentle pressure, moving the brush in small circles. This angle means water flows away from the handle, protecting the glue and wood.
- Repeat cleansing and rinsing until no makeup residue or suds remain. It can take two to three rounds depending on how dirty the brush is.
- Squeeze out excess water carefully using your fingers. Avoid twisting or pulling the bristles to keep them from falling out.
- Reshape the bristles with your fingers to their original form before drying. This prevents the brush from drying in a misshapen way.
- Lay brushes flat on a clean towel with the bristles hanging over the edge. This creates airflow around the brush and avoids bending or crushing the bristles.
- Allow 6 to 12 hours for drying, preferably overnight. Avoid heat sources like blow dryers or heaters that can damage glue and synthetic hairs.
Choosing the Right Cleanser for Makeup Brushes

Picking the right cleanser for your makeup brushes matters. It depends on what makeup you use and how sensitive your skin is. Check both before buying a cleaner.
Baby shampoo and dedicated brush cleansers handle most routine cleaning needs. Dish soap works best for heavy cream and liquid makeup buildup.
Dish Soap: Pros and Cons
Dish soap can cut through thick cream and liquid makeup better than regular shampoos or cleansers. It works well on tough oils.
But, it can dry out natural brush hairs. Don’t use it too often to avoid damage.
Add a small drop of olive oil to balance the soap’s dryness. Check the dish soap ingredients to avoid harsh chemicals that could damage synthetic brushes.
Using dish soap too often can make natural hair brittle and cause bristles to shed.
Shampoo Options for Brushes
Baby shampoo is gentle and works well for weekly washes on all brush types. It cleans without stripping natural oils or damaging the brush fibers.
Choose a mild, sulphate-free shampoo, especially for natural or mixed bristles. For synthetic brushes, a gentle antibacterial soap or brush cleanser can work. Lukewarm water helps prevent damage when rinsing out shampoo from the bristles.
Dedicated Makeup Brush Cleansers Compared
Brush cleansers come in liquid and solid forms and are made to clean without hurting bristles. They often include conditioning ingredients to keep natural hair soft and pliable.
Most are safe for sensitive or acne-prone skin since they avoid harsh detergents. Spray versions refresh brushes between deep cleanings but don’t replace thorough washing.
Use a liquid cleanser for deep cleaning once a week. Solid cleansers work great for quick, easy brush cleaning. Choose based on your schedule and needs.
| Cleaner | Works Well On | Limit |
|---|---|---|
| Baby Shampoo | Routine washes on any brush | Heavy foundation may need repeat lathers |
| Dish Soap with Olive Oil | Cream and liquid product buildup | Check ingredients against the brush material |
| Dedicated Brush Cleanser | Weekly washes and deep cleans | Sprays refresh but do not replace a wash |
Test your brush cleanser on one brush first to avoid damage. Replace brushes if they lose shape even with safe cleaners.
DIY Cleanser Recipes and Safety Tips
Some people mix water, rubbing alcohol, and mild soap for a DIY brush cleaner. These can disinfect but may dry or stiffen natural bristles.
Homemade cleansers should be tested on less-used brushes first. Avoid using harsh chemicals or household cleaners not designed for cosmetics.
For sensitive or acne-prone skin, stick with gentle store-bought brush cleansers or baby shampoo. Frequent cleanings help reduce skin irritation risks.
How Often Should You Wash Your Makeup Brushes?
Cleaning your makeup brushes depends on the type of brush and how often you use it. Foundation and concealer brushes need washing about once a week. This prevents buildup that can cause breakouts.
Clean them regularly for better skin health. Eye brushes should be cleaned every 1 to 2 weeks.
They touch sensitive skin and different makeup colors. Keeping them clean avoids irritation and color mixing.
Makeup sponges require even more care than brushes. Clean brushes after every use. They trap product and moisture quickly.
This prevents bacteria and buildup on your brushes. Neglecting this can lead to bacteria growth, which irritates skin and causes blemishes. Washing your brushes and sponges more often helps if you have sensitive skin.
It also reduces acne flare-ups. Keep tools clean to protect your skin.
- Clean foundation and concealer brushes weekly
- Wash eye brushes every 1 to 2 weeks
- Clean powder and blush brushes monthly
- Wash makeup sponges after each use
- Increase frequency for sensitive or acne-prone skin
- Clean cream-based makeup brushes multiple times per week
Keep in mind the material too. Cream and liquid makeup brushes get residue faster than powder brushes. So, clean them more often.
This keeps your makeup fresh and your brushes in good shape. Regular washing improves your makeup’s look and keeps your skin free from irritation.
You can spot clean your brushes between washes. But full cleaning is necessary at the recommended intervals.
Many people skip washing their brushes as often as they should. This often results in clogged pores and patchy makeup. Simply wiping brushes on a towel won’t do enough.
Use brush cleansers or gentle soap with warm water to get them truly clean. After washing, drying brushes properly protects their shape and performance.
Drying Makeup Brushes Without Damaging Them
Set your cleaned brushes flat to dry on a clean towel. Rest the bristles slightly over the edge of a counter for airflow under the brush head. This helps maintain the brush shape and avoids water dripping into the metal ferrule.
Drying sprays brush lightly will dry faster than soaking them. Soaked brushes hold more water, which can loosen glue and shed bristles.
Usually, drying takes about 4 to 6 hours. But thicker brushes may need overnight drying.
- Lay brushes flat on a towel with bristles hanging off the edge
- Do not dry brushes standing upright in a cup or holder
- Keep brushes out of closed containers and sealed bags while drying
- Rotate brushes occasionally for even drying
- Reshape bristles gently before letting them dry
- Avoid hot air or direct sunlight as it harms glue and bristles
Do not dry brushes upright after washing. Water runs down into the ferrule and weakens glue. This reduces your brush’s life and causes hairs to fall out sooner.
Closed spaces keep brushes damp longer. This condition can cause mold or bad smells over time. Always dry them in open air or with good ventilation to stay safe and clean.
Dealing with Different Brush Types and Hair Materials
Natural hair brushes need gentler care because their fibers are porous. They can soak up shampoo and water, so use mild, sulphate-free shampoo.
Synthetic brushes handle stronger cleaners and more water because they’re made from man-made materials. Mixed fiber brushes should follow natural hair rules to avoid damage.
Synthetic brushes generally clean faster and dry quicker, making them easier to maintain. Natural bristles break down if cleaned too often or roughly.
So deep clean them every 1 to 2 months. Synthetic brushes tolerate more frequent deep cleaning, especially if you apply heavy creams or liquid makeup.
Check water temperature carefully. Use lukewarm water for natural hair brushes to avoid opening pores too much, which weakens bristles. For synthetic brushes, warm water works well because their fibers resist moisture damage better.
Hot water can ruin glue and loosen bristles on both types. So keep water below 105°F (40°C).
| Brush Type | Recommended Cleanser | Water Temperature | Deep Clean Frequency | Handling Tips |
|---|---|---|---|---|
| Natural Hair Brushes | Mild, sulphate-free shampoo | Lukewarm (under 105°F / 40°C) | Every 1 to 2 months | Gentle lather, avoid soaking |
| Synthetic Brushes | Sturdier cleanser or mild shampoo | Warm (under 105°F / 40°C) | More frequent cleaning possible | Can tolerate stronger scrubbing |
| Mixed Fiber Brushes | Follows natural hair brush rules | Lukewarm (under 105°F / 40°C) | Every 1 to 2 months | Gentle care like natural brushes |
Natural hair brushes should never be cleaned with regular hair shampoo or harsh detergents. Those can strip oils and dry out the bristles. Synthetic brushes tolerate some of those cleaners but still avoid hot water.
Let natural brushes air dry fully after cleaning. Lay them flat or hang the bristles off an edge. This helps keep their shape and dries them well.
Synthetic brushes may dry faster but still avoid heat sources like hair dryers. A hair dryer can melt synthetic fibers or weaken the glue inside brush heads.
Clean cream-product stained brushes deeply and soon. This means cleaning synthetic brushes more often than natural. Do this to keep them fresh and hygienic.
Preventing Skin Issues by Proper Brush Maintenance
Dirty makeup brushes can cause acne, irritation, and even infections. They collect old product, skin oils, and bacteria every time you use them. Old makeup buildup can spread bacteria back onto your face.
This raises your chance of breakouts and rashes called dermatitis. Cristina Monaco, a certified physician assistant, explains this risk clearly.
Bacteria like staphylococcus live harmlessly on your skin but multiply rapidly on unwashed brushes. These brushes become a breeding ground for germs, including fungal infections and E. Coli, says the American Academy of Dermatology. Foundation brushes especially spread bacteria widely since they cover large areas of your face.
Regular cleaning removes oil, dirt, and bacteria that cause skin problems. Cleaning your brushes keeps your skin healthier by stopping microbe transfer. Every makeup application can spread germs if brushes aren’t cleaned.
This simple step protects your skin each time you apply makeup. Brushes without buildup help your makeup go on smooth and even.
Old makeup can make your look patchy or cakey instead. Clean brushes give you a better, flawless finish every time.
Clean your brushes at least once a week if your skin is normal. If your skin is oily or acne-prone, clean them more often. Regular cleaning helps keep your skin clear and healthy.
When you wash, use lukewarm water and a gentle cleanser designed for makeup brushes. Rinse thoroughly until water runs clear to remove all residue and germs.
Neglecting to clean brushes wastes your investment and can worsen skin issues. Dirty brushes irritate sensitive skin types, making conditions like eczema or rosacea flare up. By washing brushes regularly, you reduce bacteria and protect your face from infections and inflammation.
Disinfecting and Spot Cleaning Between Deep Washes
Quickly disinfecting and spot cleaning your makeup brushes helps stretch the time between deep washes. You can use cleansing sprays or gentle disinfectants to refresh brushes after use. Spot cleaning saves time and keeps your brushes free of bacteria and product buildup.
Using Cleansing Sprays Correctly
Cleansing sprays are great for freshening up brushes between full washes. Spray a light mist on the bristles. Wipe them on a clean towel.
Use a paper towel if needed. This removes leftover makeup without soaking the brush.
Don’t expect sprays to deep clean. They work well for a quick refresh once a day. Use them to switch colors.
Or continue your look. Using spray often keeps your brushes feeling softer and cleaner.
When to Spot Clean vs Full Wash
Spot cleaning is perfect if you only used a brush briefly or switched colors. Use it to remove just the surface makeup.
Your brushes need a full wash if they feel stiff. Also if they look dirty beneath the surface.
Consider spot cleaning these situations:
- After one day of light use
- To change eyeshadow or blush colors quickly
- When brushes touch oily or liquid products and you need a quick fix
- Your brush needs cleaning if it smells bad. Or if it looks slightly stained.
- Before storing brushes for a short break
Wash your brushes fully about once a week. Wash more often with oily or sensitive skin. Spot cleaning won’t remove deep dirt, oils, or bacteria that have built up over time.
Safe Disinfectants for Brush Care
Use gentle disinfectants that won’t damage brush hairs. Alcohol-based sprays with 70% isopropyl alcohol are effective and widely available. Avoid harsh chemicals that can dry out or break down bristles.
Here are safe options you can find or make for disinfecting brushes:
- 70% isopropyl alcohol spray
- Pre-mixed brush cleaner sprays designed for cosmetics
- Mild soap diluted with water used sparingly
- Water mixed with a few drops of tea tree oil (a natural antibacterial)
Spray disinfectants lightly and avoid soaking. Let brushes air dry fully after spraying to prevent moisture buildup inside the ferrule.
Proper Brush Storage After Spot Cleaning
Keep brushes dry and separate after spot cleaning. Store them in a clean area where air can circulate freely. This stops bacteria and mold growth from trapped moisture.
Use brush holders or cases that keep each brush’s bristles from touching others. Avoid tossing damp brushes in your makeup bag. Drying them on a towel before storing works best.
Common Mistakes and How to Avoid Damaging Brushes
Washing brushes too often usually won’t cause damage. But overdoing it can wear the bristles faster.
Plan your cleaning around how long it takes to dry them fully, not just how often. Too much pressing or scrubbing can loosen glue or break bristles, especially on delicate eyeshadow brushes.
Harsh scrubbing breaks and bends bristles, causing them to shed or lose shape. Instead, gently swirl the brush in your cleanser with light pressure.
Pressing firmly to squeeze water can also damage bristles. So squeeze softly from base to tip after rinsing.
Drying brushes bristles-up traps water in the handle, weakening the glue. Always dry them flat with the bristles hanging off an edge to air out fully. This keeps the brushes from misshaping and shedding prematurely.
- Don’t scrub hard; use gentle swirling motions only.
- Squeeze water softly, never twist or pull bristles.
- Reshape the bristles after washing to keep their form.
- Dry brushes flat, bristles hanging past the edge of counters.
- Replace brushes that shed excessively or lose shape.
- Wash powder brushes every two weeks if not daily.
- Use a clean towel to lay brushes on while drying.
Always reshape brushes right after washing, before drying flat to prevent misshaping.
Shedding and misshapen brushes can’t be fixed by washing. These problems mean the brush’s glue or construction has failed.
Keeping washing gentle and drying done properly stretches your brush’s lifespan. Follow these steps closely, and your brushes should stay in good shape longer.
When to Replace Your Makeup Brushes and Sponges
Makeup brushes often last 1 to 3 years with proper care. Over time, the bristles break down or shed, affecting performance. Check your brushes regularly to catch signs of wear early.
Look for these signs that show it’s time to retire a brush or sponge. Bristles falling out in clumps or a stiff, misshapen head are clues.
Also check if the handle cracks or gets loose. Sponges usually need replacing every 1 to 3 months because they absorb moisture and bacteria faster.
You can try saving a brush with small damage by cleaning it gently. Then reshape the bristles carefully before you use it again.
But deep shedding or handle damage is a sign to replace it. Damaged brushes affect your makeup’s look and your skin’s health.
- Keep brushes upright in a holder with space between each
- Store in a dry, cool spot away from sunlight
- Wrap or cover them when traveling to avoid damage
- Clean brushes and sponges regularly as recommended
- Replace sponges every 1 to 3 months to avoid bacteria build-up
- Inspect brushes often for bristle loss or changes in softness
Storing brushes properly helps them keep their shape and stay clean longer. Avoid stuffing them into a drawer or bag, which bends bristles and damages handles. Good storage extends your brushes’ life and saves you money over time.
Cleaning brushes carefully also protects them and your skin. Dirty or broken tools don’t just ruin your look. They can cause irritation or breakouts.
Spending a little time checking and caring for each brush keeps them fresh. This helps your collection stay ready for use whenever you need.
Speeding Up Drying Time Without Hurting Brushes
Drying your makeup brushes faster is possible without hurting them. Focus on gentle methods that keep the brush shape and avoid mold. Some tips depend on brush size and hair type.
Using Brush Drying Racks
Brush drying racks hold brushes upside down so water drains away from the ferrule. This stops water damage to the glue and handle. Using a drying rack speeds up drying by improving airflow around the brushes.
Racks come in various sizes and cost between $10 and $30. They fit on a countertop or hang off a sink.
You can get racks made for many brushes at once. These racks help a lot if you wash your brushes together.
These are the benefits of drying racks:
- Keep bristles pointed down to protect glue and handle
- Allow air circulation to dry brushes evenly
- Save counter space during drying time
- Work equally well for small and large brushes
- Reduce risk of mold by preventing water pooling
Racks are worth the investment if you wash brushes often. They make drying quicker and safer for all brush sizes.
Safe Use of Hairdryers
Using a hairdryer is okay if you keep the heat low and the airflow gentle. High heat can melt glue or deform bristles. Keep the dryer at least 6 inches from the brush and move it constantly.
Use a cool or warm setting, not hot, to avoid damage. Blow dry the bristles only, not the ferrule or handle to prevent loosening parts. Don’t rely on a hairdryer alone; always blot brushes first to remove excess water.
Towel Rolling Techniques
Rolling brushes in a towel is a quick way to absorb moisture before air drying. Use a clean, absorbent towel like a microfiber cloth. Gently press and roll each brush on the towel without twisting the bristles.
This removes water safely without damaging the shape. It speeds up drying by letting air dry the nearly dry bristles afterwards. Avoid squeezing, which can pull bristles loose or distort the brush shape.
Roll brushes on a towel like this:
- Place brush flat on a dry microfiber towel
- Gently press and roll along the bristles lengthwise
- Do not twist or bend the bristles
- Repeat until most water is absorbed
- Set brushes upright or hang to finish drying
Environment and Airflow Tips
Drying speed depends on brush size and hair type. Dense brushes soak up more water and dry slowly.
They can take 4 to 24 hours to fully dry, says e.l.f. Light or synthetic brushes may dry faster.
Place brushes somewhere with good airflow but away from direct heat or sunlight. Avoid humid spaces like bathrooms to prevent mold growth. Open windows or use a fan on low speed to help air circulate around the brushes.
Here are ways to improve drying conditions:
- Set brushes near an open window or gentle fan
- Keep brushes improve to let air flow underneath
- Avoid closed containers or plastic bags during drying
- Keep out of direct sunlight to protect bristles
- Dry in low humidity rooms away from steam
Step-by-Step Action Plan for Cleaning Your Makeup Brushes
Follow this plan to keep your brushes clean and skin healthy. Use it as a routine guide you can start right now.
- Before your first use: Wash new brushes with a gentle cleanser to remove any factory residue. Check that water runs clear after rinsing.
- Weekly: Deep clean brushes using lukewarm water and mild soap or brush cleanser. Ensure all makeup is gone, and bristles feel soft and not brittle.
- Daily spot cleaning: Quickly wipe brushes on a brush cleaner or spray sanitizer after use. This removes surface makeup and cuts down on buildup.
- After washing: Lay brushes flat on a towel with bristles hanging off the edge. This dries them evenly and stops water from loosening the glue.
- Once a month: Check your brushes for loose hairs or misshaping. Replace any that shed a lot or lose shape easily.
- After getting sick: Deep clean all brushes with a disinfectant to avoid spreading bacteria. Let them dry completely before using again.
- When in a hurry: Use a quick-dry fan or place brushes near a cool air source. Avoid heat or direct sunlight to prevent damage.
Frequently Asked Questions
Can I Use Baby Shampoo to Clean My Makeup Brushes?
Yes, baby shampoo is gentle and effective for cleaning. It removes makeup residue without harsh chemicals, perfect for sensitive brush hairs or skin.
Is It Safe to Wash Makeup Brushes with Hot Water?
Use lukewarm water instead of hot to protect bristles. Hot water can loosen glue, causing bristles to shed or deform.
Can I Wash Synthetic and Natural Brushes Together?
It’s best to wash synthetic and natural brushes separately. Each material needs a different cleaning method to avoid damage and preserve quality.
How Do I Remove Stubborn Makeup Stains from Brush Bristles?
Repeat gentle cleansing with a mild brush cleanser to remove stubborn stains. Avoid harsh scrubbing to prolong your brush’s life.
Is It Okay to Use a Dishwasher to Clean Makeup Brushes?
Avoid dishwashers for makeup brushes. High heat can ruin their shape.
Strong water jets also damage their softness. Stick to handwashing only.
Does Washing Brushes Cause Them to Lose Their Shape over Time?
Overwashing or improper drying can cause shape loss. Dry brushes at a 45-degree angle to keep their form intact and avoid damage.
Before You Go
Keeping your brushes clean protects your skin and improves makeup results. Start by deep cleaning your brushes this week. You’ll notice your skin feels better and your makeup looks sharper.