

How to Use the Hair Waver: Simple Steps for Perfect, Lasting Waves
Wondering how to use the hair waver to get perfect waves? Start by setting the right temperature for your hair type. Pick a lower heat if your hair is thin.
Use a higher setting if your hair is thick or coarse. Adjust heat based on your hair type.
Next, section your hair into 1 to 2-inch parts for consistent waves. Clamp down with the waver for a few seconds on each section.
Work your way around your head. This method helps your waves hold better and look uniform.
Using the hair waver is quick because it heats up in under a minute. Watch the temperature display on your device. Change the heat to prevent damage or uneven curls.
Keep it steady for even styling. That way, your waves stay flawless and last longer.
Key Takeaways
- Set the hair waver temperature between 320°F and 350°F for most normal hair types.
- Choose higher heat settings, up to 430°F, for coarse or dense hair.
- Divide your hair into 1 to 2-inch sections to ensure even waves.
- Clamp each section between the waver plates and hold for a few seconds.
- Wait for the waver to fully heat up, usually under 60 seconds.
- Use the LED screen to monitor and adjust the temperature accurately.
How to Create Waves Using a Hair Waver Step-by-Step

To create perfect waves, work through your hair in small sections. Clamp each section near the roots. Hold the tool for a few seconds each time.
Use about 1- to 2-inch wide sections for even waves. Start at the nape and work your way up.
Cover your whole head evenly. Join waves for a natural look.
Preparing Your Hair and Tools
Your hair should be completely dry before using the waver to avoid damage and uneven waves. Detangle your hair gently to make sectioning easier and help the waves form smoothly.
Apply a heat protectant spray or serum evenly throughout to shield your hair from heat damage. Warm up your hair waver to the right temperature as recommended for your hair type.
Sectioning Hair for Optimal Waves
Begin at the nape of your neck. Clip the top layers out of the way.
This keeps them clear for styling. Work with small sections of about 1 to 2 inches wide for consistent waving.
Release one section at a time for styling. This approach keeps your waves even and prevents uneven shapes or missed spots.
Clamping and Holding Technique
Hold the waver horizontally and clamp hair starting roughly an inch from your roots. Use one or two clamps depending on your tool to create deep waves or softer waves.
Hold the clamp in place for about 3 seconds. Then move down the hair strand.
Repeat this on the next section. Overlap the sections slightly so the waves flow naturally without gaps or dents.
Working Through All Hair Layers
After finishing the bottom layer, release the next clipped section and repeat the clamping process uniformly. Work your way up to the crown and sides, making sure every strand gets waved.
Take breaks if you feel your hair is getting too hot. This prevents damage and keeps your waves looking bouncy and fresh.
- Detangle and dry your hair completely before styling.
- Apply heat protectant spray evenly throughout your hair.
- Clip the top layers and start sectioning at the nape.
- Take 1- to 2-inch sections and clamp about an inch from roots.
- Hold the waver on each section for 3 seconds.
- Move down the strand overlapping previous waves slightly.
- Repeat sectioning and waving from bottom to top of your head.
- Take short breaks if hair feels too hot.
Choosing the Right Temperature for Your Hair Type
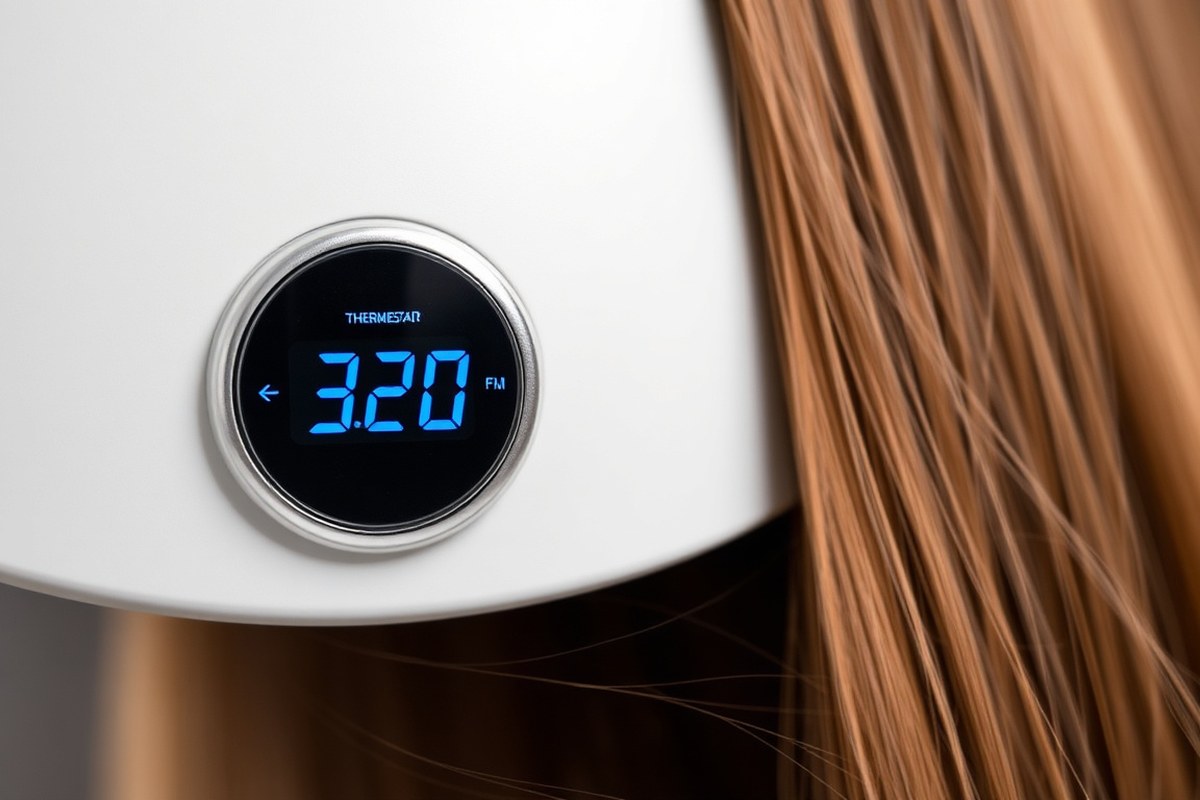
Picking the right heat keeps your hair safe. It also helps waves hold better.
Use lower heat on fine or damaged hair to avoid burning or dryness. Thicker or coarse hair needs higher heat to shape strong waves effectively.
Temperature Ranges by Hair Texture
Pick a heat setting that matches your hair’s texture for the best results. Fine or thin hair works best with low heat from 250°F to 320°F. Normal hair handles medium heat, around 320°F to 380°F. For thick or coarse hair, use the highest setting between 380°F and 430°F.
| Hair Type | Recommended Temperature | Heat Level |
|---|---|---|
| Fine or Thin Hair | 250°F, 320°F (120°C, 160°C) | Low |
| Normal / Medium Hair | 320°F, 380°F (160°C, 195°C) | Medium |
| Thick or Coarse Hair | 380°F, 430°F (195°C, 220°C) | High |
| Color-Treated Hair | 300°F, 350°F (150°C, 180°C) | Low, Medium |
These settings let you tailor heat according to your hair’s needs. Many hair wavers have adjustable temperatures, so you can find your perfect heat level. Test a small hair section first to avoid surprises.
Effect of Heat on Hair and Wave Duration
Higher heat settings break down hydrogen bonds in hair faster, forming waves quickly. This leads to longer-lasting waves, especially on thick hair that resists styling. Fine hair needs less heat because it’s more prone to damage and dries out quickly.
Applying heat for 4 to 8 seconds per section is enough depending on hair thickness. Holding the waver too long risks burning or over-drying. Cool each wave before touching to help it set and last longer.
Use the shortest heat exposure your hair needs; less heat means less damage.
Heat affects not just wave hold, but also hair health. Too much heat can cause breakage and split ends. Always adjust heat to achieve a balance between good waves and healthy hair.
Adjusting for Damaged or Color-Treated Hair
Damaged, bleached, or colored hair needs heat lowered by 20 to 30 degrees. Aim for a range around 300°F to 350°F to protect fragile strands. Using high heat on fragile hair can cause irreversible damage.
Condition-based temperature matters more than hair thickness here. Use the gentlest heat that still shapes waves well. Protective styling products can help reduce heat stress but don’t rely on them alone.
Test small sections closely and adjust heat settings based on results. Weak waves mean you should raise the heat a bit next time. Dry or brittle hair needs less heat or more time between styles.
How to Section and Clamp Hair for Consistent Waves
Start by dividing your hair into manageable sections about as wide as the waver clamp. Position the clamp so it presses flat hair without touching too close to the scalp. Overlap slightly as you move down each section to avoid gaps or uneven waves.
Ideal Section Sizes
Aim for sections that fit comfortably within the clamp without crowding the tool. Thick hair benefits from slightly narrower sections to ensure even heat distribution.
For loose waves, choose sections about 1 to 1.5 inches wide. For tighter waves, smaller sections work better.
Sections too wide can cause uneven waves or miss spots underneath. Keep the width consistent across your head for uniform results.
- Use 1-1.5 inch sections for loose waves
- Narrower sections for thick or coarse hair
- Avoid wide, bulky sections crowding the clamp
- Consistent section size leads to uniform waves
- Smaller sections create tighter, defined waves
Adjust section size based on your desired wave strength and hair texture. This method controls wave quality and styling speed.
Proper Clamp Positioning
Place the clamp about 1 to 2 inches from the roots. Avoid pressing too close to prevent scalp burns. Hold the hair flat across the open clamp before squeezing to get smooth base waves.
Angle the tool slightly downward to follow the hair’s natural fall. This helps shape consistent waves from top to bottom without sharp bends or kinks.
- Start 1-2 inches away from scalp for safety
- Lay hair flat on the clamp before closing
- Keep clamp pressure firm but not overly tight
- Angle tool downward for natural wave flow
- Don’t stay too long in one spot to avoid damage
Practicing this positioning prevents hot spots and keeps waves looking smooth and natural.
Layered Sectioning Technique
Divide hair horizontally into layers from bottom to top. Clip upper layers away before styling the lower ones. This avoids flattening freshly waved hair underneath.
Tackle one layer fully before moving on. Pin each section you finish to keep them separate and neat throughout styling.
- Start with the lowest layer near the neck
- Pin upper layers out of the way
- Style layer by layer for complete coverage
- Overlap clamp placements slightly within each section
- Let hair cool after waving each layer for better hold
This systematic approach helps you cover all hair evenly without missing spots. It also saves time and keeps your style tidy.
Styling Tips for Different Hair Types and Conditions
Fine or thin hair needs the lowest heat settings on your hair waver. Use around 300 to 350 degrees Fahrenheit and clamp each section for about 5 seconds. This protects fragile strands from damage and prevents waves from falling flat.
Coarse or thick hair requires more heat to shape properly. Raise the temperature to 400 or 430 degrees.
Hold the waver on each section for 8 to 10 seconds. This helps the waves stay defined without repeated passes that cause extra heat stress.
Curly or natural hair benefits from a gentle, slow approach. Start with the waver on a medium heat setting to avoid loosening curls too much. Work in smaller sections.
Smooth strands with your fingers before clamping. This keeps texture while creating waves.
Color-treated or bleached hair is more prone to breakage and dryness. Keep the waver temperature low, around 300 degrees.
Style only a couple of times per week. Always use heat protection spray before styling to seal moisture and protect the cuticle.
Apply a heat protectant product evenly on your hair before using the waver. This forms a shield against thermal damage and keeps hair shiny. Wearing a heat-resistant glove helps you handle the tool more safely for quicker, more precise styling.
Start the wave from the bottom of each hair strand. Move upward for a smoother, natural look. For thick or color-treated hair, try to work in smaller sections to ensure even heat.
Your hair may feel stiff or dry after styling. Reduce heat or shorten clamp time for the next session.
Products and Techniques to Make Waves Last Longer
Spray a heat protectant on dry hair before using your hair waver. It shields your strands from damage and helps waves hold better. Let it dry completely to avoid steam or uneven styling.
After waving, let your hair cool completely before touching it. Cooling locks the wave shape, making it last longer. Running your fingers through waves too soon can make them fall flat.
Use a flexible hair setting spray right after waving. This spray gives hold without stiffness. You can spritz again later to boost hold on day two.
- Use a heat protectant spray before styling on dry hair.
- Hold hair in the waver for a few seconds to form waves.
- Let hair cool down fully to set waves.
- Gently separate waves with fingers after cooling.
- Finish with flexible hold hair spray to lock waves.
- For fine hair, pick lightweight sprays and lower heat.
- Refresh next day with dry shampoo or a light setting spray.
To refresh waves without heat the next day, spritz your hair lightly. Use water or a leave-in styling mist for best results. This helps revive your waves gently.
Then scrunch hair gently to revive texture. Avoid brushing since it can flatten the waves fast.
Always cool your waves completely before touching them, or they won’t hold well.
These steps usually keep your waves fresh all day and sometimes into the next. Cost for heat protectant sprays ranges from $8 to $20. Flexible hair sprays typically cost around $10 to $15.
Choosing the right hold spray matters for your hair type. Heavy sprays can weigh down fine hair and loosen waves.
Common Mistakes with Hair Wavers and How to Fix Them
Uneven or bunched-up waves often happen because the sections of hair are too large or damp. Smaller, dry sections heat evenly and shape better. You might clamp the waver too long in one spot.
This can dent or burn the hair. It also breaks the wave pattern.
Check how you clamp the tool when your wave dents or misses. Overlapping clamping or rushing from one section to the next can cause uneven imprints.
Hold the waver still for 5 to 8 seconds on each section. This usually works well for most hair types.
Hair that feels overheated or damaged was likely hot too long. The temperature was probably too high or pressed too long.
Lower the heat for fine or damaged hair and never use the waver on damp hair. Steam from wet hair causes damage and weak waves.
- Use dry hair only to prevent steam damage and uneven waves.
- Take small sections, about 1 to 1.5 inches wide, for better waves.
- Clamp the waver for 5 to 8 seconds per section, no longer.
- Adjust heat: lower for fine hair, higher but not maximum for thick hair.
- Move the waver through hair smoothly to keep wave patterns consistent.
- Don’t overlap clamping spots to avoid dents or missing waves.
Using smaller sections creates looser, more natural waves. Larger chunks tend to bunch up and look messy. Reduce heat below 350°F if your waves feel damaged.
Don’t use it daily. Heat damage can make hair brittle over time.
A mini waver is handy for shorter hair or tighter waves. It’s easier to control heat and section size with smaller barrels.
Pick the right waver size for your hair length. This helps avoid uneven results or overheating small strands.
How Long Does It Take to Style Hair with a Hair Waver?
Styling a full head with a hair waver usually takes between 10 and 20 minutes. For long, thick hair, expect about 15 minutes. Medium or thinner hair usually takes about 10 minutes to style.
How thick your strands are can change this time. Dense strands take longer. Short hair styles usually need less than 10 minutes.
The size of the barrel on your hair waver affects your timing. Wider barrels create larger waves and cover more hair with each press. This speeds up your styling but results in looser waves.
Narrow barrels take longer since you style smaller sections. But they give tighter, more defined waves.
Using a triple-barrel waver can save you time compared to a single barrel. It presses three waves in one clamp, cutting down the number of passes you make. Proper sectioning is very important when using the waver.
Slide the waver down your hair. Stop when the barrel near your roots hits the wave bend. This method covers all your hair evenly and quickly.
To save time, start with washed and completely dry hair. Damp hair takes longer to style and can cause uneven waves.
Section your hair well before you start. Small, neat sections let you work faster and avoid missing spots.
Choosing a waver with helpful features makes a difference. A swivel cord stops tangling, letting you move naturally. Temperature control lets you match heat to your hair type.
This avoids wasting time on fixing curls. It helps style your hair faster. An auto shut-off adds safety if you get distracted.
Once you finish styling, let your waves cool before touching them. This sets the shape and keeps them lasting longer. Running your fingers lightly through your hair softens the waves to a natural look.
Fixing your hair while it’s still hot can mess up your style. It also slows down your styling process. Let your hair cool first.
Cleaning, Maintenance, and Safe Storage of Hair Waver Tools
Clean the plates of your hair waver every 2 to 3 uses. This removes product buildup and keeps the heat consistent. Use a soft cloth dampened with rubbing alcohol.
You can also use water mixed with a drop of mild dish soap. Wipe gently for best results.
Never immerse the whole tool in water or use harsh chemicals. These can damage the heating elements or the finish. Wait for the plates to cool completely before cleaning to avoid burns.
Maintenance helps the waver last longer and keeps your waves smooth. Check the cord regularly for wear and avoid wrapping it tightly around the device. This prevents stress on the wiring and accidental breaks.
- Unplug and cool the waver after each use.
- Wipe plates gently with a soft cloth and rubbing alcohol.
- Remove any stuck hair or debris carefully.
- Inspect power cord for damage often.
- Store in a heat-resistant pouch or case.
- Avoid tight wrapping of the cord around the device.
- Keep tool in a dry, cool place away from water sources.
A heat-safe pouch or case helps prevent scratches and dust. Store the waver flat without pressure on the plates to avoid bending or warping. Keeping the tool dry stops rust and electrical hazards.
Never clean the hair waver while plugged in or still hot to avoid burns and shocks.
Step-by-Step Action Plan for Perfect Waves
This plan guides you through using your hair waver confidently and safely. Follow these steps closely for the best results.
- Before you start: Choose the right heat setting for your hair type to avoid damage. Check your hair feels comfortable with the warmth after 10 seconds.
- Day 1: Section your dry hair into small parts. Make sure your sections are even for consistent waves.
- Day 1: Start clamping hair near the ends and press for 5 to 10 seconds. Release and move down the strand to create natural waves.
- Day 1: Use a light-hold hair spray to set your waves. Let your hair cool fully to lock in the style.
- Day 2: Check how your waves hold after sleeping or wearing a hat. Use dry shampoo to refresh volume if needed.
- Weekly: Clean your hair waver by wiping plates with a damp cloth. Do this after every 5 uses to avoid product build-up.
- Monthly: Inspect your waver’s cord and plates for damage. Store it in a cool, dry place after unplugging.
Frequently Asked Questions
What Are the Different Types of Hair Wavers?
Hair wavers vary by barrel size and shape. Smaller barrels create tighter waves, while larger ones make loose waves. For fine hair, pick a ceramic waver.
Thick hair works best with a deep wave tool. This will give you the best results.
What Can I Spray on My Hair Before Curling It to Hold It?
Use a heat protectant with holding properties before styling. It guards hair against heat damage and helps waves last longer. Avoid heavy sprays that weigh strands down.
How to Do Waves in Hair with a Curling Iron?
Wrap hair sections loosely around the curling iron barrel. Hold for a few seconds then release. Use your fingers to separate curls into waves for a softer look.
Is It Easier to Curl with a Wand?
Yes, a curling wand is often easier since you wrap hair directly around a single barrel. It offers more control over curl tightness. Hair wavers create wave patterns with multiple barrels pressed together.
Can I Use a Hair Waver on Short Hair?
Hair wavers work better on medium to long hair. Short hair may not fit well in the triple barrels. Consider smaller barrels or alternative tools for short styles.
How Often Should I Clean My Hair Waver?
Clean your hair waver after every 5 to 10 uses. This prevents product buildup and maintains heat efficiency. Use a damp cloth once it’s cooled down.
Final Thoughts
Using a hair waver takes practice but gets easier fast. Test your heat settings and section hair evenly to make your waves last. Try this plan today and enjoy your new style safely.


