How to Straighten Hair with a Curler: Simple Steps for Smooth, Damage-Free Results
You can straighten hair with a curling iron by controlling heat and technique. Clamp your hair with the curler, then rotate it gently to smooth waves. This method helps reduce curls and makes hair straighter.
Begin with clean, dry hair and apply heat protectant spray to avoid damage. Pick a curling iron with a larger, flat barrel or a straightening wand for best results.
Use low to medium heat for fine or color-treated hair. Higher heat for thick hair.
Work in small sections slowly to get a smooth, sleek finish without burning your hair. Move the curler carefully to prevent overheating. This method is good if you don’t have a flat iron on hand.
Key Takeaways
- Use a curling iron with a barrel at least 1 inch wide for straightening.
- Apply a heat protectant before styling to shield hair from damage.
- Set the heat level based on your hair type to avoid burns.
- Work on dry or mostly dry hair for better straightening results.
- Clamp hair gently, then rotate the curler 180° to smooth strands.
- Divide hair into small sections for even heat distribution and control.
Can You Straighten Hair Using a Curling Iron?

You can straighten hair with a curling iron. This tool is not the usual choice. But it works if you use it right.
A curling iron heats hair just like a flat iron. It usually curls hair because of its rounded barrel. The heat helps shape the hair.
Hold your hair tight when using the curling iron. Glide the iron gently down to smooth waves or curls. This helps straighten your hair.
The look from a curling iron is a bit different than from a flat iron. Flat irons press hair flat, which reduces frizz and leaves strands sleek and shiny.
Curling irons don’t clamp the hair flat on both sides. So the straightened hair might keep a little natural wave or bounce.
This method works best for people with wavy or mildly curly hair. Very tight curls or coily hair might not straighten fully with a curling iron alone.
You can still try it. But results may take longer or need repeat passes with the heat tool.
Start with dry hair and always apply a heat protectant to avoid damage. Clamp the curling iron close to your roots. Hold the hair tight and pull the iron down slowly.
Use one smooth motion to the ends. This tension helps stretch the hair strands and reduce curl.
Keep the curling iron temperature between 300 and 350 degrees Fahrenheit. This reduces heat damage while changing your hair shape.
Use moderate heat for best results. Avoid rushing; slow, steady movements green smooth your hair better without creating new creases or bends.
Keep in mind that curling irons don’t usually have wide, flat plates. That means the hair doesn’t get compressed as much as with a flat iron. Your hair may not look perfectly straight but will have a softer, more natural finish.
Choosing the Right Curling Iron for Straightening
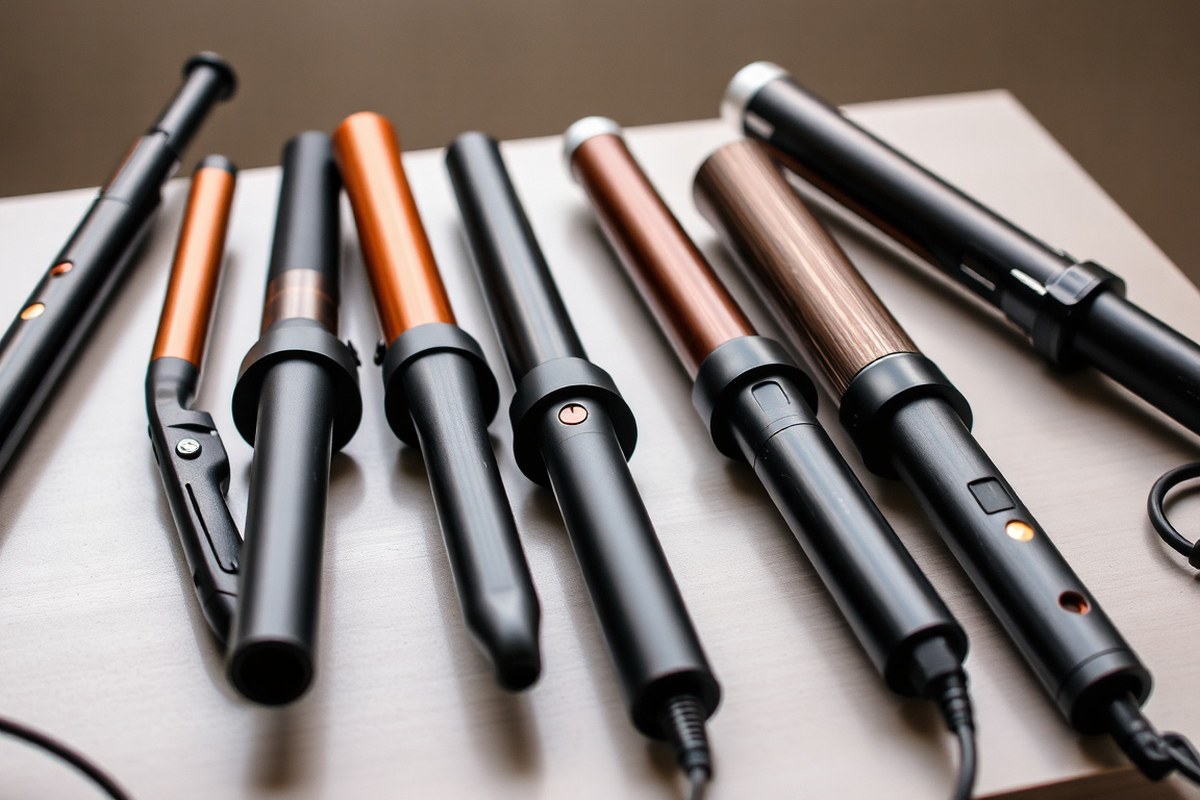
Choose a curling iron with a clamp to hold your hair flat. This helps evenly heat the hair strands for straighter results. Without a clamp, your hair can slip and curl instead of straightening well.
The barrel size affects how you straighten different hair types. Narrow barrels, around 1 inch or less, work best for short or layered hair. Wider barrels, closer to 1.5 inches, suit longer or thicker hair since they cover more surface at once.
Material matters because it affects heat distribution and reduces damage. Ceramic and tourmaline barrels spread heat evenly and cut down frizz. Titanium heats fast and lasts longer.
But can be harsh on fine hair if set too hot. These materials let you straighten your hair with less breakage.
| Hair Type | Recommended Barrel Size | Best Material | Heat Range (°F) |
|---|---|---|---|
| Fine or damaged | 1 inch or less | Ceramic, Tourmaline | 300 – 350 |
| Normal, medium thickness | 1 to 1.5 inches | Ceramic, Tourmaline, Titanium | 350 – 400 |
| Coarse or thick | 1.5 inches or larger | Titanium, Ceramic | 375 – 400+ |
| 4c or very curly | 1.5 inches | Ceramic, Tourmaline | 350 – 400 (use gentle technique) |
Start with lower heat based on your hair type and raise it only if needed. Applying a heat protectant spray is essential to shield your hair from damage. Avoid rushing and straighten small sections for best, lasting results.
Be gentle when using a curling iron on your hair to avoid pulling and breakage.
How to Prepare Your Hair for Straightening with a Curler
Prepare your hair by washing, drying, and applying heat protection before straightening with a curling iron. Your hair should be fully dry to avoid damage and to get a smooth finish. Using the right products helps shield hair from heat and keeps it healthy.
Washing and Conditioning Tips
Start with clean hair that is well-conditioned to help smooth strands before heat styling. Use a hydrating shampoo and conditioner to reduce frizz and add moisture.
Rinse with cool water to close cuticles and lock in moisture. Avoid heavy conditioners at the roots to prevent limpness.
Applying Heat Protectant Products
After washing and drying, apply a heat protectant spray or serum evenly from root to tip. This barrier helps reduce heat damage and preserves hair health.
Use a light spray if your hair is fine. For thick hair, pick an oil-based product.
Curly hair needs a hydrating treatment. Avoid overapplying, because too much product stops the iron from sliding smoothly.
- Spray or rub protectant on dry hair before heat styling
- Comb through hair to spread the product evenly
- Let product absorb a minute before using heat tools
- Use a product rated to protect up to 450°F for safety
- Choose formulas suited for your hair type and texture
Proper Drying Techniques Before Styling
Hair must be fully dry before using a curling iron. Heat on wet hair can burn the hair cuticle. This causes lasting hair damage.
Dry hair with a blow dryer and a brush. Use a round brush or a paddle brush.
This smooths hair while you dry it. Work in sections to speed drying and get even results.
The Cloud Nine Airshot Pro dryer works well for drying hair gently. Pair it with the Cloud Nine Luxury Paddle Brush. These tools style without harsh damage.
Detangling and Sectioning Preparation
After drying and protecting your hair, detangle it slowly. Use a wide-toothed comb or a detangling brush.
This prevents breakage. This prevents breakage during styling.
Divide your hair into two horizontal sections from ear to ear using sectioning clips. This makes straightening easier and more precise.
Step-by-Step Method to Straighten Hair with a Curling Iron
Straightening hair with a curling iron takes a steady hand and small sections. Section your hair, clamp close to the roots, and pull your hair smoothly down the barrel. Adjust speed and pressure for a sleek, smooth finish.
Dividing Hair into Manageable Sections
Separate your dry, smoothed hair into sections about two to three inches wide. Use clips to hold each section in place. Smaller sections let you work carefully for better straightening.
Start by parting your hair down the middle. Then work on each side, dividing it horizontally into smaller subsections.
Correct Clamping and Pulling Technique
Clamp the curling iron near the scalp with the section of hair inside the clamp. Hold the irons firmly but avoid pinching too hard. Pull the barrel slowly toward the ends, keeping hair taut.
A steady, slight downward pull helps smooth out curls. Avoid twisting the barrel; keep it flat to the hair for straighter results.
Adjusting Speed and Pressure for Smoothness
Move the iron steadily, not too fast, about three to five seconds per section. Too fast and the hair won’t straighten fully; too slow might cause heat damage. Apply even pressure to avoid creases or kinks.
For thicker or curly hair, slower passes with firm tension help. For fine hair, quicker passes at lower heat reduce damage.
Finishing the Ends and Roots
Once you reach the ends, gently pull the iron through without curling them under. Leave ends slightly straight for a natural look. Clamp close to roots, but move quickly to avoid burns or scalp irritation.
For tighter curls near your roots, hold the iron a second longer. Use gentle pressure while holding it. Don’t stay too long or damage may occur.
Cooling and Setting the Style
Let your hair cool completely before touching it. This helps the style set and last longer. Avoid brushing or running fingers through hair until cooled to keep strands smooth.
Use a light hairspray or anti-frizz serum after cooling for added hold and shine.
- Plug in and heat your curling iron to the right temperature.
- Divide your hair into manageable 2, 3 inch sections with clips.
- Clamp the iron near the root on each section without pinching.
- Pull the iron slowly down each hair section, keeping hair taut.
- Work with steady speed and even pressure to avoid damage.
- Finish gently at the ends, leaving them straight for a natural look.
- Allow hair to cool completely before touching or styling further.
Recommended Heat Settings for Different Hair Types
Set the curling iron’s heat based on your hair’s texture, porosity, and health. Lower temperatures work best for fine or damaged hair. Thicker or curlier hair types usually need higher heat to straighten properly without extra passes.
Heat Settings for Fine and Color-Treated Hair
Fine or color-treated hair is fragile and dries out easily. Use a heat setting between 280 and 320°F to avoid damage. This range is enough to straighten without stripping color or breaking strands.
Apply a moisturizing heat protectant before styling. It shields your hair while keeping it hydrated and soft. Work in small sections to avoid repeated passes that raise damage risk.
Temperatures for Medium and Normal Hair
For medium hair, aim for a heat range of 320 to 375°F. This temperature straightens efficiently without unnecessary strain on hair health.
Make sure to use a heat protectant product with your curling iron. It helps your hair maintain moisture and reduces the chance of split ends. Avoid using the highest setting unless your hair is also coarse.
Settings for Coarse, Thick, or Curly Hair
Coarse or very curly hair needs higher heat to relax curls and smooth strands. Use a setting from 375 to 410°F for best results. This range helps you straighten your hair faster and with fewer passes.
Moisture is critical for this hair type. Use a heat protectant that adds moisture and protects against heat damage. Apply a small amount of serum after styling.
This gives a polished look. Use more on thick or coarse hair.
| Hair Type | Recommended Temperature (°F) | Additional Care Tips |
|---|---|---|
| Fine / Color-Treated | 280 – 320 | Use moisturizing heat protectant, gentle passes |
| Medium / Normal | 320 – 375 | Heat protectant, avoid highest setting |
| Coarse / Thick / Curly | 375 – 410 | Moisture-adding protectant, serum after styling |
Adjust your temperature to your hair’s specific needs. Using the correct heat setting can lessen damage and keep your hair healthy.
Signs of Overheating and How to Adjust
Hair that feels dry, brittle, or looks dull may be too hot during styling. Notice smoke or a burning smell?
Lower the temperature right away. These are clear signs your hair is overheating and could break.
Start with a lower heat setting and raise it slowly if needed. Test a small section first to see how your hair reacts.
Keep the iron moving. Don’t hold it on one spot for more than a few seconds.
Always start at the lowest heat setting that straightens your hair to prevent damage.
Common Mistakes and How to Fix Them When Straightening Hair
One common mistake when straightening hair with a curler is rushing through the process. Quick passes may leave your hair uneven or cause curls to bounce back. Taking your time and working in small sections helps the heat work evenly without extra damage.
Another issue is uneven sectioning, which leads to some parts straightening while others stay curly. Thin, vertical sections are best for smooth results, especially if you have coarse or thick hair. This method lets the curler heat hair strands uniformly.
Many people neglect to protect their hair before styling. Heat can cause frizz and damage if you skip a heat protectant or deep conditioner. Use a gentle product with botanical oils to shield your hair during heat styling.
- Divide hair into thin, vertical sections for even straightening
- Avoid rushing; work slowly and limit passes over each section
- Apply a heat protectant spray before using the curler
- Use a nourishing deep conditioner regularly to prevent frizz
- Do not clamp the curler too tightly to avoid dents
- Allow hair to cool before touching or styling further
Hair curls can spring back after styling. This happens when you rotate the barrel. Or when your hold isn’t firm enough on the curler.
Avoid twisting the curler; keep it flat to the hair for a straighter look. Let hair cool completely before moving it to lock in the straight shape.
Preventing frizz starts with good moisture balance. Use gentle shampoo and conditioner suited for curly hair to keep strands soft and hydrated. Always end by applying a light serum or oil.
It smooths flyaways and adds shine. Use a tiny amount so hair doesn’t get weighed down.
Maintaining Straightened Hair After Using a Curling Iron
After straightening your hair with a curling iron, use a light hair oil or serum. Put a small amount in your palms. Rub your hands together.
Smooth it over hair to tame frizz and add shine. This step locks in moisture and creates a polished look.
Heat protectants are useful not just before styling but also for maintaining straight hair afterward. Spritz a thermal protection spray like CHI 44 Iron Guard lightly on your hair. This helps shield strands from humidity and prevents moisture from causing your hair to curl back.
Try to avoid touching or brushing your hair too much once styled. Oils and dirt from your hands weigh hair down. This makes hair lose its sleek shape faster.
Use a wide-tooth comb gently. Detangle or shape your hair during the day. Avoid rough combing to keep style.
Dry shampoo or lightweight hairspray can help. They extend the life of your straight hair. Use sparingly for best results.
Apply dry shampoo at the roots to absorb excess oil without adding weight. A flexible hold hairspray keeps strands in place without stiffness or buildup.
Wrap hair in a silk or satin scarf at night. Or sleep on a satin pillowcase. This helps keep hair smooth.
These materials reduce friction that causes breakage and frizz. You’ll wake up with straighter, shinier hair that stays healthy longer.
Thicker or longer hair may need more product. You will need more care to keep it straight. Adjust your routine as needed.
Try products designed for your hair type, such as smoothing creams made for coarse hair. Change how much product you use throughout the day.
This depends on how oily or dry your hair feels. Watch your hair’s needs closely.
When to Use Heat-Free Alternatives or Consult a Professional
Heat-free ways include air-drying with serum or using big rollers. These can smooth waves and mild curls without heat. Try these when you want a gentle touch on your hair.
These options avoid damage from heat but won’t fully straighten tight curls. Use them when your hair shows signs of dryness, breakage, or thinning. Protect your hair’s health by skipping heat on those days.
Professional treatments like keratin smoothing or Japanese straightening offer longer-lasting results than home methods. These services last months but cost between $150 and $400. The price depends on your salon and how long your hair is.
Prices vary depending on the location and style you pick. Choose these options for lasting results or if irons don’t work. They help straighten curls that don’t smooth easily with heat tools.
Go for them if you want a big change in your hair. Make sure to research and ask your stylist about maintenance after treatment.
Limit heat styling to about once or twice a week to help prevent damage. Daily use, even on low heat, raises the risk of dry, brittle strands and split ends. Switch between heat and heat-free styling to give your hair breaks.
Use a good heat protectant spray every time you straighten. Avoid curling irons when your hair feels fragile.
Give your hair time to recover first. Heat can cause more damage to weak hair.
Set your heat tool under 350°F for fine or damaged hair. For thick or coarse hair, use no more than 400°F. Keep heat levels low to protect your hair.
Get professional help if your curls are very tight and hard to straighten. Severe dryness and breakage also need a pro’s care. Don’t handle extreme damage or tough curls without expert advice.
A stylist can recommend safer, tailored treatments and products. Also, consult a pro before trying any chemical straightening to understand risks and aftercare. Your hair’s condition guides your choice between heat-free, home heat styling, or salon treatments.
Step-by-Step Action Plan for Straightening Hair with a Curling Iron
Follow these steps to safely and effectively straighten your hair using a curling iron. Each step helps you get closer to smooth, straight hair without damage.
- Before you start: Wash and dry your hair completely. Your hair is clean and dry, so heat damage will be less.
- Right before styling: Apply a heat protectant spray evenly. Your hair feels smooth and protected to the touch.
- First pass: Set the curling iron to the proper heat for your hair type. You see the iron heats quickly but not too hot.
- Immediate styling: Take 1-inch sections and clamp the curling iron near the roots briefly. Your hair slowly straightens as you gently glide down.
- After all sections: Let your hair cool without touching it for 5 minutes. Hair feels set and straight, not frizzy.
- Finishing touches: Apply a lightweight serum or oil to smooth flyaways. Your hair shines softly and looks sleek.
- Next day: Use a dry shampoo if needed to keep roots fresh. Your hair stays straight without extra washing.
Frequently Asked Questions
Can I Use a Curling Iron to Straighten Very Curly Hair?
Yes, but take very thin sections for better results. It helps the heat reach and straighten curls evenly without extra passes.
Does Using a Curling Iron Damage Hair More Than a Flat Iron?
Damage depends mostly on heat and time, not the tool. Use a heat protectant before styling.
Avoid using very high heat settings. This helps reduce damage with curlers or straighteners.
How Long Does It Take to Straighten Hair with a Curling Iron?
It usually takes 15 to 30 minutes, depending on hair thickness. Taking thin, manageable sections speeds up the process and improves straightening quality.
Can I Straighten My Hair with a Curling Iron Without a Heat Protectant?
It’s not recommended because heat protectant reduces damage. Skipping it can lead to dryness, frizz, and split ends over time.
What’s the Best Technique to Keep Hair Straight After Curling Iron Use?
Use a serum or light hairspray to lock in smoothness. Avoid touching your hair too much, which can cause frizz and loss of sleekness.
Can I Use a Curling Iron to Touch Up Straight Hair?
Yes, light passes with a curling iron can smooth flyaways. Use low heat to avoid extra damage on already straight hair.
Final Thoughts
You can get straight, smooth hair with a curling iron. Protect your hair first. Then, section it well before starting.
Focus on heat settings and keep your hair healthy with good care. Try your first pass soon and notice how your hair responds.