How to Straighten Hair Using Flat Iron: Complete Steps and Expert Tips
How to straighten hair using flat iron starts with making sure your hair is completely dry. Using a flat iron on wet hair can cause damage and uneven results. A regular flat iron works best on fully dry hair to create smooth, straight strands quickly.
Next, choose the right heat setting based on your hair type. Fine or thin hair needs lower heat to avoid damage.
Thicker hair requires higher temperatures for lasting straightness. Keeping the temperature under 150°C (302°F) helps protect natural hair from drying out.
Sectioning your hair makes the process quicker and more even. Work with small sections of hair for better straightening results. Keep the flat iron a few inches away from your scalp.
This helps you avoid burns while straightening. This method helps you straighten all parts of your hair consistently without missing spots.
Key Takeaways
- Always dry hair completely before using a flat iron to prevent damage.
- Set your flat iron temperature below 150°C (302°F) for natural hair.
- Use lower heat for fine hair and higher heat for thick hair types.
- Divide hair into small sections before straightening for even results.
- Hold the flat iron 1, 3 inches above your scalp to avoid burns.
- Let the flat iron heat for 3, 5 minutes before starting each session.
Step-by-Step Guide to Straighten Hair with a Flat Iron
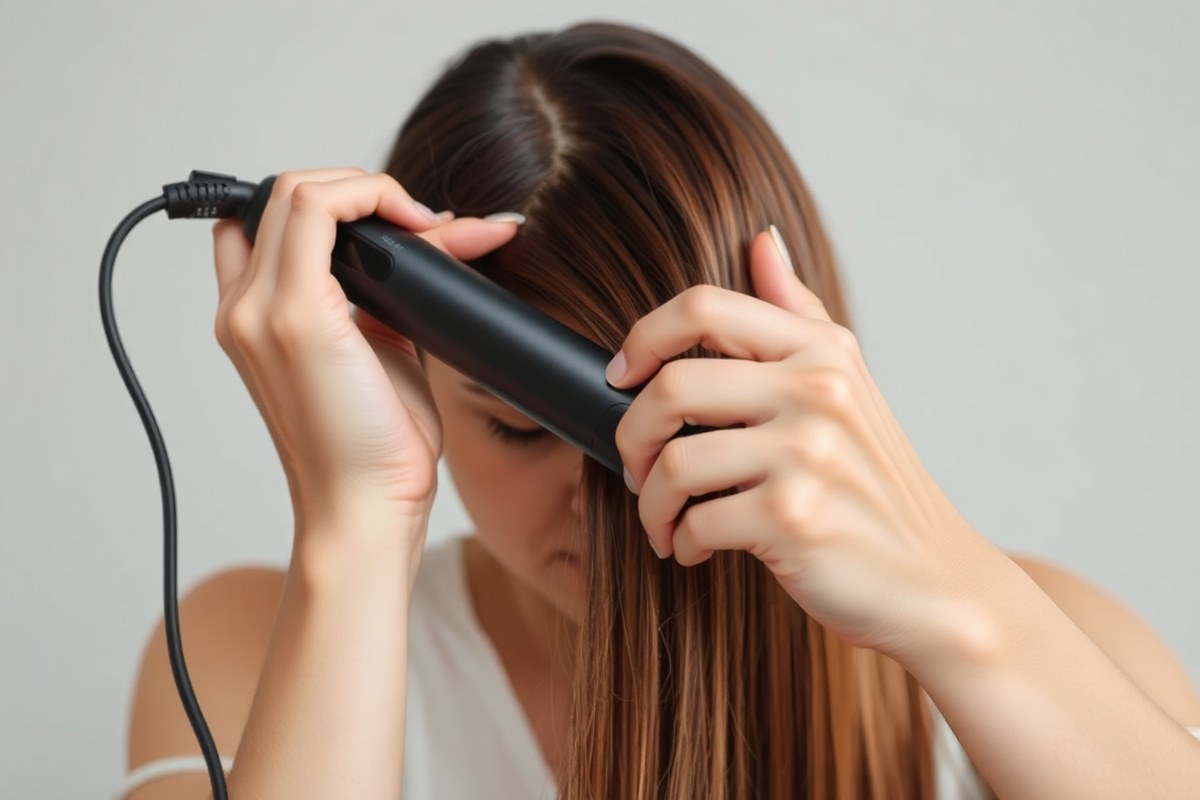
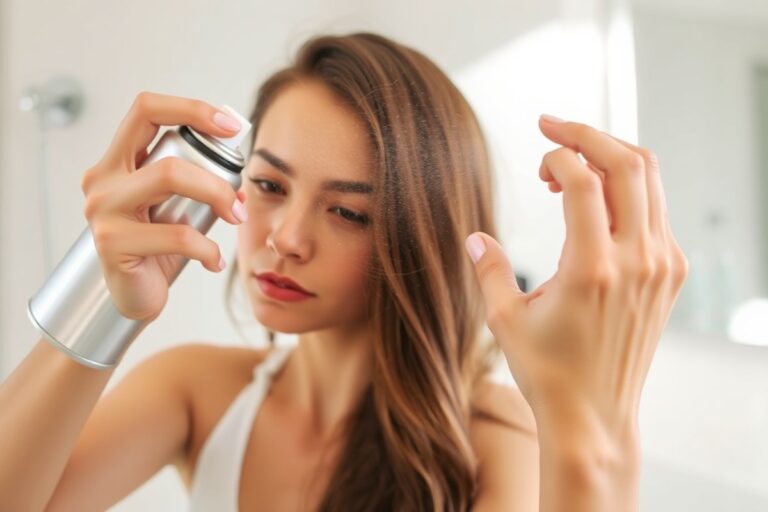
Start with your hair completely dry and detangled. Spray on a heat protectant to shield strands from heat damage. Divide your hair into small 1-inch sections for even straightening.
Hold your flat iron close to the scalp without touching it. Moving slowly and steadily, glide the iron down each section of hair. Use just one or two passes per section to avoid extra heat damage.
- Plug in and set your flat iron to the appropriate temperature.
- Brush a 1-inch section of hair and clamp the flat iron near the roots.
- Pull the flat iron slowly down the hair shaft at about 2-3 centimeters per second.
- Repeat the same motion on the section only once or twice for best results.
- Move to the next section and continue the process till your entire head is done.
- For the top layer, straighten each section upward, pulling the iron towards the ceiling.
- Keep your flat iron just a few millimeters from your scalp to avoid burns.
Keeping hair taut while straightening helps fewer passes produce the same sleek look. Pulling the flat iron smoothly prevents choppy, uneven results. Taking your time with each pass creates straighter hair that lasts longer.
Practice your rhythm and speed slowly to avoid pulling or burning. The slow glide of the flat iron lets heat evenly relax curls or waves.
Avoid going over the same section multiple times. It stresses your hair and can cause damage.
Choosing the Right Flat Iron and Heat Settings

Choosing the right flat iron starts with matching plate material to your hair type. Ceramic plates work best for fine or color-treated hair because they heat evenly and reduce snagging. Titanium plates get hot fast.
They hold higher heat. Great for coarse or very curly hair. Too harsh for fine strands.
Plate width and hair length also matter. Wider plates cover more hair at once, so they save time on long hair. Short hair is easier to manage with narrower plates, usually 1 inch.
Choose a good flat iron with ceramic or titanium plates. This helps protect hair from damage. It also gives smooth results.
| Flat Iron | Best for | Pros | Cons | Plate Type | Plate Width |
|---|---|---|---|---|---|
| Paul Mitchell Smooth+ | Everyone | Reliable and performs well on all hair types | Less effective on very curly hair compared to titanium | Ceramic | 1.25″ |
| Sutra IR2 Infrared Flat Iron | Very curly hair | Works on tough hair, heats fast | Titanium may be too strong for Type 2 hair | Titanium | 1″ |
| BaBylissPro Nano Titanium Prima3000 | Very curly hair or curling | Strong heat, versatile for straightening and curling | Pricey | Titanium | 1″ |
Set your flat iron’s temperature based on hair texture. Use around 300°F (150°C) or lower for fine or damaged hair to avoid breakage.
Thick, coarse hair can handle higher heat, between 375°F and 410°F (190°C to 210°C). Never exceed 410°F, or you’ll risk burning and drying out your hair.
Plug in the flat iron first. Let it heat 3 to 5 minutes before using. Ready when it reaches the right temperature.
Always check the temperature control before styling. Spray heat protectant on hair before styling.
It shields strands from heat damage. It also stops oil from frying.
Do not go over 300°F on natural hair to prevent damage and dryness.
Flat irons with ceramic plates help distribute heat evenly and glide smoothly. Tourmaline plates mix ceramic and crushed gems. They lower frizz with ionic heat.
Tourmaline adds shine while staying gentle. Consider tourmaline if you want sleek, polished curls without harsh heat stress.
Picking the right flat iron and heat setting saves time and keeps hair healthier. Avoid too high temperatures on fine hair and don’t rely on one-size-fits-all. Tailor your tool and heat to your unique hair thickness and length for best results.
Preparing Hair Before Straightening
Preparing hair before using a flat iron involves cleansing, drying, and protecting your strands. You need clean, fully dry hair for the best results and to avoid damage. Applying a heat protectant spray or serum before styling shields your hair from heat.
Shampoo and Condition with Repair-Focused Products
Start with a shampoo and conditioner that help repair and smooth your hair. Choose ones that hydrate and protect your strands to reduce heat damage.
Look for labels that say “repair,” “moisturizing,” or “heat protection.” This strengthens your hair before styling. Here’s what to do:
- Use a gentle shampoo for your hair type.
- Apply conditioner mainly to mid-lengths and ends.
- Rinse thoroughly with lukewarm water.
- Avoid heavy oils that make hair slippery.
- Pat hair dry gently with a towel after washing.
Dry Hair Fully or Use Suitable Damp-To-Dry Irons Cautiously
Never straighten wet or damp hair unless your iron is designed for wet-to-dry use. Straightening wet hair can blister the cuticle and cause breakage.
Air-drying your hair is gentler but can take up to an hour. Blow-drying is faster, usually 10 to 15 minutes for mid-back length hair.
If using a blow dryer, apply a heat protectant first to prevent damage. Stop blow-drying only once your hair is completely dry from roots to tips.
Apply Heat Protectant Spray or Serum Evenly
Spray or smooth a heat protectant across your hair evenly before drying or flat ironing. This helps shield hair from heat up to 450°F.
Use a lightweight spray or serum that doesn’t weigh hair down or cause buildup. Apply in a fine mist or a few drops to avoid clumps. Follow these steps:
- Spray onto damp or dry hair before heat styling.
- Comb through with a wide-tooth comb to spread product.
- Wait for the product to absorb fully before heat application.
- Reapply a small amount before flat ironing for extra protection.
Detangle Gently and Section Hair Properly
Detangle hair carefully with a wide-tooth comb or detangling brush before you start straightening. This prevents snags and uneven heat exposure.
Separate your hair into manageable sections to get even straightening. Smaller, clean sections take less time and reduce repeated passes. Try this checklist:
- Use clips to divide hair into 4 to 6 sections.
- Start straightening from the bottom sections, working upward.
- Keep sections thin enough for the flat iron plates to cover fully.
- Comb each section one last time before ironing it.
Sectioning Hair for Efficient and Even Straightening
Sectioning your hair before straightening helps make your work even and faster. It ensures heat reaches every strand without missed spots or damage. Start from the bottom layers and work your way up.
Clip out hair you’re not straightening. Take thin sections for the best results.
Divide Hair into Top, Middle, and Bottom Layers
Start by splitting your hair horizontally into three layers: bottom, middle, and top. This gives you clear zones to work with and prevents mixing strands. The bottom layer is the first to straighten, then the middle, and finally the top.
Make the parts with a comb for neat, even layers. It helps your flat iron reach hair consistently, so you don’t miss any spots. Sectioning this way also avoids overheating already straightened hair.
Clip Away Unworked Sections Securely
Use a hair clip or claw clip to hold the top layers out of your way. Clip firmly so the clipped hair won’t fall back on the sections you’re straightening. This keeps your work area clear and your straightening neat.
Slowly release small portions of clipped hair when you finish each layer below. Taking the work bottom-up protects hair from repeated heat exposure. It makes straightening faster and helps hair stay healthy.
Choose Section Width Based on Hair Thickness
Thin or fine hair works best with 0.75 to 1-inch wide sections. Thin sections avoid overheating delicate strands and give you more control. Medium hair can handle 1 to 1.5-inch sections, balancing speed and even coverage.
For thick or coarse hair, 1.5 to 2-inch chunks work better. Larger sections mean fewer passes with the iron and faster straightening. Use the largest section size your flat iron plates support for more efficient heat distribution.
Don’t vary the section width too much while straightening. Keep your sections about the same size.
This helps heat spread evenly on your hair. It lowers uneven results and damage risks.
Work on One Thin Section at a Time
Take one thin strand from the clipped section and place your flat iron near the roots. Slowly glide the iron down to the tip without rushing or forcing it through. This careful motion prevents hair from burning or getting skipped.
Check the hair after cooling to see if it looks smooth and shiny. Try thinner sections to fix puffiness.
Don’t just turn up the heat. Adjusting section size helps you find the right balance without overdoing heat.
- Comb your hair completely dry and detangled for easy sectioning.
- Part hair into three horizontal layers: bottom, middle, and top.
- Clip the top and middle layers away, exposing the bottom layer.
- Choose 1-inch sections for medium hair or adjust width by thickness.
- Take a thin section from exposed hair and clamp the flat iron at roots.
- Slide the iron slowly toward the ends, avoiding repeated passes.
- Release the next thin section and repeat until the bottom layer is done.
- Unclip the middle layer and repeat the process, then finish with the top.
Avoiding and Fixing Common Flat Iron Mistakes
One common mistake is using too much heat or the wrong setting for your hair type. High temperatures can cause dryness, breakage, and frizz over time.
Set your iron between 300°F and 350°F for most hair types. Go lower if your hair is fine or damaged.
Another problem is ironing over product buildup. Styling products that leave your hair sticky or coated reduce smoothness.
Don’t try to fix this by adding more heat. Instead, wash your hair or use a clarifying shampoo first.
Skipping heat protectant sprays is a frequent error. Protectants form a barrier to reduce heat damage.
Use one every single time you straighten your hair. Spray it evenly and wait a minute before applying heat.
- Don’t flat iron wet or damp hair; always dry completely.
- Avoid going over the same section multiple times.
- Combine moisturizing treatments into your hair care routine.
- Clean your flat iron plates regularly to prevent residue.
- Use lower heat settings on already styled or fragile hair.
- Section hair properly for even heat distribution.
Damage from flat ironing shows up as dryness, split ends, and dullness. To fix this, cut down on heat styling and give your hair a break for weeks. Deep condition your hair once a week to restore moisture and protect the strands.
Always wait until your hair is fully dry before straightening. Apply a heat protectant to your hair first. This helps prevent damage.
Frequent high-heat styling often ruins your natural hair pattern and moisture balance. When your hair feels stiff after straightening, lower your heat setting.
Use leave-in conditioners to help smooth it out. Repair products with keratin or natural oils help rebuild hair strength after damage.
Maintaining Straightened Hair and Extending Style Life
To keep your hair smooth and frizz-free after straightening, use a lightweight serum or anti-frizz spray. These products seal the cuticle and add shine without weighing hair down. Apply a small amount evenly from mid-lengths to ends, avoiding the roots to prevent greasiness.
Protect your style by avoiding humidity and excess moisture. Wearing a loose silk or satin scarf at night helps maintain smoothness.
Cotton pillowcases can cause friction, leading to frizz and faster style loss. So switch to silk or satin for longer-lasting straight hair.
You can freshen up your straightened hair the next day. Use a dry shampoo or a light mist of water. Mix the water with leave-in conditioner for best results.
Avoid washing daily to preserve the straight style and natural oils. Washing too often strips moisture, making hair frizz and lose shine quickly.
Flat ironing more than two to three times a week increases the risk of damage. Give your hair breaks to recover, using deep conditioning treatments once a week. Heat protection sprays before straightening and nourishing masks afterward reduce dryness and breakage.
The exact care products vary depending on your hair type. For thick or coarse hair, heavier creams help lock in smoothness.
Fine hair benefits from lighter serums that won’t weigh it down or make it limp. Always test new products on a small section first to avoid build-up.
Putting tension on your hair while straightening helps it stay smoother longer. After straightening, avoid touching your hair too much. Oils from your hands can transfer and cause grease or make hair frizzy over time.
Monitoring and Adjusting Heat for Safe Straightening
Set your flat iron’s heat according to your hair type and damage level. Begin with the lowest temperature that works. Watch your hair’s reaction closely and adjust the heat if needed for safe straightening.
Starting with Low Heat and Increasing Gradually
Begin with the lowest heat setting recommended for your hair type. For fine or damaged hair, that means 250 to 300°F. Use 300 to 350°F for medium hair textures. For thick or coarse hair, use 350 to 375°F. These ranges help avoid damage while straightening.
You can raise the temperature in small steps if you see your hair isn’t straightening well. Give your hair a few passes at each level before going hotter. This approach lowers damage risk and helps find the lowest effective heat.
Signs Hair Is Overheating or Drying Out
Your hair might feel crispy, stiff, or brittle if the heat is too high. You could also notice increased breakage or frizz right after straightening. Watch for a scorched smell or visible smoke while styling, which signals overheating.
Stop and reduce heat immediately if you spot these problems. Overdrying can cause permanent hair damage.
So don’t push the iron beyond what your hair tolerates. Lower temperatures usually fix these issues fast.
Adjusting Heat for Thick, Fine, or Color-Treated Hair
Fine and fragile hair straightens quickly at lower heat, around 250 to 300°F. Hardly more than one or two passes are needed on each section to avoid damage. Use extra care with color-treated or bleached hair and stay in this lower range.
Thick or curly hair usually requires 350 to 375°F for smooth results. You might need more passes with the flat iron.
This helps remove waves or curls fully. Try not to overdo passes to protect your hair. Heated styling oils help protect hair and keep it healthy when using higher heat.
Safety Tips for Heat Control
Always apply a heat protectant before using your flat iron. This helps reduce damage from the heat. Use natural oils or commercial heat sprays as part of your prep routine.
Let your hair dry completely before straightening, since wet hair is more fragile. Avoid blasting the heat; many irons allow fine tuning. Turn off the iron when not in use and let it cool on a safe surface.
When to Seek Professional Help for Hair Straightening
Seek professional help if your hair is severely damaged, chemically treated, or very coarse. A stylist can assess weak spots and prevent breakage by adjusting heat and technique. They also handle difficult textures that a home flat iron can’t smooth well without damage.
If you have heavy bleach damage or many split ends, get help. A professional should straighten your hair in such cases. It’s safer and prevents damage.
Experts use special treatments that protect your strands while styling. They know how to balance heat settings and use products that keep fragile hair healthy.
Your hair is very curly, thick, or coarse. A stylist can pick the best flat iron and method for you.
Home irons can reach up to 450°F. But pros often customize temperature to avoid burns or dryness. This avoids the common mistake of using too high heat, which causes damage.
Professionals also recommend and apply serums or conditioners after straightening to lock in moisture. This step is key for a smooth, shiny look that lasts. Good results mean hair feels soft, looks sleek, and holds style without frizz or brittleness.
Don’t push a flat iron beyond your hair’s limit. Booking a pro is better. It helps avoid costly damage.
Decide to see a stylist based on hair health and your styling knowledge. You see breakage, dryness, or smell burning while ironing. Stop right away.
Seek advice from an expert. Professionals cost from $50 to over $150, depending on the salon and treatment. But the value lies in avoiding long-term damage.
Pros can guide you to safer home care and heat tools. They help you pick what suits your hair. Use their advice before trying on your own.
Remember, straightening isn’t always safe for all hair types without expert input. Protect your hair by recognizing when it’s beyond DIY.
Step-by-Step Action Plan for Straightening Hair with a Flat Iron
Follow this plan to safely straighten your hair and keep it healthy. Track your progress and adjust as you go.
- Before you start: Pick a flat iron with adjustable heat settings. Wash your hair well. Make sure your hair is fully dry before straightening. Your hair should feel dry and smooth.
- First use: Set your flat iron to low heat. Choose between 300°F and 350°F. Match the heat to your hair type. Test on a small hair strand to avoid damage.
- During styling: Section your hair into small parts. Straighten each section slowly and evenly to get smooth results without burns.
- Right after styling: Apply a light serum or heat protectant spray to lock in moisture. Your hair should look shiny, not greasy.
- Daily care: Avoid washing hair every day. Use dry shampoo if your hair feels oily. At night, wrap your hair with a silk scarf. This helps cut down on frizz.
- Weekly check: Inspect your hair for heat damage like split ends or dryness. Reduce heat if you notice hair damage. Take longer breaks between styling sessions.
- After 2 weeks: Trim any split or damaged ends. Use deep conditioner once a week. This helps bring back moisture and strength.
- When unsure: Notice excessive dryness or breakage? Talk to a professional stylist. They can offer advice or treatments.
Frequently Asked Questions
Can You Straighten Wet Hair with a Regular Flat Iron?
No, you should never use a regular flat iron on wet hair. Hair must be completely dry to avoid damage and breakage when straightening.
How Can You Protect Colored Hair When Using a Flat Iron?
Use a heat protectant specifically for color-treated hair before straightening. It blocks heat damage and helps keep the color vibrant longer.
Is It Better to Flat Iron Your Hair in Small or Large Sections?
Straightening small sections gives smoother, longer-lasting results. Large chunks can cause uneven heat and miss spots.
Does the Direction You Pull the Flat Iron Affect the Results?
Yes, pulling the iron upwards towards the ceiling helps create natural, lifted straight hair. It also helps you avoid flat, lifeless results.
How Important Is Patience During Flat Ironing?
Patience is very important for good results. Moving too fast can leave hair wavy or cause repeated heat exposure damage.
Can a Flat Iron Fix Frizzy Hair?
Yes, using a flat iron on frizzy hair can smooth and seal the cuticle. Be sure to use heat protectant to avoid extra damage.
Key Points to Remember
Straightening hair with a flat iron takes care and the right tools. Start with low heat and protect your hair well. Keep up your hair care routine to enjoy smooth, healthy hair longer.