How to Make Shampoo at Home: Simple Recipes and Expert Tips That Work
How to make shampoo at home is a common question for natural hair care fans. You can mix gentle liquid soap, oils, and water for shampoo. This DIY shampoo cleans your hair well.
Use simple, easy ingredients for a natural shampoo. Start with a basic recipe and adjust it based on your hair’s needs.
Making shampoo at home lets you avoid harsh chemicals and use fresh, natural stuff. Always test a small amount on your skin before using a new ingredient. Store homemade shampoo in the fridge to keep it fresh.
It has no preservatives inside, so it lasts 4 to 6 weeks. Keep it cold to prevent it from going bad.
Begin by choosing a mild soap base like castile soap. Add nourishing oils and a bit of distilled water to reach the right thickness and feel. Stir gently and use right away for best results and safety.
Key Takeaways
- Use mild liquid soap like castile soap as your shampoo base.
- Add natural oils such as jojoba or coconut for extra moisture.
- Test new ingredients on a small skin patch to avoid allergies.
- Refrigerate homemade shampoo to extend its shelf life to 4-6 weeks.
- Start with a simple shampoo mix before adding custom ingredients.
- Measure ingredients carefully to keep the shampoo gentle and balanced.
What Basic Ingredients Are Needed for Homemade Shampoo?

You need a gentle liquid base to make shampoo at home. Castile soap and coconut milk work well as natural cleansers. Castile soap is plant-based and affordable, costing around $10 for 16 ounces.
Carrier oils add moisture and shine without weighing hair down. Pick jojoba oil for oily hair and argan oil for dry hair.
Castor oil helps boost hair growth effectively. Use about 1 to 2 tablespoons per cup of shampoo mix.
Essential oils bring extra benefits and fresh smells. Lavender and rosemary soothe the scalp and promote hair strength. Tea tree oil fights dandruff well.
Use no more than 10 drops per batch. Keep the amount small.
- Aloe vera gel for hydration and scalp relief
- Honey to add shine and natural softness
- Herbal infusions like chamomile or nettle for calming or oil control
- Glycerin to help lock in moisture
- Apple cider vinegar as an acid rinse to balance pH
These extras suit different hair types. For example, use aloe vera or honey for dry hair to add moisture. People with oily hair should add herbal infusions that reduce excess oil.
Start with small amounts, around 1 teaspoon per cup. So your hair doesn’t get heavy.
Substitutions can keep costs down or fit what you already have. Don’t have castile soap? Use diluted liquid castor oil soap instead.
Skip adding castor oil with it. Olive oil can replace argan oil but is heavier.
So use less for fine hair. Check labels to avoid synthetic fragrances or preservatives.
How to Make Shampoo at Home: Step-by-Step Basic Liquid Recipe
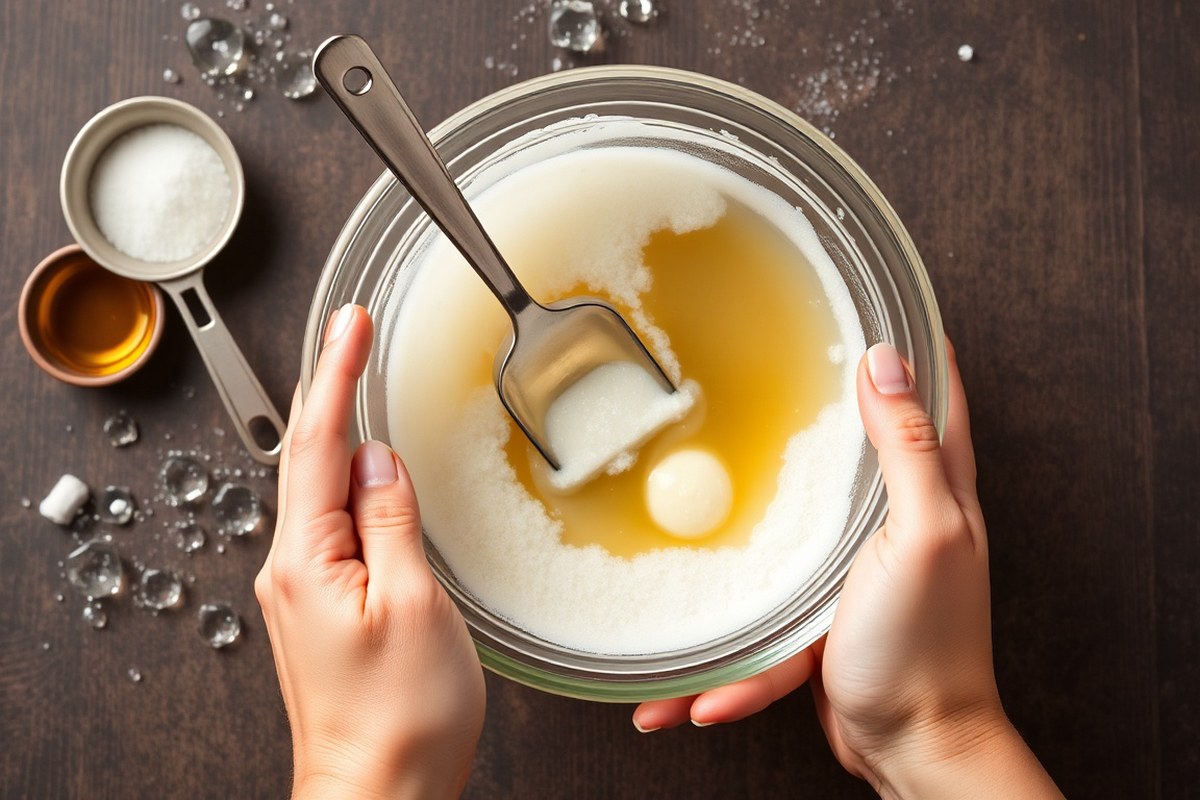
Making your own natural shampoo at home is simple and avoids harsh chemicals. This basic liquid shampoo recipe uses gentle ingredients you can find easily. It takes about 10 minutes to prepare and can last several weeks with proper storage.
Preparing the Liquid Base
Start with mild liquid Castile soap as the shampoo’s foundation. Castile soap is plant-based and cleans without stripping your hair.
Measure 1/4 cup of unscented liquid Castile soap into a mixing bowl. Unscented allows you to add your own essential oils next.
Add 1/4 cup of distilled water to dilute the soap. This keeps the shampoo from being too harsh or drying.
Mixing Oils and Additives
Add natural oils for moisture and essential oils for scent or scalp benefits. Use light oils like jojoba or fractionated coconut oil to avoid greasy hair.
Add 1 teaspoon of vegetable glycerin to give the shampoo more body. Then add 1 teaspoon of carrier oil like jojoba or olive oil.
For essential oils, add no more than 10 drops total to 1/2 cup shampoo. Use oils like lavender for soothing or lemon to control oiliness.
- Pour the Castile soap and distilled water into a medium bowl.
- Add vegetable glycerin and carrier oil to the mix.
- Drop in your essential oils carefully, counting drops.
- Whisk the ingredients gently until blended thoroughly.
- Test the shampoo on your skin to rule out sensitivities.
- Adjust oil amounts if the shampoo feels too heavy or too drying.
Too much essential oil can irritate your scalp, so add slowly and test first.
Bottling and Storage Advice
Use glass bottles or recycled shampoo containers to keep your shampoo fresh. Glass doesn’t react with oils or soap ingredients, preserving quality.
Fill clean bottles with your homemade shampoo and label them with the date. Store in a cool, dark place. Homemade shampoo typically lasts 3 to 4 weeks.
Shake the bottle before each use because natural shampoo ingredients can separate. Only make small batches if you don’t use it daily.
How to Customize Homemade Shampoo for Different Hair Types
Adjust your homemade shampoo recipe by matching ingredients to your hair type. Use gentler oils and milks for dry or sensitive scalp. For oily hair, lean on clarifying ingredients that balance without drying out your scalp.
Ingredients for Oily Hair
Pick a soap base that cleanses without stripping natural oils. Castile soap with lemon juice or clay helps reduce excess oil. Avoid heavy oils; they can weigh hair down and cause buildup.
Add astringents like lemon juice in small amounts, about 1 teaspoon per cup of shampoo. It reduces oil and refreshes your scalp. Clay additives like bentonite absorb grease and give a deep clean.
Ingredients for Dry and Sensitive Scalp
Use soothing, hydrating bases like oat or coconut milk in your shampoo. Combine them with gentle oils such as jojoba or shea butter to add moisture. Avoid harsh soaps and fragrances that can irritate your skin.
Calendula and aloe vera are good for calming sensitivities. Add about 1 teaspoon of aloe vera gel per half cup of shampoo. These ingredients reduce itching and help with dryness.
Additives for Dandruff and Hair Growth
Dandruff can appear on dry or oily scalps, so tailor your approach. Apple cider vinegar helps balance scalp pH and may reduce flakes. Use about 1 tablespoon per cup of shampoo and rinse thoroughly.
Essential oils like rosemary and peppermint can boost hair growth and scalp health. Carrot seed oil also has antifungal benefits. Combine a few drops, around 3 to 5, into your batch for these effects.
Try this table for a quick ingredient guide by hair type:
| Hair Type | Best Base | Key Add-ins | Shelf Life | Recipe Example |
|---|---|---|---|---|
| Oily | Castile soap | Lemon juice, clay | 2, 3 weeks | Basic recipe with lemon and bentonite clay |
| Dry/Curly | Coconut milk | Shea butter, aloe vera | 2 weeks | Curl recipe with coconut milk and shea butter |
| Sensitive Scalp | Oat milk + castile soap | Calendula, aloe vera | 1, 2 weeks | Gentle recipe with oat milk base |
| Normal/Combination | Castile soap | Olive oil, honey | 2, 3 weeks | Basic recipe with olive oil and honey |
Follow ingredient amounts carefully. Overdoing oils can weigh hair down, while too much lemon can irritate your scalp. Test your shampoo on a small scalp area before full use to check for sensitivity.
What Role Does pH Play in Homemade Shampoo and How to Balance It
Your scalp does best with shampoos near pH 4.5 to 5.5. This range matches your skin’s natural acidity, helping keep hair cuticles smooth and healthy. Homemade shampoos often use castile soap.
It has a higher pH of 8 to 9. Using it alone can dry or irritate your scalp.
You can test your shampoo’s pH with pH test strips. They cost about $10 online or at garden stores. Dip a strip into a small shampoo sample.
Then, compare the strip’s color to the chart that comes with it. This lets you check if the shampoo is too alkaline or well balanced.
To lower high pH naturally, add small amounts of apple cider vinegar or lemon juice. A teaspoon or two per cup of shampoo usually works.
These acids bring the pH closer to your scalp’s natural level and soften hair. Mix well and retest after each addition to avoid over-acidifying.
Some people assume castile soap alone is fine. But its higher pH can lift the hair cuticle too much. This causes dryness, frizz, and scalp itch.
Balancing shampoo pH with mild acids helps prevent sweatiness and rough scalp. It also stops your scalp’s overproduction of oil.
Avoid strong chemical pH adjusters in homemade shampoo to keep it gentle. Aloe vera gel is another mild ingredient you can add to calm scalp irritation.
Mix half a cup of chamomile tea with half a cup of liquid castile soap. Add a teaspoon of aloe vera for a soothing shampoo.
Common mistakes include adding too much acidic ingredient at once or skipping pH testing entirely. This either leaves shampoo too harsh or makes it sting your scalp.
Take your time adjusting pH slowly and testing often. Your scalp generally takes a few weeks to settle into a new routine.
How to Safely Use and Store Homemade Shampoo
Homemade shampoo usually lasts about two to four weeks without preservatives. Storing it in the fridge can extend its life up to one month. Keeping it cool slows down bacteria and mold growth that cause spoilage.
For best results, store your shampoo in a clean glass container with a tight lid. Avoid plastic bottles that might react with natural ingredients. Keep the container in a dark, cool place or in the refrigerator between uses.
Preserving homemade shampoo means preventing germs and spoilage. Here’s a checklist to help you maintain freshness:
- Use glass jars or bottles, rinsed thoroughly before filling
- Refrigerate shampoo if it has no added preservatives
- Use within two to four weeks for safety and quality
- Add natural preservatives like vitamin E or certain essential oils cautiously
- Avoid introducing water or fingers directly into the container
- Keep containers tightly sealed when not in use
Essential oils like tea tree or rosemary can help preserve your shampoo. Use 5 to 10 drops per batch to balance safety and effectiveness. Overusing oils may cause irritation, so avoid adding too much.
Testing for allergies before full use is smart. Dab a small amount of shampoo on your inner wrist or behind your ear.
Wait 24 hours to check for redness, itching, or swelling. Stop using it if you notice any reaction.
Always store homemade shampoo in the fridge. Add a commercial preservative to keep it safe. This prevents harmful bacteria growth.
Using clean hands or a spoon to scoop shampoo reduces contamination. Your shampoo should not smell off or change color.
Don’t use it if it separates. Freshness and safety are key to healthy scalp care when making shampoo at home.
How to Make Shampoo Bars and Dry Shampoos at Home
Shampoo bars are solid and last longer than liquid shampoo. They use less water, making them eco-friendly and perfect for travel. Dry shampoos are powders that absorb oil without water.
Ingredients for Shampoo Bars
Solid shampoo bars usually start with a base like solid castile soap. They can also use a mix of oils and butters. This gives the bar a good texture and cleaning power.
Common oils include coconut oil, olive oil, and castor oil, which add moisture and lather. You also want essential oils for scent and tea tree or lavender for scalp health.
Using natural clays or baking soda can help clean your scalp gently. Remember, avoid harsh chemicals or too much baking soda, it can irritate your scalp. The right pH matters to keep your scalp balanced and healthy.
Crafting the Shampoo Bars
Making shampoo bars takes more time than liquid ones but gives a lasting solid. A simple recipe uses melted castile soap, coconut oil, and essential oils. You pour the mix into molds and let it harden for at least 24 hours.
Here’s a basic shampoo bar recipe you can try at home. It costs about $10 for supplies, and the bars last for weeks.
- Melt 1/2 cup of solid castile soap in a double boiler on low heat.
- Add 1/4 cup coconut oil and stir until fully mixed.
- Mix in 10 drops of your favorite essential oil like lavender or rosemary.
- Pour the mixture into silicone molds or small containers.
- Let the bars cool and harden for 24 hours at room temperature.
- Remove from molds and store in a dry spot between uses.
Use the bar by rubbing it directly on wet hair or between hands to make foam. It cleans well but might feel different than liquid shampoo. So your scalp may need time to adjust.
Creating and Using Dry Shampoo
Dry shampoo absorbs oils and gives hair a fresh look without water. It’s great for quick touch-ups or between washes. You can make it easily with a few natural powders.
Mix 2 tablespoons of cornstarch or arrowroot powder first. Add 1 tablespoon of cocoa powder for dark hair color. Stir well to combine the powders evenly.
This blend neutralizes oil and won’t leave a white cast. You can adjust cocoa powder to match your hair color.
Here’s how to use homemade dry shampoo:
- Spoon a small amount of dry shampoo into a clean container with a shaker lid.
- Sprinkle lightly onto your roots, focusing on oily spots.
- Wait a minute or two for the powder to absorb oil.
- Use your fingers or a brush to blend the powder in gently.
Dry shampoo works best on slightly oily hair, not on very dirty scalps. Don’t overuse or you’ll risk buildup, which can cause scalp irritation.
Common Mistakes with Homemade Shampoo and How to Fix Them
Homemade shampoo might not lather well because it lacks strong foaming agents. Using gentle surfactants like decyl glucoside helps create that light, pleasant lather.
Try adding one teaspoon of aloe vera gel to your shampoo. It soothes your scalp and helps the foam naturally.
Sometimes shampoo can make hair feel greasy or dry. Greasiness means the shampoo might have too much oil or conditioner.
You can cut back on oil or add a bit more liquid castile soap. Dry hair can get better with more moisturizing ingredients like aloe vera or glycerin.
Scalp irritation or itchiness shows your shampoo’s pH might be wrong. Or an ingredient may not agree with your skin. Avoid harsh ingredients such as lemon juice that can dry the scalp.
Test your shampoo on a small skin patch first. Add a few drops of apple cider vinegar if the pH is too high.
Homemade shampoo often separates or clumps if the mixture isn’t blended well or lacks stabilizers. Mixing ingredients slowly and thoroughly helps prevent clumps.
Shake the bottle before each use if separation happens. You can add a natural emulsifier like lecithin or xanthan gum.
- For poor lather, add gentle surfactants and aloe vera.
- Greasy hair? Reduce oils or increase liquid soap slightly.
- For dry hair, add moisturizing aloe vera or glycerin.
- Fix scalp itch by testing on skin and adjusting pH.
- Shake shampoo if separated; try natural emulsifiers to mix better.
Be patient as homemade shampoo routines take time for your scalp to adjust. A one-week trial with small changes helps spot what works best.
Keep track of ingredients and their amounts carefully. This will save you time and frustration later.
How to Transition from Commercial to Homemade Shampoo Successfully
Your hair needs about two to three weeks to adjust to homemade shampoo. During this time, it may feel oilier or drier than usual. That’s normal because your scalp is adapting from commercial product buildup to natural ingredients.
Start by alternating your commercial shampoo with homemade shampoo for the first week. This eases your scalp into the new routine gently. You can mix two wash days each week.
Use your usual shampoo one day. Try the natural DIY shampoo on the other day. After that, switch fully to homemade shampoo.
Watch your hair closely during this transition. Add a natural conditioner or oils like coconut or jojoba. This helps if your hair feels too dry.
For oily hair, add a few drops of lemon essential oil. Cedar wood oil also works well.
Mix it into your shampoo. These help balance oil production without harsh chemicals.
Don’t rush the switch. A slow transition helps your hair stay healthy and avoids shock to your scalp.
Keep in mind, homemade shampoo doesn’t contain the same detergents as commercial ones. It may not foam as much, but that foaming is not necessary for cleaning. Soapy suds are just a sign of synthetic agents more than effectiveness.
Talk to a dermatologist if your scalp gets itchy or dry. See one if you find irritation after weeks.
They can check for allergies or underlying scalp conditions. Switching products shouldn’t cause lasting damage or discomfort.
You don’t need expensive tools or products to make this change. Homemade shampoo recipes often use simple, inexpensive ingredients like castile soap and essential oils. Your main investment is time and patience while your hair adjusts to a more natural routine.
Besides better personal hair health, switching can reduce your exposure to synthetic chemicals. It also supports eco-friendly living since you cut down on plastic bottles and harsh ingredients. It’s normal to need a few weeks of adjustment.
This helps you get the best results. Patience is key.
Step-by-Step Action Plan for Making Your Own Shampoo
Follow these simple steps to start making your homemade shampoo with confidence. Each step builds your skills and helps you know when you’re on the right track.
- Before you start: Gather all ingredients and tools listed in your recipe. Check that each is fresh and safe for your hair type.
- Day 1: Make your first batch of basic liquid shampoo. Use a small amount, and note your hair’s feel after washing.
- Day 3: Add an ingredient that suits your hair type. Use aloe for dry hair. Adjust your shampoo as needed. Watch how your scalp reacts over the next wash.
- End of Week 1: Check your shampoo’s pH with test strips. Add a little apple cider vinegar or baking soda if needed. Keep testing for balance. Your scalp should feel comfortable, not itchy.
- Week 2: Try making a shampoo bar or dry shampoo if you want a travel-friendly option. Check how easy it is to use and how your hair responds.
- After 3 weeks: Keep your shampoo in a cool, dark place. Watch how long it stays fresh. Take notes on its lifespan. Toss if it smells off or changes texture.
- After 1 month: Slowly move away from commercial shampoos by using your homemade one exclusively. Notice if your hair’s oil balance improves.
Frequently Asked Questions
How Long Does Homemade Shampoo Last Before It Goes Bad?
Homemade shampoo without preservatives usually lasts 4-6 weeks refrigerated. Keep it cold and use clean hands or tools when scooping to avoid contamination.
Can I Use Essential Oils in Homemade Shampoo?
Yes, you can add essential oils for fragrance and benefits. Use about 10-15 drops per cup of shampoo to avoid irritation.
Does Homemade Shampoo Lather as Much as Commercial Shampoo?
Homemade shampoos typically produce less lather than commercial ones. That doesn’t mean they clean less well; lather is mainly for feel.
Can I Make Shampoo Without Castile Soap?
Yes, you can use alternatives like liquid soap nuts or rhassoul clay. These options are still natural but may require different recipes.
Should I Use Distilled Water When Making Shampoo at Home?
Distilled water helps prevent bacteria growth, extending shelf life. Tap water can introduce impurities that spoil your shampoo faster.
Can Homemade Shampoo Cause Scalp Dryness?
It can if the recipe’s harsh or unbalanced in pH. Adjust with oils or honey to add moisture and keep your scalp comfortable.
Before You Go
Your homemade shampoo can clean well and suit your hair type with care and practice. Start by making a small batch today and learn what your hair likes best. Keep experimenting gently and enjoy the natural feel.