How to Make Natural Organic Shampoo at Home: Complete Guide with Tips
How to make natural organic shampoo starts with choosing simple, gentle ingredients. You mix cleansing agents like baking soda or natural clay. Then add liquids such as green tea or herbal infusions.
These mixtures create your shampoo base. This creates a shampoo that cleans without chemicals or stripping your hair’s natural oils.
Using the liquid form is the easiest way to get a smooth, even shampoo mixture. Start by measuring the right amount of cleansing powder to avoid drying out your hair. Adding oils like jojoba helps balance your scalp’s natural oils for healthier results.
Before adding essential oils, test them on your skin for 24 hours to avoid reactions. Store your homemade shampoo in the fridge so it lasts up to one month without preservatives. Keep your routine simple and fresh for best effects.
Key Takeaways
- Use 1-3 teaspoons of baking soda or clay for a clarifying shampoo base.
- Infuse herbs in your liquid base for 2-3 weeks, shaking regularly.
- Choose ingredients based on your specific hair type and scalp needs.
- Test essential oils on a patch of skin to check for sensitivity.
- Store homemade shampoo in the fridge to extend freshness up to one month.
- Gently rub shampoo on your scalp for at least 2 minutes. This helps remove dirt and oils deeply. Massage softly to avoid irritation.
How to Make Natural Organic Shampoo Step-by-Step
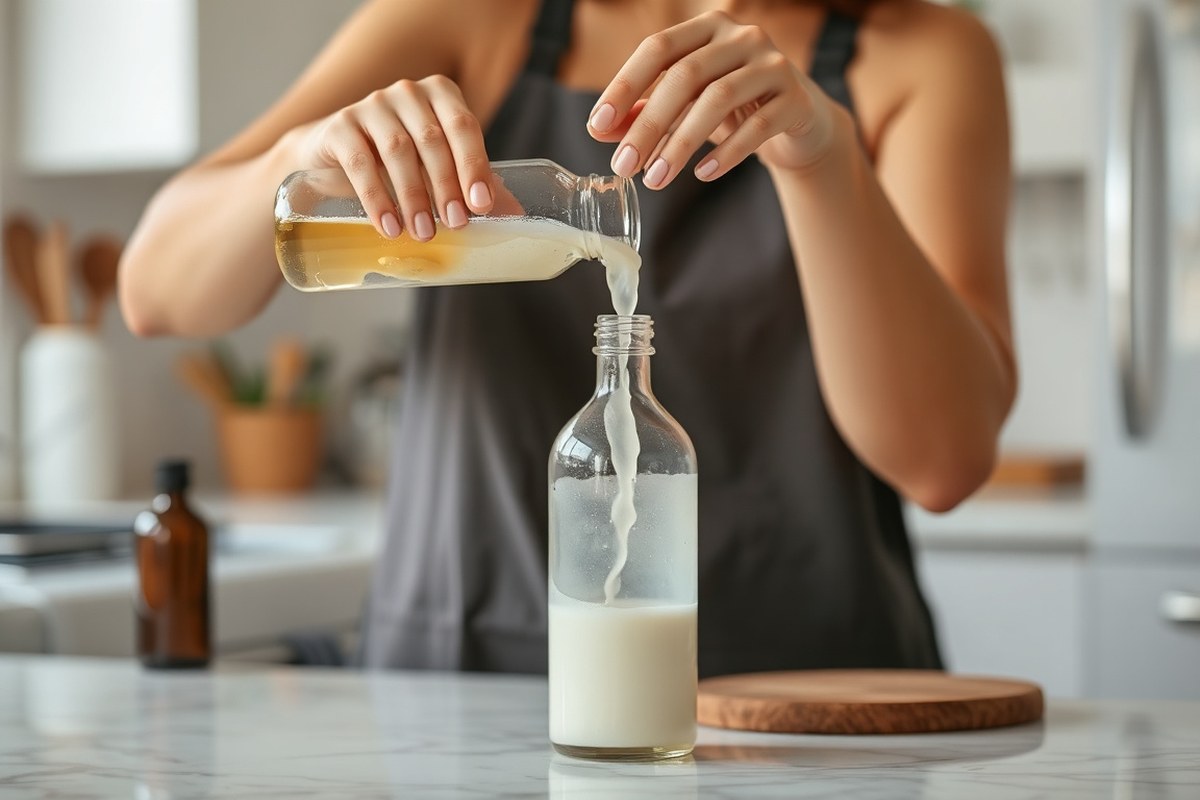
Making your own natural organic shampoo is simple and cost-effective. Most ingredients and tools are things you already have or can easily buy. You’ll mainly need a gentle liquid base for your shampoo.
You also need a few natural additives. Clean containers are required to store your shampoo.
Safety comes first when making shampoo at home. Always work in a clean area and wash your hands before starting. Use fresh, organic ingredients and a clean funnel and bottle for bottling your shampoo.
Don’t heat the ingredients too much to protect them. Store your shampoo in a cool place. Keep it dry to stay fresh and effective.
- Gather your ingredients and equipment.You need liquid castile soap as your shampoo base. Add organic aloe vera gel to keep hair moist. Use carrier oils like jojoba or sweet almond for nourishment. Have a bowl, a spoon, a funnel, and a clean shampoo bottle ready.
- Mix the liquid castile soap with aloe vera gel. Pour 1 cup (8 ounces) of liquid castile soap into your bowl. Add 1/4 cup of aloe vera gel and stir gently to combine. This mix cleanses and soothes your scalp.
- Add your carrier oil. Mix in 1 tablespoon of your chosen oil. This adds moisture and shine to your hair without weighing it down. Stir the blend gently to avoid too many bubbles.
- Customize with optional ingredients.Add 10-15 drops of essential oil if you want scent. Always follow safety rules for using essential oils. Don’t use too much to avoid irritation. Add natural herbs or powdered clays for scalp health if desired.
- Pour the shampoo mixture into a clean bottle. Use a funnel to avoid spills. Choose a bottle with a tight cap to prevent contamination and leakage.
- Label your shampoo. It’s helpful to note the date and ingredients used. Homemade shampoo can typically last 1 to 3 weeks when stored in a cool, dark place.
- Shake before each use. Natural shampoo ingredients can separate over time. A quick shake mixes everything evenly for best performance.
Use this gentle shampoo as you would any other. It cleans well yet won’t strip your hair of natural oils. You’ll notice your scalp feeling calmer and hair softer with regular use.
Choosing the Best Natural Ingredients for Your Hair Type

Choosing ingredients for your natural shampoo means matching them to your hair and scalp. Different hair types need different oils and herbs to stay clean and healthy. Adjusting amounts and types of ingredients helps avoid dryness or excess oil.
Oils and Their Benefits for Hair
Oils add moisture and protection to your hair without weighing it down. Jojoba oil works well for dry hair because it mimics natural scalp oils. For oily hair, use less jojoba or opt for lighter oils like grapeseed.
Coconut oil nourishes and strengthens hair but can be heavy on fine strands. Adding around half a teaspoon of jojoba oil helps dry scalp. Use it in an 8-ounce shampoo mix.
It won’t leave your hair greasy. For normal hair, a balanced amount gives shine and softness.
| Hair Type | Recommended Oils | Amount in Shampoo |
|---|---|---|
| Dry Hair | Jojoba oil, Coconut oil | ½ teaspoon to 1 teaspoon per 8 oz |
| Oily Hair | Grapeseed oil, Lightweight jojoba oil | ¼ teaspoon or less per 8 oz |
| Normal Hair | Jojoba oil, Coconut oil (balanced) | ½ teaspoon per 8 oz |
Changing the amount of oil can prevent buildup or dryness. Oils should be organic to avoid pesticides and chemicals that irritate scalp skin.
Herbs and Clays for Scalp Care
Herbs like lavender and chamomile calm and soothe irritated scalps. You can infuse these in your shampoo by steeping dried herbs in hot water before mixing. This adds natural fragrance and nourishment.
Clays like bentonite gently remove excess oils and impurities from oily scalps. Adding a small spoonful to your shampoo mix helps balance oil without stripping moisture. Use clay sparingly for dry hair to avoid overdrying.
Different herbs offer specific benefits. Calendula, for example, supports healing and reduces scalp inflammation. Choose herbs that match your scalp’s needs to reduce itchiness or dandruff.
Liquid Soap Bases Compared
Liquid castile soap is a common natural shampoo base. It cleans your hair well but has a high pH. The pH is 8 to 9.
Hair’s natural pH is lower, about 4 to 5. This can cause dryness if not balanced with oils or conditioning ingredients.
Castile soap comes unscented or scented, such as with peppermint. Using unscented soap lets you add your preferred essential oils for scent and extra benefits. Mixing one part soap with one part water makes a mild cleansing base.
Other bases include mild liquid soaps with lower pH levels. These soaps may be gentler on hair.
Organic versions often cost more to buy. Castile soap is widely available and usually costs around $10 to $15 per 16 ounces.
Reducing casting soap or adding oils helps avoid shampoo that feels too drying or heavy.
How to Safely Add and Use Essential Oils in Shampoo
Adding essential oils to your natural shampoo brings both fragrance and hair benefits. Use 5 to 10 drops total for safety and a nice scent. Pick oils that match your hair needs and blend them carefully.
Top Essential Oils for Hair Care
Lavender, rosemary, and chamomile work well for most hair types. Lavender soothes the scalp and calms irritation. Rosemary stimulates hair growth and improves scalp circulation.
Peppermint adds a cooling feeling and reduces dandruff. Citrus oils like lemon, lime, and sweet orange help control oiliness. Carrot seed oil fights fungus and supports healthy hair growth.
- Lavender: soothes scalp, reduces dryness
- Rosemary: promotes hair growth, improves circulation
- Chamomile: calms irritated scalp, adds shine
- Peppermint: cools scalp, helps dandruff
- Lemon, lime, sweet orange: control oil
- Carrot seed: antifungal and growth stimulant
Choose oils based on what your hair needs most. You can also add a teaspoon of crushed herbs like rosemary or lavender. These add gentle fragrance and benefits without essential oil concentration.
Safe Dosage and Patch Testing
Limit essential oils to 5 to 10 drops per batch of shampoo. This keeps you in a safe range without skin irritation. Adding 6 to 8 drops of citrus oils also adds scent safely.
Always do a patch test before using a new oil. Apply one drop diluted in carrier oil to your skin. Wait 24 hours to see if any redness or itching appears.
If irritation happens, skip that oil or lower the drop count. Homemade shampoo is gentler when you stick to these guidelines.
Popular Essential Oil Blends for Shampoo
Mix oils for a pleasant and functional scent that suits your style. Try these blend ideas using the 5 to 10 drop total rule:
- Refreshing Mix: 4 drops peppermint, 4 drops lemon, 2 drops rosemary
- Floral Calm: 5 drops lavender, 3 drops chamomile, 2 drops rose
- Herbal Boost: 5 drops rosemary, 3 drops carrot seed, 2 drops cedarwood
After adding essential oils, close the shampoo jar and shake it well. Let the scent sit for a day to fully develop before using. You can adjust blends over time to find your favorite.
How to Test and Adjust Your Homemade Shampoo Safely
Before using your homemade shampoo fully, test it to ensure it’s safe and mild. Check its feel, smell, and how your skin reacts. Adjust thickness and pH naturally to fit your hair and scalp needs.
Performing a 24-Hour Skin Patch Test
This test helps spot irritation risks before full use. Apply a small amount of shampoo to your inner arm. Watch for redness, itching, or bumps for 24 hours.
Follow these steps to do a skin patch test right:
- Clean a small skin patch on your inner forearm.
- Apply about a pea size of shampoo and gently rub it in.
- Leave the area uncovered or covered with a bandage.
- Wait 24 hours without washing the test spot.
- Check the spot for redness, swelling, or irritation.
- You likely can use it if no reaction shows after 24 hours.
- Rinse the area with cool water right away when irritation starts.
Repeat this if you add new ingredients, especially essential oils. Try a gentler recipe or cut back on additives when irritation occurs.
Adjusting Thickness with Natural Thickeners
Shampoo texture affects how it spreads and feels on your hair. To thicken your shampoo, add natural thickeners gradually. Baking soda or natural clay works well for oily hair types.
Here’s how to adjust shampoo thickness naturally:
- Shake your shampoo well before use to mix ingredients evenly.
- Add 1 to 3 teaspoons of baking soda or natural clay to 8 ounces of shampoo.
- Stir thoroughly until the powder dissolves or mixes completely.
- Test the thickness by pouring a small amount between your fingers.
- Repeat adding little by little if more thickness is needed.
- Store the shampoo in a sealed container and shake before each use.
Keep in mind, adding too much thickener can make shampoo hard to rinse. Find a balance that feels smooth and spreads easily.
Balancing pH for Hair Health
Maintaining your shampoo’s pH keeps your scalp healthy and prevents damage. Hair prefers a slightly acidic pH around 4.5 to 5.5. Natural additives like lemon juice can help adjust acidity.
Follow these steps to balance your shampoo’s pH naturally:
- Test your shampoo’s pH using pH strips or a testing kit.
- Add a few drops of fresh lemon juice to lower pH above 6.
- Mix the shampoo thoroughly after each addition.
- Retest the pH until it reaches the 4.5 to 5.5 range.
- Add a pinch of baking soda to raise pH if it gets too low.
Adjust pH gradually to avoid sudden scalp irritation or hair dryness. Using balanced shampoo helps reduce dandruff and folliculitis risks.
How Long Does Homemade Shampoo Last and How to Store It
Homemade shampoo without preservatives usually lasts about 7 to 10 days. You can stretch this to about one month by storing the shampoo in the refrigerator. Keeping it cold slows down the growth of bacteria and mold, which cause spoilage.
Store your shampoo in a clean, airtight container. A pump bottle or a jar with a tight lid works well. Avoid leaving the container open or touching the shampoo with dirty hands, as this invites contamination.
Adding natural preservatives can also help extend shelf life. Ingredients like vitamin E, rosemary extract, or grapefruit seed extract act as antioxidants and mild preservatives. Use about 0.5% to 1% of these by weight in your recipe for best results.
Another way to keep your shampoo fresh is to make smaller batches. Mixing only enough shampoo for one to two weeks reduces waste and freshness loss.
Small batches also make adjusting your formula easier. So you can see what works best for your hair.
Always check your shampoo for changes in smell, texture, or color before using it.
Warm your shampoo container in water before use to mix it well. Heat helps separate ingredients blend back together. Use warm water, not hot, to do this safely.
Heat your shampoo container quickly to avoid excess heat. Do not raise temperature above 110°F. Excess heat can harm sensitive ingredients and cut effectiveness.
Add a cosmetic preservative to extend shelf life longer. Choose preservatives approved for natural products, such as Geogard 221 or linatural. These help keep your shampoo fresh.
These products can keep your shampoo safe to use for several months. They generally cost $10 to $20 for small amounts, which last for multiple batches.
Troubleshooting Common DIY Shampoo Problems
Shampoo that’s too thin or watery can feel like it’s not cleaning well. You can thicken it by adding natural thickeners like xanthan gum or guar gum. Start with 0.5% to 1% of the total shampoo weight.
Mix slowly to avoid lumps. Cornstarch also works but may leave a slight residue.
Shampoos that irritate your scalp often contain harsh ingredients or the pH is off. Use gentler cleansers like decyl glucoside or add soothing ingredients such as aloe vera gel.
Aloe vera helps calm redness and itchiness while cleansing gently. Avoid adding undiluted essential oils if you have sensitivity.
Lather issues usually mean not enough surfactant or the water quality affects foam. You can boost lather by including a mild surfactant like coconut-derived sodium cocoyl isethionate.
Another trick is adding a small amount (around 0.5%) of sea salt to help thickening and foaming. Avoid using too much oil, which can weigh hair down and reduce foam.
- Add 0.5% to 1% xanthan gum to thicken thin shampoo
- Include aloe vera gel for soothing scalp irritation
- Use gentle surfactants like decyl glucoside for sensitive scalps
- Add mild foaming agents like sodium cocoyl isethionate
- Try 0.5% sea salt to improve texture and foam
- Reduce oils if shampoo is too heavy, affecting lather
- Test shampoo pH between 5 and 7 to prevent scalp issues
Too thick shampoo can be diluted with filtered water or hydrosols to reach the right consistency. Add water slowly and mix well to avoid separation.
Always check your shampoo after adjusting because texture can change after a day. Keep the shampoo stored in a cool place to maintain stability and prevent spoilage.
How to Customize Shampoo for Specific Hair and Scalp Needs
To make homemade shampoo for dandruff, start with a gentle base like castile soap. Add apple cider vinegar to balance your scalp’s pH and reduce flakes. Mix 1 cup liquid castile soap with 2 tablespoons apple cider vinegar.
Add 10 drops tea tree oil. This fights fungus that makes dandruff worse.
For oily scalps, use a clarifying shampoo by adding ingredients that remove excess oil. Bentonite clay or activated charcoal work well. Stir 1 tablespoon of either into 1 cup liquid base.
Add a few drops of rosemary essential oil. This helps clean oils well.
Avoid washing too much. Too much washing harms your scalp’s natural oils.
Dry scalps need moisturizing ingredients to soothe irritation and flakiness. Mix 1 cup of castile soap with 2 tablespoons of almond or jojoba oil. Add 5 drops of lavender oil for calming effects.
Oils rich in vitamin A, like carrot seed oil, help your scalp. They boost natural moisture. This reduces dryness-related dandruff.
Supporting hair growth naturally needs ingredients that nourish hair follicles. Castor oil, known for promoting circulation, works well. Blend 1 cup soap base with 1 tablespoon castor oil.
Add 10 drops peppermint or rosemary essential oil. These oils stimulate blood flow, possibly helping hair grow stronger and thicker.
Use your shampoo every 2 to 3 days to avoid over-stripping oils. Store homemade shampoo in a cool place.
Shake well before each use to mix ingredients. You may need to tweak amounts slightly depending on your hair’s reaction and season changes.
Use these natural ingredients as a guide. Customize shampoo for your scalp and hair needs.
| Hair/Scalp Concern | Key Ingredients | Function |
|---|---|---|
| Dandruff | Apple cider vinegar, tea tree oil | Balances pH, reduces flakes, antifungal |
| Oily Scalp | Bentonite clay, activated charcoal, rosemary oil | Clarifies, removes excess oil, balances scalp |
| Dry Scalp | Almond oil, jojoba oil, carrot seed oil | Moisturizes, soothes irritation, supports natural moisture |
| Hair Growth | Castor oil, peppermint oil, rosemary oil | Stimulates circulation, nourishes follicles |
Adjusting your shampoo is a simple process. Add ingredients slowly, testing how your scalp feels for a week.
Changes in weather or scalp oil production might require new tweaks over time. Watch your scalp for itching, dryness, or irritation and reduce or switch oils accordingly.
Eco-Friendly Practices When Making Organic Shampoo
Making shampoo at home helps cut down on plastic waste a lot. Most store-bought shampoos come in plastic bottles.
Only about 10% of that plastic gets recycled. Using reusable or natural containers means you avoid adding more plastic to landfills or the environment.
Choosing sustainable containers also keeps your homemade shampoo fresh and safe. Glass bottles don’t leach chemicals. You can clean and reuse them easily.
They work great for natural shampoo. Metal tins or aluminum bottles are good choices.
They are lightweight. Plus, they won’t break easily.
- Glass pump or flip-top bottles for liquid shampoo
- Aluminum or tin containers for solid or cream shampoo
- Biodegradable or compostable cardboard tubes for travel size
- Repurpose old shampoo bottles after a good cleaning
- Use recycled or post-consumer recycled plastic containers if needed
Buy ingredients from local stores or co-ops. This cuts packaging waste. It also reduces shipping emissions.
Choose suppliers who use minimal or eco-friendly packaging. Bulk buying natural ingredients cuts cost and waste, though storing them properly keeps them from spoiling.
Homemade shampoo can react to seasonal changes like humidity and temperature. In warm weather, keep your shampoo in a cool, dark spot to avoid spoilage or separation.
During dry or cold months, some recipes might thicken. So add a bit of distilled water back in if needed for the right consistency.
Store homemade shampoo in a dry, cool place away from sunlight to extend shelf life.
Step-by-Step Action Plan
Follow these simple steps to start making your natural shampoo. Each step helps you check your progress and make changes if needed.
- Before you start: Gather all ingredients and tools. Check that everything is fresh and clean.
- Day 1: Mix your base shampoo with carrier oils and mild cleansers. Test it on a small skin patch to avoid irritation.
- Day 3: Add essential oils carefully. Use only a few drops and test again for any reaction, especially on your scalp.
- Week 1: Use the shampoo on your hair. Note how your scalp feels and if your hair looks clean and soft.
- Week 2: Change the formula if your hair feels dry. Add more carrier oils to fix dryness. Use extra essential oils if your hair feels oily.
- Week 3: Store your shampoo in a cool, dark place. Check its smell and texture to ensure it hasn’t spoiled.
- After 4 weeks: Evaluate how your shampoo works with your hair’s needs. Decide if you want to customize it further.
Frequently Asked Questions
What Is the Easiest Form of Natural Shampoo to Make at Home?
The easiest is liquid shampoo using pure liquid castile soap. It mixes well with oils and additives for your hair type.
Can I Use Baking Soda in Natural Shampoo Safely?
Yes, 1-3 teaspoons of baking soda help with oily hair or clarify buildup. Use it sparingly to avoid scalp dryness or irritation.
How Do I Choose Ingredients for a Homemade Shampoo?
Pick ingredients based on your hair type and specific hair problems. This way, your shampoo will nourish and treat your scalp properly.
Is Homemade Natural Shampoo Cost-Effective Compared to Store-Bought?
Homemade shampoo can save money over time, despite initial ingredient costs. Plus, you avoid synthetic chemicals found in some commercial products.
Will My Hair Feel Different When I Switch to Natural Shampoo?
Yes, natural shampoo may feel less foamy or slippery at first. Your scalp is adjusting away from artificial detergents and harsh chemicals.
Can I Store Natural Shampoo for Long Periods?
Homemade shampoo usually lasts up to a month, depending on ingredients. Store it in a cool, dark place to keep it fresh longer.
Final Thoughts
Making your natural, organic shampoo lets you control what touches your hair and scalp every day. Start with small batches to learn what suits you best. Try your first mix this week to see what works for your hair type.