How to Cut a Guy’s Hair with Scissors: Simple Steps for Perfect Results
Wondering how to cut a guy’s hair with scissors? The key is to start with clean, slightly damp hair for better control. Use sharp, small scissors to get a clean cut without pulling or snagging.
Begin by sectioning the hair into manageable parts. Work slowly and cut small amounts to avoid removing too much at once. This way, you can shape the haircut carefully and fix any uneven spots as you go.
Pay attention to the angle you hold the comb and scissors. Consistent angles help create smooth layers or a neat taper without harsh lines. Keep the hair around 50-70% dry.
This makes it easier to see the cut. You get a better idea of how it looks finished.
Key Takeaways
- Use sharp, 5-6 inch scissors designed for hair cutting.
- Cut hair when it’s damp, around 50-70% dry for best results.
- Section hair into at least two parts to manage the cut easily.
- Move the comb at a consistent angle, usually between 45 and 90 degrees.
- Cut small amounts first, then adjust length to avoid mistakes.
- Regular trims every 4-6 weeks keep hair looking fresh and tidy.
Step-by-Step Guide to Cutting a Guy’s Hair with Scissors

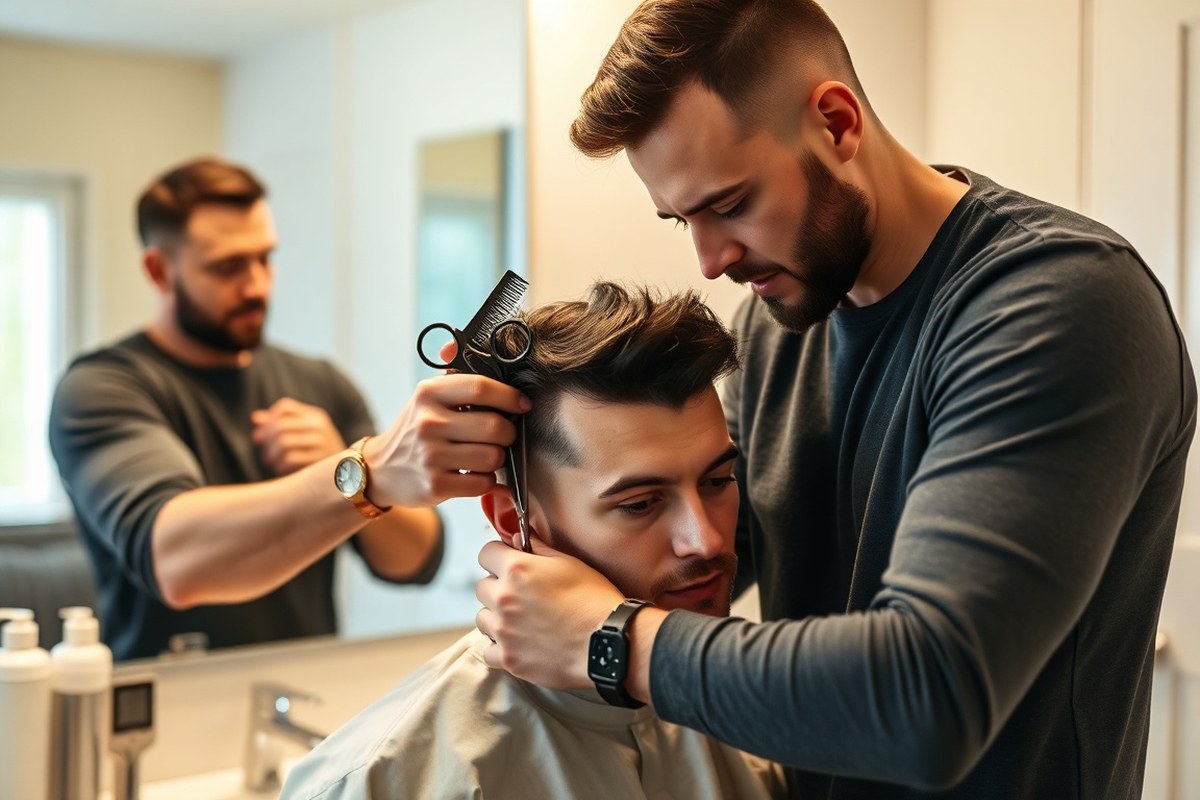
Using scissors to cut a guy’s hair takes control and patience. Hold the scissors between your thumb and ring finger. Use your index and middle fingers to guide the cut.
Grip the hair between your index and middle fingers. Keep control firm but gentle. Avoid pulling too hard.
Start at the top and work back in 1-inch horizontal rows. Cut small amounts of hair, about a quarter inch at a time, to keep control. Point cutting means cutting hair tips with scissors held vertically.
This technique gives a natural finish. It avoids a blunt cut line.
- Comb and section: Detangle the hair with a wide-tooth comb. Section the hair starting at the crown, then separate it sideways into 1-inch rows.
- Hold the hair: Pinch one row between your fingers, keeping a straight hold. Avoid stretching curls or thick hair too tight.
- Cut small amounts: Use sharp scissors. Cut a quarter inch or less from the ends. Cutting little lets you adjust if needed.
- Point cut ends: Turn scissors vertically. Snip gently into the hair tips for a textured look rather than a straight edge.
- Move methodically: Work row by row from the top toward the back. Keep each section uniform to avoid uneven spots.
- Check frequently: Use a mirror to check the shape around the back and sides. Make sure curls meet naturally and weight feels balanced.
- Trim around ears: Carefully cut small sections close to the ears for neat edges. Scissors provide precise control here.
- Adjust as needed: Compare both sides and the back for balance. Trim lightly if one section looks too long or heavy.
Cutting this way controls length and shape without rushing. Point cutting avoids harsh lines, which can stand out, especially on thick or curly hair. Doing neat rows helps maintain symmetry and steady progress.
You’ll spend more time trimming small sections. But the end result will be cleaner and easier to manage.
A common mistake is cutting large chunks at once. It’s hard to fix if you go too short.
Scissor cuts take a steady hand and focus. Don’t ignore the crown or cowlick because these areas often need gentle shaping to blend well.
Essential Tools and Preparation for Scissor Haircuts

Sharp hair cutting scissors are your most important tool. Regular household scissors won’t cut cleanly and can damage hair.
Look for scissors designed specifically for hair. They often cost $15 to $30 but give a smoother cut that looks professional.
You also need a fine-toothed comb to separate and guide hair. A spray bottle filled with water keeps hair damp and easier to manage.
Damp hair softens strands and reduces the chance of uneven cuts. For curly or thick hair, you might want to cut while damp to control strands better.
A mirror is essential, ideally two mirrors or a setup that lets you see all angles. Good lighting helps you spot uneven spots and get clean lines.
Try using a bright lamp or natural daylight near a window. Clear the work surface of hair clippings and distractions to stay focused.
- Sharp hair cutting scissors made for men’s hair
- Fine-toothed comb to section and guide hair
- Spray bottle with water to dampen hair evenly
- Mirror setup showing front and back angles
- Bright, natural or daylight-balanced lighting
- Clean workspace free from clutter and hair debris
- Optional thinning scissors for blending and texturizing
Before cutting, wash hair if it’s greasy or full of product. Clean hair cuts easier and scissors won’t clog. Let the hair dry until just damp, not soaking wet.
Too much water can pull the hair and cause uneven cuts. Dry hair like this helps you cut cleaner, smoother lines.
Arrange your tools close by so you aren’t distracted mid-cut. Arrange the chair and mirror so you can work easily. Make sure both you and the person are comfortable.
Good setup helps avoid mistakes and keeps haircuts neat. Check lighting one last time, adjusting lamps or moving closer to the window.
Keep your scissors sharp and clean. Dull scissors cause split ends and messy cuts.
How to Section Men’s Hair Before Cutting
Start by dividing the hair into the main zones: top, sides, and back. This breaks the hair into manageable parts and makes cutting easier and neater. Use clips to hold each section in place as you work.
Dividing into Top, Sides, and Back
Use a fine-tooth comb to create clean, horizontal partings. These partings separate the top from the sides and back. Comb the hair thoroughly to remove tangles before sectioning.
The top section usually holds more length, while sides and back are shorter. Part the hair just above the ears to mark the sides. Create a horizontal line at the base of the crown to separate the back.
Pinning and Clipping Sections Cleanly
Clip hair sections away neatly to keep them out of your working area. Use hair clips or small clamps to secure each zone firmly. This helps you focus on the section you’re cutting.
For the top area, comb hair forward or upward before clipping it out of the way. The sides and back should be combed straight down, then clipped. Keep clips close but not too tight to avoid creases.
Special Sectioning for Curly and Thick Hair
Divide curly or thick hair into smaller sections for better control. Smaller parts let you manage volume and curl patterns better as you cut. This prevents cutting too much hair at once or uneven results.
Hold hair with fingers upright on the sides and horizontally on top when cutting curls. Taking controlled, gradual steps prevents overcutting, which changes the shape. Curl shrinkage can make hair look shorter, so work carefully.
Use these steps to section hair before cutting:
- Comb hair thoroughly to remove all tangles and knots.
- Create a horizontal parting from one temple to the other, separating the top.
- Section the sides on both left and right. Part them from the top line down to the ears.
- Divide the back from the top section with a horizontal line at the crown’s base.
- Clip the top section upward out of the way.
- Comb the sides and back straight down and clip them separately.
- For curly or thick hair, divide each main section into smaller subsections.
- Hold hair with fingers positioned correctly per area before cutting to ensure control.
Best Cutting Techniques for Different Hair Types
Hair type changes how you cut with scissors. Straight hair lays flat. So you can cut evenly and use blunt scissors to keep the look sharp.
Wavy and curly hair need more care to avoid uneven shapes and shrinkage after drying. Thick hair can feel bulky and hard to control. Thin hair might need gentle layering to add volume without looking patchy.
For curly hair, cutting with scissors works well if you keep the hair damp. This helps you spot the natural curve. It lets you trim stray hairs.
You keep the curl pattern intact. Cut curls one at a time or in small sections, following their shape. Avoid kitchen scissors; sharp hairdressing scissors make a cleaner cut and prevent split ends.
Thick hair calls for thinning or texturizing with scissors. Use point-cutting, where you snip into the hair ends vertically. This breaks up the bulk and controls volume.
Thin hair responds better to blunt cuts that keep ends full and avoid exposing scalp. Use less layering on thin hair to keep it looking thick.
| Hair Type | Cutting Approach | Why It Matters |
|---|---|---|
| Straight | Blunt cuts with scissors on damp hair | Even shape and sharp edges are easy to create |
| Wavy | Layer and point-cut for volume and texture | Improve natural waves and prevents flatness |
| Curly | Cut curls damp, trim small sections following curls | Preserves curl pattern, avoids uneven length |
| Thick | Point-cut or thin layers to reduce bulk | Controls volume, makes hair easier to manage |
| Thin | Blunt cuts with minimal layering | Keeps hair looking fuller and avoids patchiness |
Use sharp, clean scissors for every cut to avoid damage. Keep the hair damp but not soaking wet. Damp hair cuts more smoothly and reduces tugging.
For curly or thick hair, cut less at first. You can always trim more after seeing the dry shape. Wavy hair suits textured crop styles, offering volume with natural flow.
Controlling volume and shape depends on your cutting angle. Cutting straight across keeps length and weight. Slanting the scissors or point-cutting softens edges, adds movement, and thins thick hair.
Practice small snips first, then check the style in dry hair to adjust where needed. This way, you avoid cutting too much and keep the look natural.
Blending, Layering, and Texturizing Techniques
Blending, layering, and texturizing help create a natural look when cutting men’s hair. Smooth transitions, soft layers, and subtle texture make the style appear neat and easy. Here’s how to handle each technique step by step for a polished finish.
Blending Sides into the Top
Work from the shortest parts on the sides to the longer hair on top. Cutting the sides with gradually longer sections makes the hair flow smoothly. Feather the ends gently where lengths meet to avoid harsh lines.
Use a comb to guide you where the shorter hair ends and the longer hair begins. Cutting small amounts to feather the hair helps blend these sections naturally. This method keeps the haircut balanced and tidy.
- Comb the side hair upward and towards the top section.
- Hold scissors at a slight angle to the comb.
- Trim just a small amount to feather the edges.
- Move gradually higher, cutting longer sections as you reach the top.
- Check the blend by looking for any abrupt length changes.
- Make tiny adjustments until the hair flows smoothly.
Take your time blending; rushing can leave visible lines between sections.
Creating Layers with Scissors
Layers add movement and remove weight from bulky hair. Lift small sections of hair at an angle away from the scalp. Cut the ends slightly to introduce layers that look natural.
Use the comb to lift hair vertically and decide how much to cut. Cutting too much can make top layers too short. Aim to cut between 1/4 to 1/2 inch off the tips at first.
- Divide the hair into sections for better control.
- Lift a hair section with your comb or fingers at a 45-degree angle.
- Cut just the tips, about 1/4 inch or less for subtle layering.
- Continue lifting and trimming around the head evenly.
- Compare sides frequently to keep layers balanced.
Layer gradually to avoid cutting too much at once and ruining the style.
Texturizing Ends for Softness
Point cutting is a method to soften sharp cut lines. Hold scissors vertically and snip into the hair ends at an angle. This removes bulk and adds natural texture for a less blunt look.
This technique lets the hair fall naturally, avoiding a stiff finish. Point cutting works well on both thick hair and finer textures to keep volume without weight.
- Hold a small section of hair between your fingers.
- Use the tips of the scissors, holding them vertical.
- Snip into the hair ends at a slight angle, not straight across.
- Repeat along the haircut edges and any thick spots.
- Comb through and check how the texture blends.
- Add more snips if needed to refine the look subtly.
Avoid using full blade length for point cutting; it can over-thin hair.
Fixing Common Mistakes and How to Avoid Them
Cutting too much hair at once can be a big problem. Grabbing a thick chunk and cutting an inch or more risks unevenness.
Instead, snip a small bit, about 1/4 inch, then double-check how it looks. You can always cut more, but you can’t add hair back.
Notice uneven lengths after cutting? Comb hair straight to spot differences. Hold the hair between your fingers where it’s uneven.
Then, carefully trim little bits off the longer side. Work slowly, checking again every few snips. Avoid cutting all around immediately to prevent choppiness.
Dull scissors cause more trouble than you might expect. They don’t slice cleanly, which leads to bent or split ends. Signs your scissors are dull include hair tugging and uneven snips.
Replace cheap scissors with ones made for cutting hair. A good pair costs $20 to $40 and lasts longer without damaging your hair.
Cuts can look choppy or blocky when you cut straight across in one pass. That leaves blunt edges that stand out, especially on thick or curly hair.
To avoid this, use point cutting: hold scissors vertically and snip into hair ends gently. This softens edges and blends layers better.
- Cut small amounts to avoid taking off too much hair.
- Use sharp, professional hair cutting scissors only.
- Comb hair frequently to spot uneven areas.
- Trim uneven parts by snipping little bits gradually.
- Use point cutting to soften harsh edges.
- Keep scissors clean and dry to prevent rust and dullness.
- Stop and reevaluate your work every few minutes.
For curly hair, cut when dry to see how curls naturally fall. Cutting wet curls too much can cause uneven shrinkage once dry.
Thicker or coarse hair may need slightly more frequent maintenance cuts to keep ends healthy. Regular trims every 6 to 8 weeks help stop split ends and maintain shape.
Watching how hair behaves during cutting prevents big mistakes. Dry hair shows real length, so check your progress as you go. For thin hair, avoid cutting too short all over, which can expose scalp patches.
Instead, trim with a comb lifted slightly for a natural gradient. Paying attention to these details fixes common errors quickly.
When and How to Cut Hair Wet, Damp, or Dry
Cutting hair when it’s about 50 to 70 percent dry works best. That’s usually damp. This suits most men well.
Damp hair offers better control and feels less fragile than soaking wet hair. Soaking wet hair stretches curls and can make it hard to judge the final length.
For straight hair, damp cutting helps you see the natural fall and weight of the hair. It also avoids the uneven snipping that can happen on dripping wet hair. Cutting curly or wavy hair when it’s damp helps with shrinkage.
It keeps curls defined enough. This guides the scissors better.
Dry hair shows the natural curl pattern and shrinkage fully. Cutting dry works well for curly hair once you know the pattern well.
It also helps when you want to spot uneven spots or bulk before finishing. But dry cutting can be less forgiving and harder to shape for beginners.
Before cutting, towel dry the hair after shampoo or mist it lightly until damp. Avoid cutting hair that’s soaking wet, as it’s more delicate and cuts less predictably.
Check with the person getting the haircut about how they wear their hair daily. So you cut it in a way that suits their style.
Try cutting curly hair on damp hair first, especially if you’re new to it. You get a balance between control and curl behavior. For straight hair, cut it damp or slightly dry.
This helps you see the shape clearly. It works well that way. Dry hair is best for picking up the final details or shaping thick or coarse hair.
Cutting damp hair saves you from cutting too short. Curly and wavy hair looks shorter as it dries and springs up more.
Always allow about 10 to 20 percent length for shrinkage on curls and waves. Cutting dry to adjust length requires more skill to avoid mistakes and unevenness.
Finishing Touches and Styling After Scissor Cuts
Checking the haircut for missed spots and uneven edges is key. Use mirrors to see the hair from all sides. Then, finish with natural styling products to keep the look fresh and tidy.
Final Length Checks with Mirrors
Use a hand mirror to see the back of the head in a large wall mirror. This shows you angles the barber’s chair misses. Look closely for uneven spots or longer strands.
Run your fingers gently over the hair to feel for rough or uneven sections. These often show better by touch than sight. Trim just a little at a time to avoid cutting too short.
- Check the hairline across the neck and ears
- Look at the crown and back for lumps or bumps
- Compare one side of the head with the other
- Ensure the top blends smoothly into the sides
- Keep your scissors close and sharp for finish trims
Use short snips rather than big cuts to keep control and avoid mistakes.
Applying Natural Styling Products
Lightweight pomades work well for most hair types. They add shine and hold without feeling greasy or heavy. Creams suit thicker or wavy hair to tame frizz and soften texture.
Start with a small amount on damp hair and spread evenly. You can add more, but avoid overloading your hair. Style with your fingers or a comb to shape the hair gently.
- Pomade for hold and a polished finish
- Light cream for natural texture and frizz control
- Matte paste for a rough, casual look
- Sea salt spray to add volume and tousle
- Use water to reactivate product during the day if needed
Natural products keep hair healthy and allow easy restyling throughout the day.
Routine Maintenance Between Cuts
Trimming every 4 to 6 weeks keeps hair looking sharp and fresh. Styles with longer hair need closer attention since missed spots show faster. You may spend 5 to 10 minutes on touch-ups during this time.
Focus on trimming the neck and around the ears first. Then light snips can clean up any uneven lengths elsewhere. Stick to small adjustments to avoid losing the original style.
- Schedule regular trims every 4-6 weeks
- Spend just a few minutes refreshing the neckline and sides
- Remove breakage or split ends as they appear
- Keep scissors sharp for clean cuts
- Check natural curl patterns before trimming to maintain shape
Frequent small trims reduce the risk of cutting hair too short or unevenly.
Step-by-Step Action Plan for Your First Men’s Scissor Haircut
Follow these steps to cut hair confidently and check your progress as you go.
- Before You Start: Gather your scissors, comb, spray bottle, and clips. Make sure the hair is damp and tangle-free.
- Section the Hair: Divide hair into four parts using clips. The sections let you work methodically and avoid missing spots.
- Start Cutting the Sides: Trim small amounts using point-cutting technique. Check regularly for even length and a natural look.
- Move to the Back: Comb hair straight down and cut in small sections. Use a mirror or ask for feedback to keep it symmetrical.
- Cut the Top: Lift small sections straight up with fingers and cut to desired length. Make sure to keep the hair balanced front to back.
- Blend the Layers: Use thinning or blending scissors over the cut lines. The hair should flow smoothly without harsh lines.
- Check and Fix: Look for uneven spots or longer strands. Trim carefully and check with mirrors for a polished finish.
- Style and Inspect: Dry the hair and style as usual. See if the haircut feels comfortable and looks good from all angles.
Frequently Asked Questions
Can I Use Regular Scissors to Cut a Guy’s Hair?
No, regular scissors are too thick and bend hair while cutting. Use sharp professional hair scissors for clean, precise cuts. This also prevents hair damage and gives a neater result.
How Often Should I Sharpen My Hair-Cutting Scissors?
Sharpen your scissors every 6 to 12 months depending on use frequency. Dull scissors make it hard to cut cleanly and can damage hair ends. Keeping scissors sharp helps you cut smoothly with less effort.
Is It Better to Cut Hair Wet or Dry with Scissors?
Cutting hair damp gives more even results and easier control over strands. Wet hair is softer and lays flat, making straight cuts simpler. Dry cutting helps see natural hair fall but can be harder for beginners.
Can I Cut a Guy’s Beard with the Same Scissors Used for His Hair?
It’s best to use separate scissors for hair and beard trimming. Beard hair is coarser and needs different scissor types or settings. Using the right tools keeps both styles looking neat without rough cuts.
How Long Does It Take to Learn Scissors Cutting for Men’s Hair?
It takes several practice sessions to get comfortable and precise cutting skills. Starting with simple trims on longer hair helps you build confidence. Watching tutorials and practicing sectioning speeds up your learning.
Should I Clean My Scissors After Each Hair Cut?
Yes, clean scissors after every use to remove hair and oils. Wiping blades with alcohol prevents rust and keeps scissors sharp longer. Proper care increases the tool’s lifespan and maintains cutting quality.
Wrapping Up
Cutting a guy’s hair with scissors can be simple with steady steps. Take your time and focus on small sections. Next, try your first cut using this plan and adjust as you learn.