How to Curl Hair Without a Clamp: Simple Steps for Fast, Lasting Curls
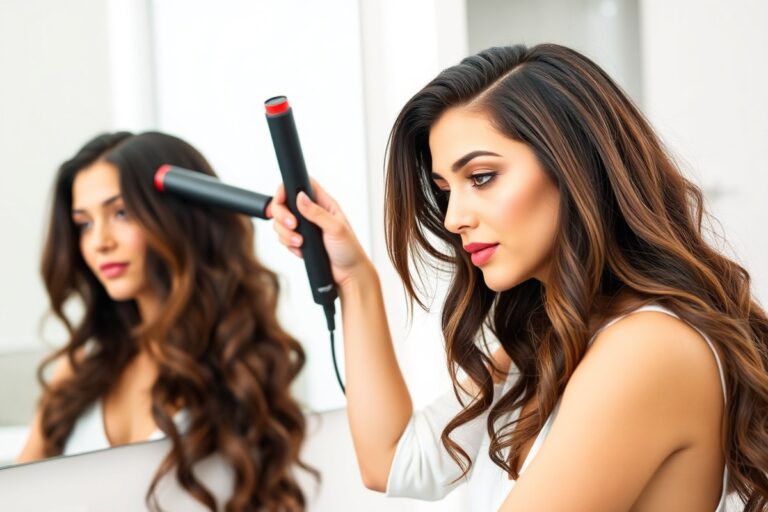
How to curl hair without a clamp depends on using the right curling wand. You wrap small sections of hair around the wand barrel and hold them briefly. This technique avoids clamp marks and gives soft, natural curls quickly.
Start with clean, dry hair that’s about 80% dry to reduce heat damage. Use a wand with a smooth barrel surface to stop hair from snagging or breaking.
Smaller hair sections create tighter curls. So pick your size based on the look you want.
Hold each section on the wand for 8 to 12 seconds before carefully releasing it. Work your way up from the bottom strands to the top for even curls. This way, your curls stay fresh longer and you finish styling faster.
Key Takeaways
- Use a curling wand with no clamp for smooth, clamp-free curls.
- Work with hair that’s about 80% dry to protect your strands.
- Wrap smaller sections tightly for defined, lasting curls.
- Hold each curl on the wand for 8 to 12 seconds only.
- Curl hair starting at the bottom to cover all strands evenly.
- Choose heat settings based on your hair type to avoid damage.
How to Curl Hair Without a Clamp Using a Curling Wand

A curling wand without a clamp gives you more natural, loose curls or waves. You wrap hair around the barrel instead of holding it with a clamp. This lets your hair move freely, avoiding marks or kinks.
You’ll need a heat-proof glove to protect your hand from the hot barrel. Hold the hair near the heat using your fingers carefully. Use the glove to protect your skin from burns.
This helps control the hair wrap safely. Curl size depends on your wand’s barrel and how tightly you wrap each hair section.
- Put on a heat-proof glove to protect your hand as you curl.
- Take a 1-inch section of dry, product-prepped hair and comb it smooth.
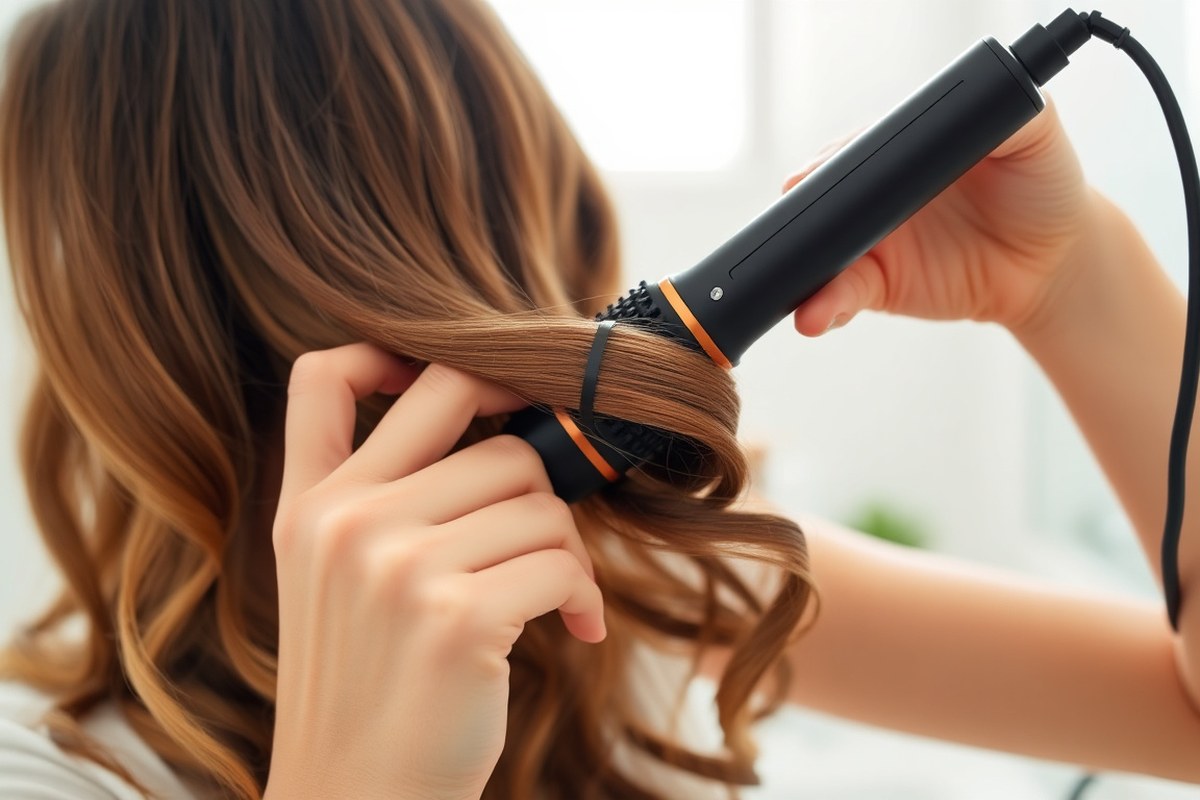
- Start near the ends and wrap the hair around the barrel, moving upward.
- Hold the wrapped hair for 8 to 12 seconds, depending on hair thickness.
- Unwind the hair gently without pulling to keep the curl intact.
- Repeat on other sections, wrapping away from your face for a natural look.
- Let curls cool before touching or styling; this helps them hold longer.
Tighter curls come from wrapping smaller sections around a thinner barrel, about ¾ inch. For looser waves, use a 1-inch wand and larger hair sections. Always wrap hair smoothly to avoid tangles or uneven heat sections.
Finger placement matters. Pinch the hair between your thumb and middle finger. Use your index finger to guide and wrap it.
Wrap the hair around the curling barrel carefully. Your glove hand holds the barrel steady while your fingers move the hair. This setup keeps your fingers far from the hot surface.
It also lets you control the curl tightly. You get a safe and tight hold this way.
Not drying hair thoroughly can ruin curls. Make sure your hair feels completely dry before curling.
Products like heat protectant and light mousse add grip to hold curls without stiffness. Avoid large thick sections, since they heat unevenly and cause some parts to curl less.
Best Tools and Products for Clampless Curling

Using the right tools makes clampless curling easier and safer. Curling irons without clamps or curling wands work best because they let you wrap hair smoothly. The Sedu Revolution Clipless Curling Iron has 3/4-inch and 1-inch barrels.
It heats evenly for curls that look the same all over. This helps you get consistent curls every time. Flat irons can also help you create waves by twisting sections of hair around the plates.
Your fingers will get close to heat. So be careful and consider finger heat guards for protection.
Products will boost your curls’ hold and prevent heat damage. A heat protectant spray is a must, it shields hair from damage and keeps it smooth. Use lightweight sprays for thin or fine hair to avoid weighing it down.
Volumizing mousse adds grip and body, especially for straight hair that resists curls. Your hair is thick or slippery, so try texture spray. It adds some grit to hold curls for longer.
- Heat protectant spray to prevent damage
- Volumizing mousse for fine or straight hair
- Texture spray for thick or slippery hair
- Sectioning clips to work in manageable layers
- Strong or flexible hold spray to lock curls
- Shine spray for a glossy finish
Holding sprays matter for different environments and looks. A flexible hold spray gives natural bounce and lets you brush curls out. Strong hold spray locks curls for humid days or special events.
Thin hair can benefit from a volumizing spray to lift roots and add fullness. Finish with a shine spray to polish and smooth out frizz. Hold curls on the tool as long as your hair needs.
This usually takes 8 to 12 seconds. This timing helps curls set properly.
Always spray heat protectant before using any hot tool, or your hair can dry out fast.
For hair types, thick hair may need more texture spray and longer heat times. Fine hair does best with low heat and lightweight products to avoid limp curls. Straight hair should get extra grip through mousse or texture spray to hold curls longer.
Change tools and product amounts based on your hair’s response. Test a small hair section first. This helps avoid damage and poor curl shapes.
Prepping Your Hair for Curling Without a Clamp
Prepping your hair right is key for curling without a clamp. Make sure your hair is mostly dry, evenly sectioned, and styled with the right products. This keeps curls lasting longer and protects your strands from heat damage.
Ensuring Hair Is Fully Dry for Best Results
Hair needs to be about 80% dry before you start curling without a clamp. Wet hair wrapped around a wand won’t hold the curl and might cause uneven heat distribution.
Blow-dry your hair until it feels damp, not wet. This usually takes about 15 to 20 minutes depending on thickness and length.
Let your hair air dry partially to avoid over-drying when using heat tools. Touch your strands to check dryness before you begin curling.
Applying Heat Protectant and Styling Products
Even though you avoid clamp damage, applying a heat protectant is smart. It guards your hair from high temperatures and keeps strands smooth.
Start with a leave-in conditioner from roots to tips to keep hair moisturized. Then, add a light heat protectant spray evenly for added defense.
Scrunch your hair section by section to encourage natural wave patterns before curling. This helps curls form without extra damage or stiffness.
Sectioning Hair Evenly for Smooth Curling
Divide your hair into sections. Match each section’s size to your curling barrel.
Usually, sections should be 1 to 2 inches wide. Smaller sections create tighter curls, while larger sections give loose waves.
Sectioning evenly ensures every curl gets the right amount of heat and looks uniform. It also speeds up the curling process.
Secure each section with clips or hair ties. Start curling from the top sections, moving down. This method smooths hair layers and prevents tangling.
Follow these steps to prepare your hair properly before curling without a clamp:
- Shampoo and condition your hair for clean, hydrated strands.
- Towel dry gently to remove excess water without roughing up hair cuticles.
- Blow-dry hair until it’s about 80% dry, focusing on roots and mid-lengths.
- Apply leave-in conditioner evenly from root to tip to lock moisture.
- Spray a light heat protectant to shield hair from heat damage.
- Section hair into 1 to 2 inch pieces based on your curl size preference.
- Secure sections with clips and scrunch hair to activate natural waves.
Adapting Clampless Curling Techniques for Different Hair Types
Hair texture and length affect clampless curling methods a lot. Fine hair curls best with gentle heat and less time. Thick or coarse hair often needs more heat and more time to shape curls.
Short hair can be curled clampless. But you must adjust your tool use and section size.
Fine or Color-Treated Hair Adjustments
Fine or color-treated hair needs gentler heat to avoid damage. Use lower temperatures around 250°F to 300°F and curl small sections quickly. The Ponytail Method or Velcro Rollers add volume and soft curls with less stress on strands.
Apply mousse on roots and mid-lengths to lift fine hair. Avoid leaving the wand on any section longer than 5 seconds to prevent frying. These steps help keep curls light and bouncy without breaking fragile hair.
Thick or Coarse Hair Recommendations
Thick or coarse hair curls slower. It needs higher heat for curls.
Set heat between 350°F and 400°F. Use larger sections of hair when curling to fully shape the strands. Spread mousse evenly from mid-lengths to ends for better control and definition.
Try dividing hair into smaller sections if curls won’t hold after the first pass. You might need to hold heat a bit longer.
But not over 10 seconds to avoid damage. Thick hair might look best with loose, defined curls instead of tight ringlets.
Techniques for Short and Layered Hair
Short hair can curl without a clamp but needs smaller sections, about ½ inch wide. Holding the wand vertically lets curls form more naturally for short cuts. Point the curling wand away from your face for an even wave look.
For layered cuts, curl each layer separately, starting from the bottom. Use fabric strips for wrap curls. They should be 2 inches wide.
Length should be 8 to 10 inches. Keep curls light and tousled for a fresh, modern style.
Different hair types and lengths respond uniquely to clampless curling. Here’s a simple guide to help you tailor your approach across textures and lengths.
| Hair Type | Mousse Goal | Application Method |
|---|---|---|
| Fine/Thin | Volume & Lift | Focus on roots and mid-lengths |
| Thick/Coarse | Definition & Control | Distribute evenly from mid-lengths to ends |
| Curly/Wavy | Frizz Control & Bounce | Scrunch into damp hair for shape |
Fine hair benefits most from mousse on the roots to keep the curl light. Thick hair responds well to mousse spread throughout for better hold and control. Curly or wavy hair gets extra bounce by adding mousse to damp hair, then scrunching gently.
Heat Settings and Safety Tips for Curling Without a Clamp
Heat is key when curling without a clamp. But too much can damage your hair. Adjust the temperature depending on your hair type for the best results.
| Hair Type | Recommended Heat Setting (°F) | Why This Matters |
|---|---|---|
| Fine or damaged | 250 – 300 | Lower heat protects delicate strands and avoids breakage. |
| Normal or medium | 300 – 350 | Mid-range heat styles well without excessive damage. |
| Thick or coarse | 350 – 400 | Higher heat ensures lasting curls on tougher hair. |
Working close to a hot iron means safety is a must. Avoid touching the barrel directly with bare fingers to prevent burns. Use a heat-resistant glove when handling hair near the iron.
Or wrap a small cloth around your fingers. This protects you from burns while styling.
Cooling curls properly helps set the shape and reduce frizz. After heating, hold the curl in your hand for 5 to 10 seconds. Or use a clip to hold it gently while cooling.
Then release the curl carefully. This step makes curls last longer and look smoother without extra product.
Heat settings vary but picking the right one lowers damage risk. Curly styles take time; don’t rush and avoid repeating heat on the same sections. Sectioning your hair evenly also helps curls form better and keeps hair from overheating in spots.
Do not skip the cooling step. Hold curls tight after heat. This locks your style and adds shine.
Use these tips to manage heat while curling without a clamp. Keep the iron at the right temperature, protect your fingers, and cool curls fully. With care, clampless curling can give you soft, lasting waves without marks or burns.
Troubleshooting Common Mistakes When Curling Without a Clamp
Curls not holding is a common problem when using a clampless curling method. This often happens because the hair is too clean or lacks product to grip the curls. Spritz your hair lightly with a texturizing spray before curling.
Use a flexible-hold spray before applying heat. After the curls set, spray lightly with finishing spray. This locks the curl shape in place.
Uneven curls usually mean heat was uneven. It can also mean hair wrapped inconsistently. Fixing this helps improve texture and curl shape.
Take similar-sized sections, wrap the hair smoothly and hold the wand at a steady angle. Avoid curling slightly damp hair to prevent melting or uneven curling. Wait until your hair is completely dry before starting.
Burned hair or heat damage can happen without clamp marks but still ruin your style. Keep your heat setting between 300°F and 350°F. Lower heat works best on fine or damaged hair. Thicker hair might need the higher end.
Move the wand slowly and carefully every time. Do not keep it on one spot too long. This protects your hair from damage.
- Use similar-sized hair sections for uniform curls
- Apply a texturizing spray on dry hair for better hold
- Keep heat between 300°F to 350°F to prevent burning
- Don’t curl damp hair to avoid uneven texture and damage
- Spray flexible-hold before curling and finishing spray after
- Wrap hair smoothly around the wand for defined curls
Curls losing shape? Mist with water or curl spray. Then gently scrunch to bring curls back.
Avoid touching curls too much; this defines more frizz than shape. Skipping the clamp means no clamp marks and less damage.
But you must hold hair carefully around the wand. This helps curls last longer.
How to Make Clampless Curls Last Longer
Making curls last longer without a clamp depends on how you treat them right after curling. Cooling curls helps them set and hold shape better. Using the right products boosts curl hold without stiffness.
Start by spraying a curl-improving product once you finish curling. A lightweight spray works well because it spreads evenly without weighing hair down. This locks in the shape while keeping curls soft.
Next, cool the curls while holding them in your palm. This step sets the curls more firmly.
Avoid rushing to release the curls. Hold for one to two seconds before letting go.
After cooling, finish with a light mist of flexible hold hairspray. This stops curls from falling quickly but still lets hair move naturally. Avoid heavy products that can make curls limp.
Here’s a reliable step-by-step aftercare routine that keeps clampless curls fresh longer:
- Apply a curl enhancer spray to dry hair before curling.
- Wrap a section of hair around the curling wand, leaving ends out for relaxed waves.
- Hold the curl for about 10 seconds and gently release it into your hand.
- Hold the curl in your palm for 1 to 2 seconds to cool and set.
- Repeat for all hair sections until done.
- Once all curls are set and cooled, spray a light flexible hold hairspray evenly.
- Let hair cool completely before touching or styling further.
Using sprays instead of heavy creams or gels helps curls stay light and bouncy. Use a curl-improving product to scrunch wavy or curly hair after styling. This reactivates the curls and refines them without crunchiness.
Products generally cost between $10 and $20 for a good curl spray or hairspray. Look for ones labeled “light hold” or “flexible hold” for the best balance. Overdoing product causes curls to weigh down or look greasy faster.
Follow these tips and your curls will last several hours longer without the clamp. Cooling the curls properly right after curling makes a big difference in hold. Spraying and layering lightweight curl products locks in curl shape while keeping natural movement.
Heatless Curling Methods as Alternatives to Clampless Curling
Yes, you can curl your hair without clamps using several heatless methods. These alternatives protect your hair from heat damage and still create nice curls or waves. Timings and curl types vary with each method, but all keep your hair safer.
Braids and Twists for Natural Waves
Braiding damp hair is a simple way to get waves without heat or clamps. Start with clean hair that’s slightly damp. Next, braid it into sections.
Leave the braids to dry on their own. The bigger the braids, the looser the waves, while smaller braids give tighter waves.
Braid your hair right after washing it. Let it dry fully before taking out the braids. This usually takes 4 to 6 hours or overnight.
Undo the braids, then run your fingers gently through to separate the waves. Add a little sea salt spray to keep the waves fresh and textured.
Sock Curls and Fabric Rag Method
This method uses soft fabric to curl hair without heat or clamps. Take a clean sock or a strip of cloth about 18 inches long. Take a sock or rag and roll damp hair around it.
Start about an inch from your hair ends. Tie the fabric ends to keep it in place.
The curls will take about 6 to 8 hours to set. So doing this before bed works well.
When dry, remove the fabric and use fingers to loosen tight ringlets. This method works great if you want defined curls without any heat damage or clamp marks.
- Tight curls with rag curls using narrow fabric strips
- Looser curls with thicker socks or bigger fabric pieces
- Work best on damp, not soaking wet hair
- Leave curls to set for several hours or overnight
- Use a light hairspray or texturizer for hold
- Avoid pulling hair too tight to prevent discomfort
- Ideal for medium to long hair lengths
Avoid wetting hair too much before rolling to prevent frizz once dry.
Flexi-Rods and Silk Ribbons
Flexi-rods bend to hold hair in place without clamps and create curly styles overnight. Wrap sections of damp hair around the rods, then bend the ends to secure. Flexi-rods come in various diameters for different curl sizes.
Silk ribbons can replace clamps by tying twisted hair sections tightly after wrapping. This gentle grip keeps curls without dents or marks. Keep these curls wrapped for 6 to 8 hours.
This time gives soft, springy curls. These curls last longer than freeform methods.
Results vary by rod size or ribbon tightness. Smaller rods and tighter ties give more defined, smaller curls. Larger rods create loose curls or waves better for casual, everyday styles.
Step-by-Step Action Plan for Curling Hair Without a Clamp
Follow these clear steps to get smooth curls using a curling wand without a clamp. Each step builds your skill and helps you see real results fast.
- Before you start: Apply a heat protectant spray to dry, detangled hair. You’ll know it worked because your hair will feel smooth and ready for heat.
- First attempt: Heat your curling wand to the recommended temperature for your hair type. Caution with finer hair, use lower heat. Your wand should feel hot but not smoking.
- Learning the wrap: Take a 1-inch hair section. Wrap it around the wand. Make sure to wrap away from your face. Hold for about 8 seconds. The hair should start forming a curl.
- Repeat on all sections: Curl each section the same way. Start at the back first. Then move toward the front. You will see consistent curls forming if you keep timing and timing right.
- Set the curls: Let your curls cool completely before touching them. This helps the curls hold shape and last longer.
- Style and finish: Run your fingers gently through the curls for volume. Finish with a light hold spray to keep curls from falling out.
- Adjust in week two: Tweak heat settings or wrap direction based on how your curls hold. Fine hair may need less heat or shorter hold time.
- Maintenance routine: Keep your wand clean and your hair hydrated with occasional deep conditioning. Healthy hair curls better and looks shiny.
Frequently Asked Questions
How to Curl Hair Without Getting Clamp Marks?
Use a curling wand without a clamp to wrap hair around the barrel gently. This prevents pinch marks and avoids hair pulling that clamps cause. It leaves smooth, natural-looking curls.
What Are Some DIY Ways to Curl My Hair?
Try heatless methods like braids, rag curls, or using Velcro rollers on damp hair. These keep your hair safe from heat damage and create curls without tools. Let hair dry fully for best results.
How Do I Curl My Hair with No Tools?
Twist damp hair into buns or braids and leave them overnight. This natural method forms curls with no heat or gadgets. Use a bit of mousse to help hold the shape better.
What Are Some Quick Ways to Curl My Hair?
Use a clampless curling wand on small sections for fast, easy curls with no clamp lines. You save time because you don’t have to adjust a clamp or worry about marks.
Can I Curl My Hair Without Heat If I Have Thick Hair?
Yes, thick hair curls well with heatless methods like large braids or flexi rods overnight. These reduce heat damage risk and still give decent curl definition. Moisturize hair to avoid frizz.
How Do I Keep Clampless Curls from Falling Out Quickly?
Set curls with light hairspray or mousse before and after curling to improve hold. Avoid touching curls too much; gentle handling keeps curls intact longer.
Wrapping Up
Curling hair without a clamp gives you soft, natural-looking waves without pinch marks. Start with small sections and the right heat for your hair. Try the wand method tonight and see how easy it is to get nice curls.