How Do You Wash a Hairbrush: Simple Steps and Best Methods Explained
How do you wash a hairbrush? Start by removing all hair strands caught in the bristles. Then, soak your brush in warm, soapy water for a few minutes.
This helps loosen dirt and oils stuck inside. After soaking, scrub gently to remove buildup.
Use a gentle shampoo or dish soap for the soak. After soaking, scrub between the bristles with an old toothbrush to clear away buildup. This simple step helps get your brush really clean.
For wooden brushes, avoid soaking in water. Instead, use a damp cloth with mild soap. Vinegar can help remove product residue.
Soak plastic brushes in a mix of vinegar and water. Use one part vinegar to two parts water. Let them sit in the mix for 10 to 15 minutes.
Key Takeaways
- Remove hair from your brush before soaking it in water.
- Use warm water mixed with shampoo or dish soap for soaking plastic brushes.
- Scrub between bristles with a toothbrush to remove leftover debris.
- Soak plastic brushes in vinegar and water to fight buildup.
- Do not soak wooden brushes; wipe them gently instead.
- Let your hairbrush air dry completely before using it again.
How to Wash a Hairbrush Effectively at Home

Washing your hairbrush properly takes a few simple steps. You need to remove hair first to clear the bristles and get better cleaning results. Soaking softens dirt for easier scrubbing, making the whole process more effective.
Follow these step-by-step instructions to wash your hairbrush well at home:
- Remove hair: Use your fingers to pull hair from the dry brush. A rat tail comb can help to remove stuck hair. Make sure you get all the hair out. For tangled clumps, carefully cut them with scissors.
- Fill a basin: Mix warm water with a little shampoo in a small bowl. Use mild soap instead if you prefer. The water should be shallow enough to soak the brush base. For stubborn grime, add some vinegar or hydrogen peroxide instead.
- Soak the brush: Place the brush in the solution for about 10 minutes. This loosens dirt and product buildup from the bristles and base.
- Scrub: Take an old toothbrush or small brush for cleaning. Gently scrub between the bristles and the base. This removes leftover dirt and product buildup.
- Rinse well: Hold the brush under warm running water. Let the water wash away soap and loosened dirt. Make sure to rinse thoroughly.
- Dry: Shake off excess water and let the brush air dry with bristles facing down. For wooden or boar bristle brushes, use a low-heat hair dryer to speed drying without damage.
Remove hair first to clean faster. Wet hair traps moisture and can cause mildew. Soaking hair can make it smell and degrade the brush.
A 10-minute soak softens buildup without harming the brush. Skipping soaking may leave residue stuck to the bristles or base.
Scrubbing after soaking is key for deep cleaning, especially if you use styling products often. Rinsing thoroughly helps prevent soap buildup, which can dull bristles. Drying properly avoids warping or mold growth on the brush over time.
Tools and Cleaning Agents You Need for Hairbrush Care
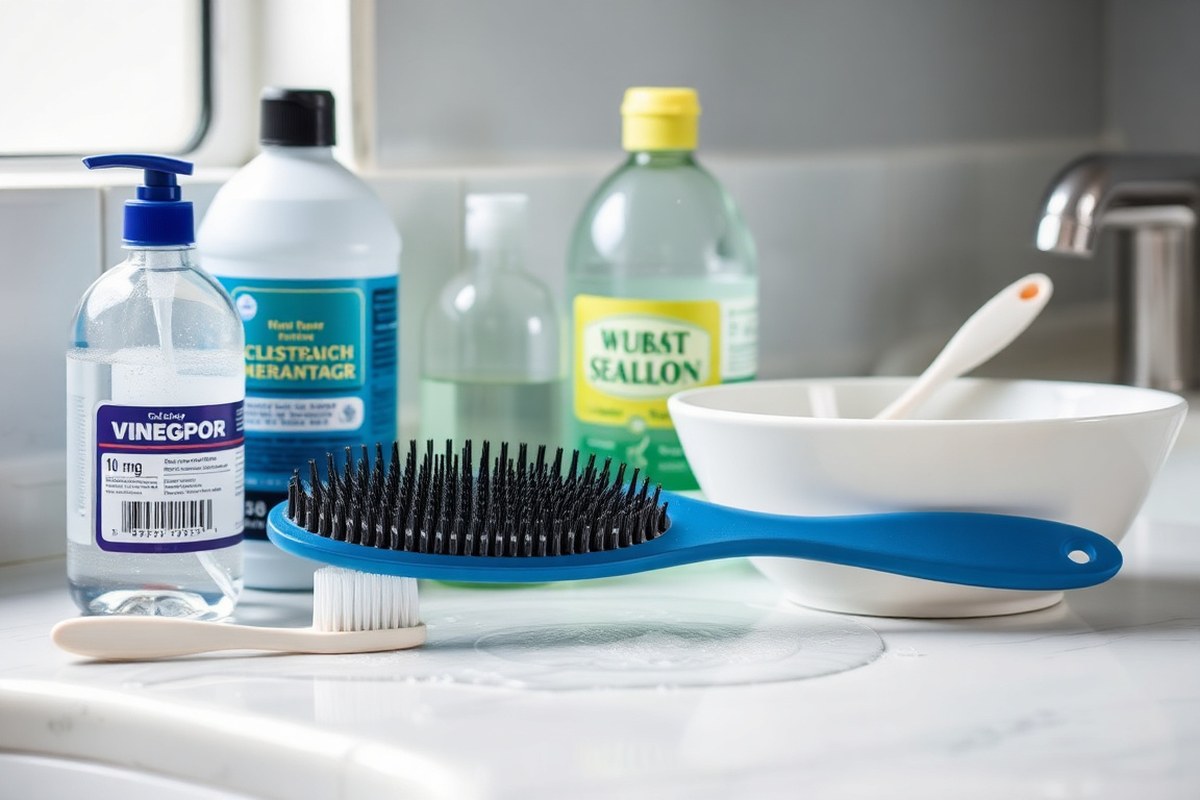
You need a few basic tools and cleaning agents to wash your hairbrush well. Common items like shampoo, soap, baking soda, and vinegar work great. A toothbrush or cotton swab helps clean tight spots in your brush.
Essential Tools for Cleaning Your Hairbrush
Start with a clean toothbrush or cotton swab to scrub between the bristles. These tools get into tight spaces that your fingers can’t reach. You also need a basin or bowl to soak the brush in warm, soapy water.
Hair removal before washing is important. Pick out tangled hair with your fingers or a wide-tooth comb. This lets the cleaning agents reach the brush more easily and work better.
Choosing the Right Cleaning Agents
Shampoo or mild liquid soap is your safest bet for everyday brush cleaning. Add 2 tablespoons of shampoo to warm water for soaking. It breaks down oils, residue, and buildup without harsh chemicals.
Baking soda, about a tablespoon, can be mixed with shampoo for extra scrubbing power. It helps remove stubborn grime and odors. Use baking soda mainly on plastic brushes; avoid it on wooden ones.
Use white vinegar only on plastic brushes, not on wooden or natural ones. Mix one part vinegar with two parts warm water and soak the brush for 10 to 15 minutes. Vinegar cleans buildup and kills germs without harming the plastic.
When to Use Special Agents and How
Hydrogen peroxide or ammonia can clean tough grime but need careful use. These are mostly for deep sanitizing rather than regular cleaning. Always dilute properly and avoid mixing chemicals.
Anti-dandruff shampoos that have tea tree oil help if your scalp flakes stick to the brush. They limit fungal and bacterial growth when used during soaking.
Cleaning Process with Tools and Agents
Soak your brush in warm, soapy water for 10 minutes. Then use a toothbrush to scrub it clean. This helps remove dirt stuck deep in the bristles.
Focus on the base and bristles to loosen stubborn dirt. Rinse well under running water to remove all soap and residue.
Plastic brushes can be soaked again in vinegar after shampoo cleaning if needed. Natural and wooden brushes should not be soaked in vinegar because it can damage them. Instead, just rinse and dry thoroughly.
- Gather toothbrush, cotton swab, and bowl or basin
- Remove hair from your brush before washing
- Soak brush in warm water with shampoo or soap for 10 minutes
- Scrub base and bristles with a toothbrush or swab
- Rinse brush thoroughly and shake off excess water
- Soak plastic brushes in vinegar-water mix 10, 15 minutes if needed
- Dry brushes on a towel with bristles facing down
Never soak wooden or natural-bristle brushes in water or vinegar. It can weaken and warp them over time.
How to Remove Hair and Buildup from Your Hairbrush
Removing hair and buildup from your hairbrush starts with clearing out all the stuck hair first. Hair can tangle tightly around the bristles, especially when damp, so loosen it gently. After that, clean any oils and product residue to keep your brush fresh and working well.
Using Fingers and Combs for Removal
You can remove a lot of stuck hair with your fingers or a fine-toothed comb. Using your fingers lets you feel tangles.
Pull hair out gently. This avoids damage to your brush or fingers.
Use a comb to slide through the bristles and catch hair strands. This is easier for brushes with close or stiff bristles. Comb slowly to avoid pulling or bending the bristles.
Cutting Through Tangled Hair Safely
For hair that’s tightly matted or knotted, scissors can help but with care. Use small sharp scissors and cut only the tangles wrapped around the bristles. Avoid cutting the bristles themselves.
Take your time and trim tiny sections rather than cutting large clumps. Trim loose ends first when hair is badly stuck.
Then pull strands free gently. This prevents damage to your brush and fingers.
Cleaning Around Bristles with Tools
Once the hair is out, you can tackle buildup around your brush’s bristles. A toothbrush dipped in soapy water works well to scrub away oils and sticky residue. Gently brush between bristles to lift dirt without bending them.
Wiping the handle with a damp cloth helps clear away leftover product on the brush’s body. For buildup in small spaces, toothpicks or cotton swabs reach tight areas safely. Clean regularly to stop buildup from hardening and sticking to the brush.
Follow these steps to remove hair and buildup from most hairbrushes:
- Start by pulling out loose hair with your fingers, one small section at a time.
- Use a fine-toothed comb to help remove hair stuck deeper in the bristles.
- Carefully cut through tangled hair with scissors if it won’t come out easily.
- Dip a toothbrush in warm soapy water and scrub the bristles and head gently.
- Use toothpicks or cotton swabs to reach buildup between the bristles and base.
- Wipe the handle and brush base with a damp cloth to clear off sticky residue.
- Rinse the brush with warm water to wash away loosened dirt and soap.
- Dry your brush fully before using it again to avoid mold or mildew growth.
Cleaning Different Types of Hairbrushes Correctly
Different hairbrushes need specific cleaning methods to stay in good shape. Plastic brushes can handle soaking, but wooden and natural bristle brushes require gentler care. Using the wrong method might damage your brush or leave residues behind.
Plastic and Synthetic Brushes
Plastic or synthetic brushes are the easiest to clean. You can soak them in warm, soapy water for a short time. Soaking takes 3 to 30 minutes.
The time depends on how much buildup there is. Soaking helps loosen oils and dead skin while scrubbing removes trapped lint.
After soaking, rinse the brush under cool running water. Then, dry it by blotting with a clean towel to remove extra water. Avoid boiling water as it can warp the plastic or melt cushions.
Wooden Handle and Bristle Brushes
Avoid soaking wooden handles because water can cause warping or cracks. Instead, dunk the base and bristles briefly in warm, soapy water after removing loose hair. Wipe the wooden parts with a damp cloth rather than submerging.
Dry wooden brushes thoroughly with a towel and keep them in a well-ventilated place. Regular cleaning prevents buildup but over-soaking speeds up wear and damage on wooden parts.
Natural and Boar Bristle Brushes
Natural or boar bristle brushes usually have wooden bases that need special care. Soak only the bristles in warm water with clarifying shampoo. Leave them for 10 to 15 minutes.
This softens dirt and product residue. Gently scrub the bristles without soaking the wood.
Rinse carefully, avoiding the handle, then towel dry the bristles. These brushes last about six months, so careful cleaning keeps them usable without damage. Over-soaking natural bristles makes them brittle and less effective.
The table below compares cleaning methods for each brush type. It shows differences in soaking and care times. This helps you pick the right method.
| Type Of Brush | Cleaning Method |
|---|---|
| Thermal Brush | Wipe with soft cloth; dampen cloth if needed |
| Natural Bristle Brush | Soak bristles in warm water with clarifying shampoo 10-15 min |
| Nylon Bristle Brush | Soak in warm water and baby shampoo 10-15 min |
| Mixed Bristle Brush | Soak in warm, soapy water 10 minutes |
| Detangling Brush | Soak in warm water and clarifying shampoo |
| Paddle Brush (Plastic) | Soak fully in warm water |
Following these steps helps you clean each brush type well without damage. Adjust soaking time based on buildup but avoid soaking wood parts. Proper care keeps brushes clean and extends their lifespan between replacements.
How Often Should You Clean Your Hairbrush and Why
Cleaning your hairbrush depends on your hair type and how often you style your hair. People with thin or fine hair may clean their brush every two weeks. Those with thick or oily hair should clean their brush weekly to remove oils and buildup.
Using styling products like gels or hairspray means buildup can happen fast. This buildup dulls your hair and clogs your scalp pores. Cleaning your brush once a week helps prevent these issues and keeps your hair looking fresh.
Daily brushing collects loose hair, scalp oil, dirt, and dead skin cells. Skipping cleaning lets oil, dirt, and hair mix and get reapplied.
This causes greasy, flat hair and can irritate your scalp. Poor scalp health also slows hair growth.
- Clean your brush every 2 or 3 weeks. This helps avoid drying your scalp. It is especially important for dry or curly hair.
- Using hair products daily means washing your brush weekly. This removes buildup.
- Brushes used on wet hair should be dried thoroughly to prevent mold.
- Separate brushes for natural hair and product-heavy styling tools to avoid cross-contamination.
- Remove hair strands from your brush after every use to make cleaning easier.
Don’t run a dirty brush through clean hair. It spreads old oils and buildup back onto your scalp and strands.
Brushing your hair regularly helps keep it healthy. But a dirty brush reverses that effect.
You can keep your hair and scalp thriving by sticking to a cleaning schedule. The extra minutes each week pays off with shinier hair and a healthier scalp.
Sanitizing Hairbrushes to Eliminate Germs and Lice
Sanitizing your hairbrush helps kill bacteria, mites, and lice that regular washing might miss. Vinegar soak works well since white vinegar has antibacterial properties. Soak your brush in equal parts vinegar and water.
Leave it for 3 to 5 minutes. Then rinse the brush thoroughly with clean water. This also helps remove odors and buildup without harsh chemicals.
Hydrogen peroxide is another option that cleans oils and bacteria effectively. Pour 3% hydrogen peroxide to cover the bristles of your brush. Let it sit for about 5 minutes before rinsing.
After soaking, rinse with warm water to clear residue. It supports scalp hygiene and reduces germs stuck in the brush.
Hot water kills lice and nits effectively but avoid boiling water. Keep the water temperature at about 130°F (54.4°C) and soak the brush for at least 15 minutes.
This is usually enough to eliminate lice without warping plastic or loosening glued parts. Avoid soaking wooden handles or natural-bristle cushions fully, or water damage can occur.
Alcohol wipes are a quick way to sanitize without soaking. Use them on the handle and bristle base to kill bacteria and viruses on contact.
These wipes work well if you need fast cleaning between washes. But they don’t remove oils or product buildup like soaking does.
UV sanitizers are generally safe for hairbrushes but make sure the device fits your brush size. These use ultraviolet light to kill germs and lice on the surface.
They don’t replace the need for deep cleaning with water and soap. But they can reduce bacteria quickly when you’re short on time.
Choose your method based on time, brush type, and cleaning needs. Vinegar and hydrogen peroxide soaks clean deeply and disinfect. Hot water kills lice but may damage delicate brushes if too hot or long.
Alcohol wipes and UV devices offer fast germ removal but don’t replace regular wash routines. For sensitive materials like wood, use wipes or UV sanitizers to avoid damage.
Drying and Storing Your Hairbrush After Cleaning
After cleaning your hairbrush, drying it properly helps stop mold and damage. Set it with the bristles pointing downward so water can run out easily. Avoid leaving the brush face-up because water can pool inside, causing mildew or weakening glue.
Using a hairdryer is possible but not the best choice for most brushes. The heat might dry out natural bristles. It can also melt plastic parts.
This happens if the dryer is too hot. Let the brush air dry on a towel.
Choose a spot with good airflow. This keeps the wood or padding safe.
Keeping your brush clean longer involves more than washing. Store it in a dry place with airflow to avoid moisture buildup that invites bacteria. Don’t store the brush in a closed bathroom cabinet.
It might stay wet there. This can make the brush smell musty.
- Dry the brush bristles down over a towel or sink edge.
- Let the brush air dry naturally without covering it.
- Avoid direct, strong heat sources like hairdryers or radiators.
- Store brushes in open containers for airflow.
- Keep brushes away from bathrooms or damp areas.
- Wipe the brush handle and back to remove leftover oil before storing.
- Replace brushes showing signs of mold or broken bristles.
When you dry the brush facing downward, excess water leaves quickly. This keeps the padding and glue from softening or coming apart. Drying with airflow reduces germs.
It stops the brush from smelling bad. That smell means the brush stayed wet too long.
Which drying fits best depends on how fast you need the brush ready. Air drying takes hours but protects the brush. Use a hairdryer on a cool setting to dry quickly.
Keep it at a safe distance. This has little risk and works well. Always check the brush material before using heat.
When to Replace Your Hairbrush Instead of Cleaning
A hairbrush wears out over time, and cleaning won’t fix everything. When bristles bend or break, brushing gets harder and can cause hair damage. Cracks in the brush head or visible wear mean the brush no longer works well.
Some brushes last years. But frequent washing and brushing wet hair can shorten their life.
Brushes made from sturdy materials usually last longer. Replace your brush if it stays dirty even after a thorough cleaning.
- Bristles bent, broken, or missing
- Cracks or dents in the brush base or handle
- Brush cushion is torn or heavily worn
- Persistent buildup or residue after cleaning
- Brush smells bad or shows mold
- Brushing feels rough or pulls hair
Replace your hairbrush immediately if the bristles start breaking off to avoid injuring your scalp.
Product buildup can harden around bristles, and residue sometimes won’t wash off. This reduces brushing effectiveness.
Your old brush pulling hair means it’s time for a replacement. Replacing worn brushes protects hair health and scalp.
Step-by-Step Action Plan for Cleaning Your Hairbrush
Follow these steps to keep your hairbrush clean and fresh. You’ll know it’s working when your brush looks and smells clean.
- Before You Start: Remove all hair strands from your brush. This clears the way for a deep clean.
- Day 1: Soak the brush in warm water with gentle shampoo for 10 minutes. This loosens dirt and oil buildup.
- Day 1, After Soaking: Use an old toothbrush to scrub between bristles. Check for any leftover residue.
- Day 1, Rinse Time: Rinse thoroughly under warm water. The brush should feel grease-free and clean.
- Day 1, Drying: Shake off excess water and pat dry with a towel. Then, air dry bristles down on a clean towel.
- Weekly Routine: Spray brush with a disinfectant spray after drying. This kills germs and lice.
- Monthly Check: Inspect the brush for damaged or loose bristles. Replace if you spot wear or damage.
Frequently Asked Questions
How Often Should You Deep Clean Your Hairbrush?
Deep clean your hairbrush once a month for best results. Weekly quick cleans help but a monthly deep clean removes buildup and oils thoroughly.
Can Vinegar Really Help Clean a Hairbrush?
Yes, soaking your hairbrush in vinegar for 30 minutes breaks down grime. Vinegar also helps kill germs and removes sticky residues left by hair products.
Should You Cut Hair Stuck in a Round Brush Before Washing?
Yes, use scissors to cut hair tangled around round brush bristles. This step makes it easier to get rid of all strands and buildup during cleaning.
Is It Okay to Use Shampoo to Clean a Hairbrush?
You can use mild shampoo with warm water to clean your hairbrush. This method pulls away oils and residues without damaging the bristles.
What Kinds of Hairbrush Materials Need Extra Care When Washing?
Brushes made of wood or natural fibers need gentle cleaning to avoid damage. Avoid soaking them too long, which can cause warping or loosening.
Can a Dirty Hairbrush Cause Scalp Problems?
Yes, use of dirty brushes can spread oils, product buildup, and germs. This may clog pores and irritate your scalp, risking dandruff and infections.
Before You Go
Cleaning your hairbrush keeps it hygienic and working well. Choose the right method for your brush type. Start by removing hair and soaking it today for a fresh brush tomorrow.