Do It Yourself Haircut: 8 Essential Steps for a Perfect Home Cut
Do it yourself haircut can save you time and money easily. You just need the right steps and tools to get a good result. Cutting your own hair at home is possible and safe if you follow simple advice.
Start by gathering sharp shears designed for hair, not regular scissors. Find a well-lit spot to cut your hair. Use a mirror you can move or a handheld mirror.
This helps you see clearer angles. Trim small sections slowly to avoid mistakes.
Keep your hair dry or slightly damp for better control, especially if your hair is thick. Taking off too much at once can lead to uneven cuts, trim little by little instead. This way, you’ll see progress and adjust in real time.
Key Takeaways
- Use six-inch Japanese steel shears for precise and clean cuts.
- Trim small sections about 1-2 inches wide for even cutting.
- Keep a handheld mirror or moveable mirror to check your work clearly.
- Trim hair every 6-8 weeks to maintain shape and healthy ends.
- Start cutting with dry or slightly damp hair for better control.
- Cut little by little to avoid removing too much at once.
1. Is Cutting Your Own Hair at Home Possible and Safe?

You can cut your own hair at home safely and with good results. Use sharp hair shears, a comb, clips, and good lighting for the best outcome. Wash and dry your hair first to make it clean and easier to handle during cutting.
Before you start, check your skill level and pick a simple style if you’re a beginner. Take small sections about 1 to 2 inches wide to work on. Cut a little at a time.
Use a second mirror or your phone’s camera. This helps to see the back better. It also shows tricky angles clearly.
Try cutting dry or slightly damp hair. But always keep your hair evenly sectioned and check both sides for balance. Avoid dull scissors and poor lighting, as these usually cause uneven cuts.
Cut slowly and carefully. Keep your fingers away from the blades. Safety must always come first.
Staying patient matters a lot. Trim long hair using a guide strand. It helps control the length better.
This way, you avoid cutting too much. Twist curly or wavy hair sections before cutting. This avoids mistakes and gives a softer finish.
It keeps the hair looking natural. Regular trims every 6 to 8 weeks help maintain the shape and keep ends looking neat.
Point cutting means cutting hair ends at an angle. It softens the hair’s look. It also blends layers nicely.
Be ready to adjust your technique based on hair type and the style you want. It might take time and a few tries to get confident. But many people successfully cut their own hair at home following these steps.
2. Essential Tools and How to Prepare Your Hair and Space
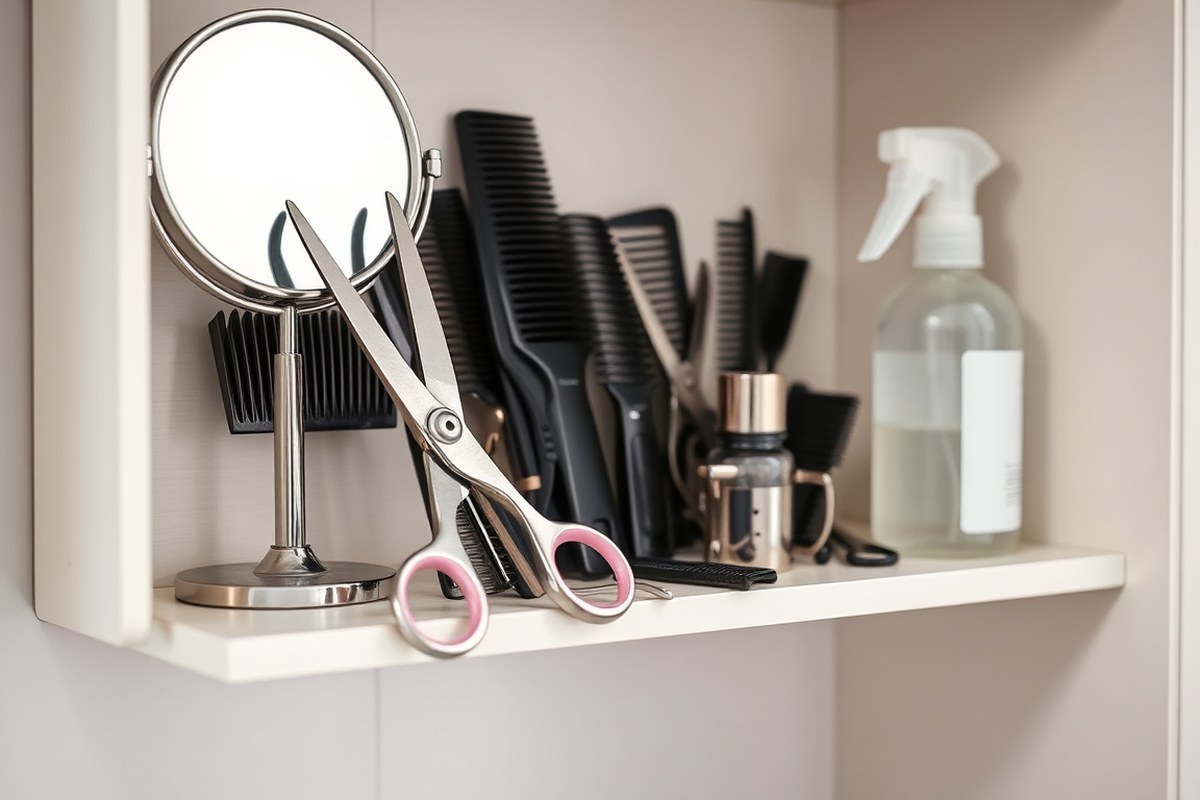
Start with a few must-have tools to cut your hair at home. Sharp hair scissors, a fine-tooth comb, hair clips, and a handheld mirror help. They make cutting easier and more precise.
Expect to pay about $10 to $30 for basic hair scissors. These are made for cutting hair.
Cutting hair dry or damp changes what you should expect from the result. Damp hair is best for straight or wavy hair. It’s easier to comb.
You can cut evenly without stray strands. Cut curly or wavy hair dry to see how curls fall. This avoids cutting too short.
Before you start, clean and detangle your hair fully. Towel dry it, so it’s slightly damp but not dripping.
Don’t cut soaking wet hair. It shrinks when it dries and may end up shorter.
- Use sharp hair scissors to avoid split ends or uneven cuts
- Comb out all tangles before parting hair into sections
- Use clips to hold up sections you’re not cutting yet
- Place a large towel or mat under your cutting area to catch hair clippings
- Set up good lighting and a mirror at eye level
- Keep a handheld mirror handy for checking hard-to-see spots
- Have a spray bottle nearby to mist hair if it starts drying out
Set up your workspace in a well-lit room with a flat surface. Put an old towel or newspaper on the floor. It catches hair and means less cleanup.
Keep scissors and tools close by. This helps steady your hands and avoids drops or mistakes.
Don’t rush; small cuts mean less chance of mistakes and easier fixes later.
Having all your tools and a tidy space helps you focus on each step calmly. Make sure your hair is relaxed and ready to cut.
This helps you control the cut and get a cleaner look. Good preparation saves time and helps avoid uneven spots or surprises after drying.
3. How to Section and Work Through Your Hair for an Even Cut
Sectioning your hair into 4 to 6 even parts helps control your cut. It makes cutting simpler and your hair ends more even. Divide your hair with clips before snipping to keep things neat and manageable.
Choosing Your Parting Style
A center part is a common starting point for DIY cuts. It divides your hair evenly, making it easier to work on both sides. You can also try a side part if that fits your usual look.
Create a clean part by using a fine-tooth comb. Run the comb from your forehead to the crown in a straight line. A precise part prevents uneven sections and messy clipping.
Dividing Hair into Manageable Sections
Split your hair into 4 to 6 sections depending on thickness and length. Thick hair needs more sections to avoid misses. Thin hair holds better with fewer, larger parts.
Start by dividing the hair down the center from front to back. Then, split each side into front and back halves. This layout creates four main sections you can clip separately.
Back sections are the hardest to cut, so keep them clipped tight and neat. When cutting, release only one section at a time. This focus helps you match every piece to your length guide strand.
Using Clips and Combs Effectively
Basic plastic clips work well to hold your sections firmly. Place clips close to the scalp but don’t pull the hair tight. Hair pulled too hard may create dents or bumps in your cut.
Use a wide-tooth comb to detangle each section before cutting. Smooth hair lies flat for more consistent trimming. Comb from roots down gently to preserve natural texture.
Tips for Sectioning Based on Hair Texture
Curly hair should be cut curl by curl rather than in big sections. Trying to cut curls as straight lines can cause uneven lengths. Let your curls hang naturally and snip the ends individually.
For straight or wavy hair, sectioning works best with clips. Keep hair slightly damp or dry to prevent shrinkage surprises. Wet hair stretches, so dry hair shows the true cut length.
- Comb your hair to remove all tangles.
- Create a center part from forehead to neck with a fine comb.
- Divide each side of your head into front and back sections.
- Clip back sections carefully, leaving the front sections loose.
- Start cutting the back sections first, using a guide strand.
- Release front sections one at a time, matching their length to your guide.
- Check all sections after cutting for even length and smooth edges.
- Adjust clips and comb hair to fix any uneven spots if needed.
4. Simple DIY Haircuts for Every Hair Type
Simple haircuts suit different hair types and lengths for easy DIY success. Knowing your hair’s natural texture helps choose a cut that grows out nicely. For example, curtain bangs softly frame long hair and add movement without much upkeep.
A shoulder-length cut with flowing layers works for most hair types. It gives natural volume and shape without sharp lines to worry about. Gentle face-framing layers blend into the length, upgrading your style subtly.
For curly hair, cutting following your natural curl pattern prevents awkward shapes. A curly girl method cut uses your hair’s bounce to guide how much to trim. Pixies and short layered bobs work well for thick hair.
They fit curly or coily hair textures too. Clippers make these cuts easier to manage.
| Hair Type | Best Beginner Cut | Key Tools | Style Tips |
|---|---|---|---|
| Straight, fine | Shoulder-length layers with curtain bangs | Scissors, comb | Cut bangs long for soft face framing |
| Wavy | Casual wavy shag with feathery bangs | Scissors, thinning shears | Use layers to add bounce and lighten weight |
| Curly (Type 3) | Curly girl method cut with layered ends | Scissors, clips | Cut dry curls for better shape control |
| Coily (Type 4) | Pixie cut with clippers | Clippers, guard combs | Start longer, trim gradually for shape |
| Thick, straight | Short layered bob | Scissors, thinning shears | Stack layers in back for lift |
Bangs offer more style options but need care. Curtain bangs work well on long hair and soften facial features.
Wispy bangs require slow trimming in small sections to avoid cutting too short. Micro bangs demand boldness and precision but change your face shape fast.
Layers bring natural movement and volume, especially in thick hair. Face-framing layers blend gently to avoid harsh lines.
Start with small cuts and check frequently in the mirror to keep balance. You can always cut more, not less, so take your time.
5. Step-by-Step Guide to Cutting Your Own Hair at Home
Cutting your own hair at home calls for a careful, step-by-step approach. Start by choosing a guide strand and the length you want. Trim small amounts slowly, then work around the back before checking for evenness and clean lines.
Selecting Your Guide Strand and Desired Length
Pick a strand that shows your desired hair length. This strand sets the cut for the rest of your hair. It’s best to start with a medium length, especially if you want a simple trim.
Pick a length first, like a four clipper guard. This guard cuts hair to about half an inch from your scalp.
It’s a simple way to set how short you want. This gives you a clear target and helps keep your cut consistent.
How to Trim Small Amounts Safely
Trim your hair in small sections, starting with just a quarter inch or less. Cutting tiny amounts lowers the risk of cutting too much. Always comb hair downward and toward the back before snipping.
- Detangle your hair fully to avoid uneven cuts.
- Select a small section near the front or side.
- Pinch the hair between your fingers to get a straight guide.
- Cut just a little below where your fingers hold the hair.
- Release the section and move to the next small part.
- Repeat slowly, working all around the head.
- Check your progress before cutting more.
Always start by trimming less than you think you’ll need to avoid mistakes.
Working Around the Back of Your Head
The back is the trickiest part to reach and see. Use your fingers to pull small sections forward when trimming. Pinch excess hair and snip just a bit at a time.
For a simple one-length cut, comb hair from the crown and ears forward. Cut across to the desired length, keeping the guide strand in mind.
Final Checks for Symmetry and Clean Lines
After cutting, comb through your hair and compare both sides. Make sure lengths match around the ears and the nape evenly. Look for uneven strands and trim them carefully.
Check your hair with a hand mirror while facing a larger mirror. This double view helps spot missed spots or uneven parts. Fix those last by trimming very small amounts.
6. Common DIY Haircut Mistakes and How to Fix Them
The biggest mistake in cutting your own hair is snipping too much at once. It’s tempting to go fast but trimming small amounts lets you control the shape better. Working slowly means you won’t regret a cut that’s too short.
Uneven hair or choppy edges come from rushing or missing spots. Stand in front of a mirror and use a second mirror to see the back. Check your hair in natural light for a true look at the length.
Some easy fixes reduce unevenness without cutting more hair. Try wetting your hair again and combing it straight.
Gently trim small uneven bits first. Using thinning scissors on choppy ends softens harsh lines and blends better.
- Cut hair in ¼ inch or smaller sections for control.
- Hold scissors horizontally for straight cuts, vertically for soft ends.
- Use clips to keep cut hair away from uncut sections.
- Regularly comb and check your work in mirrors.
- Trim little by little, no big snips at once.
- Use thinning shears to fix choppiness gently.
- Cut your hair dry if you want to avoid surprises post-dry.
Spot a big uneven patch? Wet your hair.
Don’t force symmetry right away; correcting little by little works best. You could save yourself a lot of hassle and keep your style tidy this way.
For styles like a DIY lob or mens taper, small mistakes don’t kill the look. The lob can be a bit messy and still work because it’s a looser shape.
The taper needs gradual fades that can be adjusted over several attempts. Trying to fix everything too quickly causes more trouble than waiting and trimming gradually.
7. How to Maintain and Refresh Your DIY Haircut over Time
To keep your DIY haircut looking fresh, trim it regularly and dust split ends often. These simple habits prevent damage and maintain your style’s shape. Proper care after cutting helps your hair stay healthy and styled longer.
Recommended Trimming Frequency
Most people find trimming every 8 to 12 weeks works well. This schedule stops split ends from traveling up the hair shaft. Having curly hair means trimming about every 8 weeks keeps curls healthy.
Your hair grows fast or splits appear earlier. Trim more often then.
For slower growers or short styles, trimming every 10 to 12 weeks can be enough. Watch your hair’s texture and ends to decide your perfect routine.
Techniques for Dusting Split Ends
Dusting involves clipping off just the damaged ¼ to ½ inch at your hair ends. Use sharp hair shears made for cutting hair, not regular scissors. Sharp shears give a cleaner cut and cause less breakage.
Work one small section at a time, especially with curls. Take one curl and find the damaged tips. Trim just those ends.
This keeps your natural wave pattern intact. This method gently thins and refreshes without major length loss.
Using a feather razor with a guard can also soften edges for a natural finish. But be careful to move slowly and lightly to avoid cutting too much. Dusting gently extends your haircut’s life and keeps healthy ends.
Best Hair Care Practices Post-Cut
After trimming, use leave-in conditioners or light oils to seal your ends. This reduces frizz and keeps hair smooth. Avoid heat styling right after a cut to prevent new damage.
Wash your hair in cool or lukewarm water. Hot water can dry hair and cause split ends. Be gentle when brushing or detangling, using wide-toothed combs or fingers to protect your cut ends.
Follow these tips with regular trims and dusting to keep your DIY haircut sharp and healthy. Consistent care means your hair looks polished between cuts and grows stronger over time.
8. When to Seek a Professional Instead of Cutting Yourself
Stop and see a professional if you cut unevenly or accidentally take off too much hair. Uneven lengths or unexpected choppiness can be hard to fix at home.
Your hair has tight curls or thick texture. A stylist can give a neat finish.
Complex styles like layers, fades, or undercuts need special tools and skills. These cuts require precision and specific angles you might not get with DIY methods. Trying these styles yourself often makes results uneven.
It can look patchy. Fixing it later takes more time and money.
Avoid fixing a bad DIY cut by cutting more. It usually makes problems worse. Instead, book a professional appointment.
Stylists blend your cuts well and shape hair evenly. They also suggest styles that suit what you have left.
Correction cost ranges from $40 to $100. It depends on your salon and the haircut’s complexity.
If your hair feels wrong when touched or looks jagged without style, call a pro. If it doesn’t frame your face, also call a pro.
Also, if the haircut requires thinning or texturizing that you can’t do safely, don’t risk it. Professionals manage these safely and improve look and feel.
Stop cutting if your DIY cut feels uneven or jagged. Book a stylist if it needs advanced texturizing.
Step-by-Step Action Plan for Your First DIY Haircut
Follow this plan to get your haircut started and keep it looking good. Check your work at each step to stay on track.
- Before you start: Gather your scissors, comb, clips, and a mirror. Having everything ready saves time and stress.
- Day 1: Section your hair into manageable parts. Even sections mean a more balanced cut.
- Day 1: Trim small amounts at a time, especially if it’s your first cut. Stop and check after each snip.
- Day 1: Use scissors meant for hair to avoid uneven cuts or damage. Your hair will look cleaner and more natural.
- After the first cut: Rinse your hair and let it dry naturally. This shows you how your hair really falls and feels.
- Day 2: Look for uneven areas or spots that need trimming. Use a comb to double-check the length.
- Week 1: Make any small corrections with steady hands. Avoid big changes to prevent mistakes.
- Every 3-4 weeks: Trim your ends to keep your haircut fresh. Look for split ends to keep your hair healthy.
Frequently Asked Questions
How Do I Choose the Right Scissors for Cutting My Own Hair?
Use hair-cutting shears if you can. They’re sharper and safer than regular scissors and give a cleaner cut. Avoid using kitchen or craft scissors, as they can make your hair split or look choppy.
Can I Cut My Own Hair If It’s Curly or Textured?
Yes, but take extra care to avoid uneven spots. Cut your hair dry or slightly damp, and work with small sections. Going slow helps you see how the curls fall and prevent big mistakes.
Should I Wash My Hair Before Cutting It Myself?
It depends on your hair type and style goal. Cleaner hair is easier to work with and cuts more evenly. For curly hair, cutting it dry might preserve the shape better.
How Do I Avoid Cutting My Hair Too Short at Home?
Cut small amounts at a time and check your progress often. It’s better to trim little by little than to cut off too much. Use longer guard lengths on clippers if you’re unsure.
Can I Create Layers When Cutting My Own Hair?
Yes, but layering takes practice and attention. Pull hair at different angles before trimming to add shape. Starting with a small layer and working up helps you avoid big mistakes.
What Should I Do If I Mess Up My Haircut at Home?
Don’t panic; small errors can often be fixed by trimming nearby areas for balance. Clean, even blending with scissors or clippers helps minimize the look of mistakes. For major issues, consider visiting a professional for the fix.
The Bottom Line
Cutting your own hair can work well if you take it slow and plan carefully. Keep up with small trims to maintain your style. Next time, try a simple trim to build your confidence with DIY haircuts.