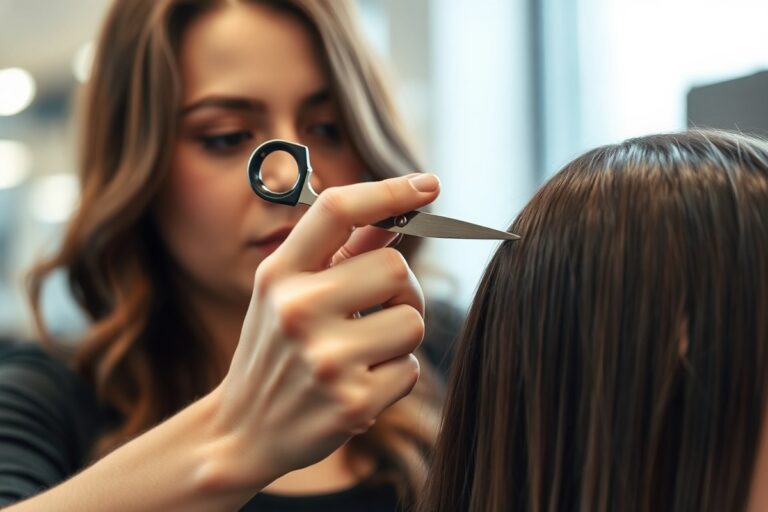
How to Do Beach Waves with Flat Iron: Simple Steps for Fast Natural Waves
Learning to create beach waves using a flat iron speeds up styling time and simplifies the process. Use a compact, 1-inch flat iron that has rounded edges. This tool helps you achieve soft, natural-looking waves.
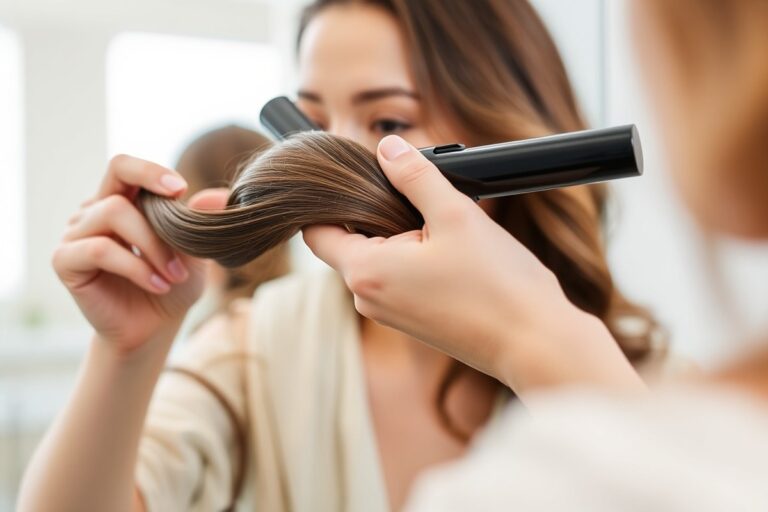
Clamp the iron near your roots and twist it 180 degrees away from your face. Slowly glide the iron down the hair to create loose waves.
Start with completely dry hair to avoid damage and uneven styling. Always apply a heat protectant spray before using the flat iron to shield your strands. Section your hair into chunks about one to two inches wide for more control and consistent waves.
Use medium heat settings, typically between 300 and 350 degrees Fahrenheit, depending on your hair type. Fine or damaged hair needs lower heat, while thick hair may require more. Avoid going over the same section multiple times to keep your hair healthy and waves soft.
Key Takeaways
- Use a 1-inch flat iron with rounded edges for natural beach waves.
- Apply heat protectant before styling to protect hair from damage.
- Section hair into 1- to 2-inch parts for easier and consistent waves.
- Clamp the flat iron near the roots and twist it 180 degrees away.
- Move the flat iron down slowly with a light touch to form waves.
- Use medium heat settings suited to your hair type to avoid damage.
How to Create Beach Waves with a Flat Iron Step by Step

Using a flat iron to create beach waves gives your hair a relaxed, natural look. Section size and how you twist and pull the iron matter for those perfect waves. Follow these steps to get soft, lasting beach waves.
Your hair will feel like you just left the shore. Take your time and do each step carefully.
- Section your hair: Divide your hair into 1- to 1.5-inch sections. Smaller pieces give you better control and natural waves without looking too tight. Clip away the rest to avoid tangling.
- Clamp near the roots: Open your flat iron and clamp a section close to the scalp. This base holds the wave shape and helps create volume near your roots. Make sure to use a medium heat setting if you have medium hair.
- Twist the iron away from your face as you pull it down. This helps create the wave shape. Keep the twist steady while moving the iron. This motion creates soft bends rather than tight curls. Move steadily but don’t rush.
- Drop the middle: To shape the wave, stop pulling halfway down the section. Release the iron slightly to let the middle bend naturally. This drop makes the wave look loose, like you walked on a beach breeze.
- Open the iron carefully once the wave forms. Hold the wave in your hand to cool it down. Let it rest for a few seconds to set. Cooling helps the wave set, so don’t brush it out immediatey. Repeat all over your head.
- Finish with light styling: Run your fingers through the waves to separate them gently. Avoid a brush to keep the texture. Use a light hairspray or sea salt spray after curling. This locks in the waves and gives texture. Spray evenly for the best effect.
The key is gentle twisting combined with pulling the flat iron smoothly. That stops your waves from looking stiff or overdone. You should see soft, natural bends with a little bounce.
Open the iron sooner or use bigger hair sections if waves are too tight. This makes the waves look softer and more natural. Avoid smaller sections to reduce tight curls.
Choosing the Best Flat Iron and Settings for Beach Waves
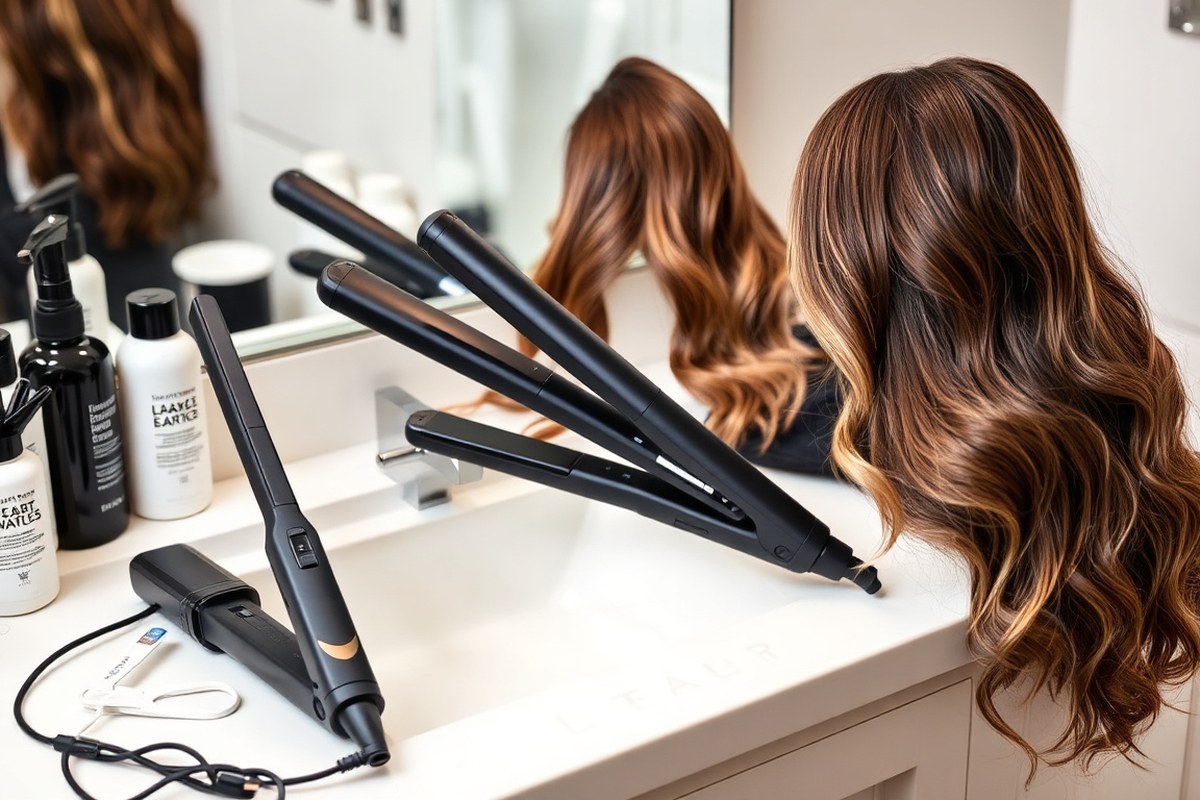
Pick a 1-inch flat iron for beach waves for most hair types. This size controls wave shape well without making curls too tight or loose.
Smaller irons suit fine hair for precise waves. Bigger plates can overwhelm thin strands.
Flat irons with rounded sides and beveled edges glide through hair easily. This shape lets you create smooth “C” waves by tapping the iron along each hair section. Rounded edges reduce snagging and make waves consistent with fewer passes.
| Hair Type | Flat Iron Size | Plate Material | Best Heat Setting | Effect on Waves |
|---|---|---|---|---|
| Fine | 0.75, 1 inch | Ceramic or Titanium | 250, 300°F | Defines gentle, loose waves without damage |
| Medium | 1 inch | Ceramic or Tourmaline | 300, 350°F | Holds shape well, smooth and shiny waves |
| Thick or Coarse | 1, 1.5 inches | Titanium or Tourmaline | 350, 400°F | Strong waves with fewer passes, less heat damage |
Ceramic plates spread heat evenly, reducing hot spots and damage. Tourmaline emits negative ions that smooth hair and cut static, which keeps waves neat. Titanium heats up fast and stays hot longer.
It works well for thick hair. But it can damage fine hair at high heat.
Rounded edges let you twist the flat iron easily to shape waves sideways. Flat edges work less well because they only clamp and slide hair straight. Look for irons with floating plates that adjust pressure for smoother, safer styling.
Never set flat iron temperature to the highest setting to avoid frying your hair.
Check your hair’s thickness and condition before picking heat. Use the lowest effective temperature to help keep strands healthy. Tap the iron lightly on your hair ends.
This helps keep them straight. It makes your waves look more natural.
Preparing Hair and Using Heat Protectants for Safer Styling
Always start styling beach waves on completely dry hair. Using a flat iron on wet or damp hair can cause severe damage and breakage.
Prepping your hair includes detangling and using heat protectants. This shields strands and gives you better wave results.
Dry Hair Thoroughly Before Styling
Make sure your hair is 100% dry before you reach for the flat iron. Using even a little damp hair will fry your strands and cause frizz or split ends. Blow-dry your hair fully, or air-dry overnight for best results.
On day two or three hair, use dry shampoo spray. This refreshes roots and soaks up extra oil. This keeps your hair looking clean and helps your waves last longer.
Detangle Hair Gently
Use a wide-tooth comb or a detangling brush to remove knots. Start at the ends and work upward to avoid pulling or breaking hair. Smooth, knot-free hair means the flat iron can glide evenly and create smooth waves.
Skipping detangling can cause uneven heat distribution. You might end up with some sections straighter or flatter than others. Take your time here for the best wave texture.
How to Apply Heat Protectants Properly
Use a heat protectant spray or serum that covers all hair strands evenly. Spray from roots to tips, then comb your hair to distribute the product fully. This barrier helps reduce dryness and damage from heat.
Look for heat protectants with ingredients like silicones or vitamins. These provide extra smoothing and shield hair at temperatures up to 450°F. Most flat irons heat between 300°F and 400°F. So good protectants are essential.
Tips for Preventing Dryness and Heat Damage
Lower your flat iron temperature if your hair is fine or color-treated. Keeping it between 300°F and 350°F often protects hair better. For thicker or coarse hair, you may need 375°F to 400°F.
Do not hold the flat iron on any section for longer than 5 to 7 seconds. Moving the iron steadily avoids overheating one spot, which causes breakage or a fried look. Use shampoo, conditioner, and leave-in products designed for hydration.
- Blow-dry hair completely before styling
- Apply dry shampoo on second or third-day hair
- Detangle carefully with a wide-tooth comb
- Spray heat protectant evenly and comb through
- Set flat iron between 300°F and 400°F based on hair type
- Limit flat iron contact on each hair section to 5-7 seconds
- Use moisturizing shampoo and conditioner regularly
Adjusting Prep for Different Hair Types
Thick or curly hair often requires more moisture and a stronger heat protectant for better results. You might also need to blow-dry in sections for full dryness. Fine or straight hair benefits from lighter products to avoid weighing it down.
Color-treated hair is more fragile and needs lower heat settings and extra conditioning. Always choose heat protectants with added moisturizers or oils. These help keep your beach waves shiny and smooth without damage.
Techniques to Create Different Types of Waves with a Flat Iron
Different wave styles suit different looks and hair textures. Soft waves tend to look undone and casual. Defined waves offer more structure and hold, perfect for polished beachy hair.
The ‘S’ Wave Technique Explained
The ‘S’ wave creates a consistent, flowing pattern that resembles the letter S. It’s a good mix of defined and soft waves for a natural look. Use a flat iron like a curling iron. Turn your wrist to shape the hair.
This style suits medium to thick hair, adding volume without tight curls. The consistent wave pattern looks great with layered haircuts and adds texture.
- Start with a 1-inch hair section, clamp the flat iron near the roots.
- Twist your wrist 180 degrees away from your face. Slowly pull the flat iron down.
- When halfway down, twist your wrist back in the opposite direction.
- Continue sliding the flat iron to the ends in this ‘S’ motion.
- Release the hair and repeat with other sections.
- Finish by running fingers through waves to soften if needed.
Using Braids and Pin Curls Before Styling
Braids and pin curls help shape waves without direct heat, giving softer results. Braiding damp hair overnight creates loose bends with little effort. Pin curls add volume and body.
Use braids for undone, casual waves. Pin curls work well for classic, slightly retro waves. Both set the hair’s shape before a quick flat iron pass to tweak waves.
- Braid hair in 2 to 4 sections while slightly damp.
- Sleep with braids or wait at least 1 hour until dry.
- Undo braids and quickly run a flat iron over loose waves for definition.
- For pin curls, roll 1-inch hair sections around your fingers.
- Secure each curl with bobby pins before drying or sleeping.
- Remove pins and gently flatten curls with a flat iron if needed.
- Comb through loose curls with fingers.
Tweaking Wrist Motion for Wave Variations
Your wrist controls the size and softness of waves. Slow twisting creates tighter, more defined bends. Quick, gentle bends give subtle, soft waves that look relaxed.
Try wrist bending back and forth instead of full twists for casual, slight waves. Twirling the iron while pulling down produces springier curls. Experiment with speed and angle.
For soft waves, clamp the iron gently then bend your wrist a little and pull slowly. For stronger waves, add firm twists and hold the iron a second longer.
Combining Multiple Techniques for Custom Waves
You can mix methods for unique beach waves. Start with braids to set texture, then use the flat iron on small sections. Add pin curls to frame the face for extra wave detail.
Twist your wrist to style the back hair. Bend gently at the front.
This creates a relaxed look. Combining twists and pin curls balances hold with softness.
- Braid or pin curl damp hair for 30 minutes or overnight.
- Undo and section hair.
- Use the flat iron with wrist twists on mid-length hair sections.
- Use wrist bends on front face-framing pieces for soft waves.
- Spritz waves lightly with a flexible hold spray.
Sectioning Hair for Best Results: Size, Order, and Direction
Start by dividing your hair into sections based on length and thickness. Use clips to separate the top, middle, and bottom layers. Thin or fine hair works best with smaller sections.
About 1 to 2 inches wide is ideal. This size gives better control and even waves.
Thicker hair needs more sections to reach all strands evenly. For medium or thick hair, cut sections 1 to 2 inches wide. Use more rows vertically.
This helps manage thicker hair better. This layering helps prevent missing spots and keeps the waves consistent from root to tip.
Work from the bottom up. Start with the lowest layer in the back. Then move to the middle layer.
Finish styling at the top layer. This order ensures the top layers stay neat and uncrumpled while you style underneath.
- Clamp flat iron over 1 to 2 inch sections for better wave shape.
- Wrap hair around one prong, leaving ends out to keep waves loose.
- Alternate the wave direction for natural, messy beach waves.
- Use the same section size throughout for even curls.
- Keep sections thinner for tighter waves, thicker for loose waves.
- Clip untouched hair away to avoid accidentally flattening waves.
- Finish with top layers last for a polished look.
Smaller sections let more heat reach hair, creating defined waves that hold longer. Larger sections work if you want quick, looser waves but may miss some strands.
Limit each section to 1 to 2 inches wide. This size balances heat exposure and ease of wrapping.
Twisting or alternating wave directions depends on your desired style. Alternating directions creates natural, beachy texture.
Twisting all in one direction makes waves look smoother and more uniform. Try both to see which fits your everyday look.
Keep your sections the same size. Work from bottom to top each time. This avoids uneven waves and flattened spots.
Common Flat Iron Beach Wave Mistakes and How to Fix Them
Waves fall flat or look stiff because of overheating or holding the flat iron too long. High heat damages hair and removes natural bounce. Hold each hair section for 5 to 8 seconds.
Use 300 to 350°F for most hair types. This usually gives good wave results.
Clamping the flat iron tight and not releasing quickly can cause stiff, unnatural waves. Let the iron glide smoothly without too much pressure. Too loose or uneven sections also make waves look messy or don’t hold well.
Uneven waves happen when sections are different sizes or you curl in one direction only. Try using a comb along with the flat iron to keep the wave controlled but natural. Switching the iron’s direction every couple of sections will add movement.
- Use medium heat settings: 300°F for fine hair, 350°F for thicker hair
- Clamp the iron for 5 to 8 seconds per section, don’t hold longer
- Work with equal hair sections, about 1-inch wide
- Alternate curling direction for each section to avoid uniform waves
- Apply heat protectant spray before styling to reduce frizz and damage
- Finish with a light salt spray for hold and a natural look
- Comb through waves gently instead of brushing to keep shape
Frizz and heat damage happen when you skip heat protectants or use too much heat repeatedly. A good spray blocks damage and helps hair stay smooth. Try smaller sections to help waves hold better.
Spray light hairspray before curling. These steps improve your wave hold.
Tight waves often happen when the flat iron stays too long. Too much heat can also cause tight waves. Keep heat and timing balanced.
Try faster passes and lower temperature next time. For loose waves, use bigger sections and pull the hair gently as you twist the iron. A little practice helps you find the sweet spot.
Finishing and Maintaining Beach Waves for Long-Lasting Style
Use a lightweight hold spray to set your waves without stiffness. Products like flexible hold hairsprays or sea-salt sprays add texture and keep waves soft. Avoid heavy sprays that make hair crunchy or weighed down, especially if you want natural movement.
Finger comb your waves instead of brushing to maintain their shape. Brushing pulls curls apart and causes frizz, which kills the beach wave look. Use your fingers to gently separate strands and shape your style.
Refreshing waves after sleep or during the day is simple. Use a bit of water or spray mist. This helps bring your waves back to life.
Lightly spritz your hair to reactivate your styling product, then scrunch with your fingers. This helps revive waves without needing extra heat.
Adding a small amount of hair oil can boost shine and tame flyaways. Work one or two drops into your palms and distribute it through the ends. Avoid applying too much oil near roots to prevent greasiness.
- Spritz sea-salt spray on damp hair for extra texture before styling.
- Use a flexible hold spray right after flat ironing your waves.
- Finger comb waves to reshape instead of brushing to reduce frizz.
- Apply a few drops of lightweight hair oil to add shine and smoothness.
- Revive waves by misting with water and scrunching throughout the day.
- Use a silk or satin pillowcase to reduce sleep friction and keep waves intact.
To keep heat-styled waves longer, don’t touch your hair often. Oils from your hands make waves fall faster. Try to keep your hands away as much as possible.
Sleeping on a silk blazer helps maintain waves longer by cutting down friction and moisture loss. Reapplying a small amount of product the next morning freshens waves without restarting from scratch.
Good waves look touchable, soft, and have a natural bounce. Too much product can make your hair feel heavy or crunchy, which looks less casual. Let your hair breathe and don’t overload with hairspray.
Adjusting Flat Iron Waves for Different Hair Lengths and Textures
Adjusting your flat iron technique depends on hair length and texture. Short hair needs smaller sections and faster moves.
Thick or curly hair benefits from higher heat and slower passes. Fine hair requires lower heat and light curls.
Short Hair Styling Tips
Short hair calls for tiny sections, about half an inch wide. Using a smaller flat iron, around 1 inch or less, helps. It lets you reach close to the roots easily.
You get better control with this size. Quick twists while clamping create waves without losing volume.
You may skip wrapping the hair fully around the flat iron. Instead, clamp and gently swivel the iron to bend the ends outward. This technique gives a choppy, natural wave that suits short styles.
Use a lower heat setting (around 300°F) for short hair to avoid damage.
Medium and Long Hair Variations
For medium to long hair, sectioning into four or more layers works best. Take larger chunks (1 to 2 inches) but keep the ends free for a relaxed look. Moving flat iron slower makes the wave last longer on long hair.
Layered hair requires curling sections in alternating directions. This stops waves from clumping and adds texture. Focus on curling mid-lengths and ends but avoid heating roots to prevent frizz.
Working with Curly or Coarse Hair
Coarse or curly hair often needs higher heat, about 350°F to 400°F. Use smaller sections, about 1/2 inch wide, to ensure even heat reaches all strands. Try two slow passes per section to get soft waves.
Applying heat protectant is key to prevent damage. Straightening the roots first smooths the base, then finish by adding waves from mid-shaft to tips. This controls frizz and keeps curls defined.
For curly hair, avoid too much heat near the scalp to stop dryness or burns.
Adapting for Fine or Thin Hair
Fine or thin hair needs careful heat control, ideally between 270°F and 320°F. Work in thin sections, no thicker than 1 inch, to avoid flattening your hair. Keep the iron moving quickly to form gentle waves.
Too much heat or holding the iron too long can create stiff curls. Use a light hairspray after styling to hold waves without weighing hair down. Layered thin hair benefits from curling only the lower sections to keep volume.
Step-by-Step Action Plan for Your Beach Waves
Use this plan to get beach waves with a flat iron in just a few steps. Follow along to see clear results today.
- Before you start: Wash and dry your hair completely. Smooth, dry hair holds waves better.
- Right before styling: Apply a heat protectant evenly. You’ll notice your hair feels less dry afterward.
- During styling: Section your hair into small, even parts. Waves will look smoother and more natural this way.
- While curling each section: Clamp the flat iron close to the roots. Twist it and pull down smoothly. Check your waves forming, not too tight or loose.
- After styling: Run fingers or a wide comb through your hair gently. This softens the waves for a natural feel.
- Finishing touch: Spray a light hairspray or texturizing mist. Waves will stay fresh all day without stiffness.
- Later in the day: Avoid touching your hair too much. It helps keep the shape longer.
Frequently Asked Questions
How to Do Beach Waves with Flat Iron?
Start by applying heat protectant and sectioning your hair. Set your flat iron to medium heat. Twist the tool as you glide it down each section.
This makes natural waves in your hair. Finish by finger-combing and applying a light hairspray for hold.
Is a Curling Iron or Flat Iron Better for Beach Waves?
A flat iron offers more control and varied wave shapes. Curling irons create uniform curls. Flat irons work well for natural-looking waves.
You can twist the plates to change the wave. This lets you create different wave patterns.
What Is the Easiest Way to Get Beachy Waves?
The easiest way is to braid damp hair and let it dry. Or, use a flat iron on dry hair.
Always apply heat protectant first. Both ways give you easy-looking texture without much skill needed.
Are Beachy Waves Still in Style In 2026?
Yes, beachy waves remain popular for their relaxed, easy look. They suit many hair types and work well for casual or dressy occasions.
How Do I Wave My Hair Using a Straightener?
Clamp a small section near the roots, twist the straightener 180 degrees, then slowly glide down. Repeat on all sections, alternating twist directions for a natural wave.
Can I Create Beach Waves with a Flat Iron If I Have Thick Hair?
Yes, use smaller sections and higher heat with a flat iron for thick hair. This helps the waves hold better and reduces styling time.
Wrapping Up
Your flat iron beach waves look great when you keep the right steps simple. Practice these moves slowly to build confidence. Start styling today to see the best natural waves you’ve had at home.