Is It Easier to Curl Hair Without Clamp? Complete Guide with Pro Tips
Is it easier to curl hair without clamp? Yes, it can be simpler once you get the hang of it.
Clampless curling irons give you more control and make curls look natural without pinching strands. You just need a steady hand and a little practice wrapping hair around the barrel.
Start by making sure your hair is completely dry to avoid damage. Use the right heat setting for your hair type to prevent burns or frizz. Since you aren’t using a clamp, grip the hair ends firmly.
Wrap your hair around the iron carefully. Hold it tight to keep the curl secure.
This method works especially well for creating loose waves or soft curls. It lets your hair move freely around the barrel, creating a more relaxed texture. Just take your time sectioning your hair neatly to avoid uneven curls or missed spots.
Key Takeaways
- Always dry hair fully before curling without a clamp.
- Use medium heat (350, 400°F) for most normal hair types.
- Clamp-free curls need a firm grip on hair ends while wrapping.
- Divide hair into three or more sections for easier styling.
- Work from the top of each section to ensure even curls.
- Low heat settings work best for fine or damaged hair.
Is It Easier to Curl Hair Without Using the Clamp?
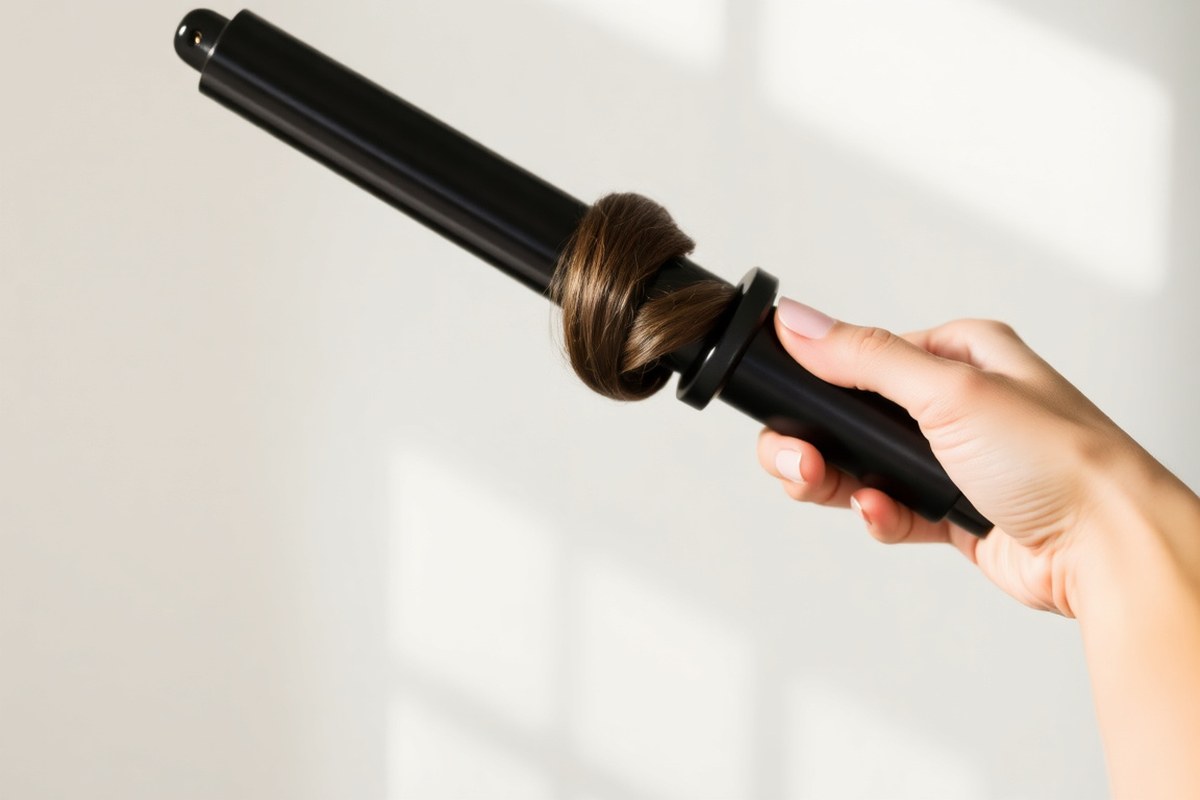
Curling hair without a clamp can be easier for many people. Without the clamp, you don’t stop to position it.
So wrapping hair around the barrel feels smoother. This speeds up styling and reduces the risk of clamp marks or kinks on your curls.
Using a clampless curling iron gives you more control. A tapered barrel helps make different curl shapes. You can style your hair flexibly with it.
You just hold your hair near the roots, then wrap strands around the barrel by hand. This method works well to make softer, more natural waves instead of uniform ringlets.
Beginners or people with fine hair like clampless curling. This method avoids the tugging that clamps cause. It’s easier on delicate hair strands.
It also reduces the chance of accidentally crimping the hair. Use a heat-proof glove to protect your fingers.
The glove helps when you hold hair near the hot barrel. This keeps your skin safe from burns.
Key Differences Between Clamp and Clampless Curling Irons

The main difference between clamp and clampless curling irons is their structure. Clamp curling irons have a lever to hold the hair in place while it heats up. Clampless irons, or wands, have a simple barrel.
They don’t have a clamp. You wrap your hair around the barrel by hand.
Curls from clamp irons tend to look more structured and precise. The clamp flattens the hair slightly, making tighter, uniform curls. Clampless tools create looser curls or waves with a more natural feel and less crease.
Using a clamp gives better control, especially for beginners. You can easily secure the hair without worrying about slips. Clampless irons need more practice to use safely.
You must wrap hair carefully around the barrel. This helps avoid burning your fingers.
| Feature | Clamp Curling Iron | Clampless Curling Iron (Wand) |
|---|---|---|
| Structure | Barrel with clamp lever holding hair tight | Barrel only; hair manually wrapped |
| Curl Shape | Tighter, more uniform curls with flat surface | Looser, natural-looking waves and curls |
| Ease of Use | Easier to secure hair, good for beginners | Requires practice to wrap hair without clamp |
| Safety | Clamp prevents hair slipping; less risk of burns | Higher risk of finger burns; focus needed |
| Heat Damage | Can cause creasing or flattening on hair | Less creasing but requires care to avoid burns |
| Cost Range | $20-$50 depending on brand and features | $15-$45 with size variations for curls |
Clamp irons let you clamp hair at a set height, making even curls simple. You wrap the strand around the barrel and hold for about 8-10 seconds. This method gives precise curls but can leave clamp marks if left too long.
With clampless wands, hold the barrel vertically and wrap hair around it. Use a heat protectant spray to protect strands. Tight curls need a smaller barrel, 3/4 inch works well.
For waves, use a 1-inch barrel. Let curls cool fully to set the shape naturally.
Always use a heat protectant spray before styling. It helps protect hair from heat damage. This is true for any styling tool.
Preparing Hair and Tools for Clampless Curling Success
Preparing your hair and tools properly sets you up for curling success without a clamp. Dry hair holds curls better. Use the right products for heat protection.
They also help curls last longer. Sectioning hair into smaller pieces helps you work neatly and evenly for consistent curls.
Dry Hair and Heat Protectant
Start with completely dry hair to get the best curl shape. Damp hair can steam and weaken curls after styling. Blow-dry your hair fully, using a round brush to smooth strands and create slight volume.
Before curling, spray a heat protectant evenly on dry hair. This shield helps prevent damage from temperatures between 300°F and 400°F. Use a light mist so your hair isn’t weighed down but fully coated.
Sectioning Hair into Manageable Pieces
Divide hair into small, neat sections about 1 inch wide or less. Smaller sections curl tighter and stay in shape longer. Brush out each section before curling to remove tangles and smooth strands.
Lightly spray each brushed section with curl spray. Then wrap it around the wand.
This adds grip and hold. Work from the bottom layers to the top to avoid tangling.
Choosing Barrel Size and Heat Settings
Pick a curling wand with a barrel size that fits your desired look. A 1-inch barrel works well for tighter curls, while 1.5 inches creates looser waves. Tapered wands offer varied curl sizes on one tool.
Adjust heat settings between 300°F and 375°F, depending on your hair type. Fine hair needs lower heat to avoid damage.
Thick hair may need a higher setting for longer-lasting curls. Limit contact time to 5 to 10 seconds per section.
Essential Products for Long-Lasting Curls
Choose curl enhancers for extra bounce and hold after curling. Spray formulas lightly mist the hair without weighing it down. Apply once before styling and again on each section for better grip.
Finish with a flexible hold hairspray to set curls gently. Avoid stiff products that make curls crunchy or stiff. For wavy hair, skip mousse but use heat protectant and texture spray for natural bounce.
Follow these steps to prep your hair and tools:
- Blow-dry hair completely with a round brush, twisting strands to add slight volume.
- Spray a heat protectant evenly over dry hair to guard against heat damage.
- Divide hair into 1-inch-wide sections, clipping them for easy access while styling.
- Brush each section smooth, then mist it lightly with a curl improving spray.
- Select the right curling wand barrel size based on your curl preference.
- Set curling wand heat between 300°F and 375°F depending on hair thickness.
- Wrap hair section around the wand, holding for 5 to 10 seconds before releasing.
- Spray curls with flexible hold hairspray to maintain shape without stiffness.
Step-by-Step Guide to Curling Hair Without a Clamp
To curl hair without a clamp, wrap small sections around the heated barrel. Hold each section 8 to 12 seconds for lasting curls. Let curls cool fully before touching or styling for best shape.
Selecting a Hair Section and Starting the Wrap
Pick a section about 1 inch wide to curl. Smaller sections give more defined curls, while bigger sections create loose waves. Hold the iron vertically and start wrapping hair near the roots.
Wrap hair around the barrel from the base toward the ends. Keep the wrap smooth to avoid bumps. This method grabs all strands evenly and holds the curl better.
Holding and Timing the Curl
Hold the wrapped hair firmly on the barrel, keeping tension but not too tight. Hold it in place for 8 to 12 seconds.
Shorter time means softer curls, longer means tighter curls. Check your tool’s heat setting, too hot can damage hair, too cool won’t curl well.
Use medium heat around 300 to 350°F for most hair types. Fine hair takes less heat; coarse hair needs more time and heat. Avoid burning your hair by testing a short section first.
Releasing and Cooling the Curl
Slide your fingers gently to unwind hair off the barrel instead of pulling. Let the curl cool in your hand just after release to help it set. Place curls in a clip or pin while they cool to maintain shape longer.
Leave curls pinned and spray lightly with flexible-hold hairspray. This avoids “helmet hair” and keeps curls soft. Cooling fully before styling locks the curl pattern in place.
Finishing Touches for Shape and Hold
After cooling and releasing, gently separate curls with fingers or a wide comb for natural volume. Avoid brushing too much to prevent frizz. Finish off with a light mist of hairspray to seal your style without stiffness.
Apply hairspray evenly and hold the can about 12 inches away. Too close will make hair crunchy and sticky. Use a shine spray if you want a glossy finish.
- Divide hair into 1-inch sections.
- Hold curling wand vertically and place section near roots.
- Wrap hair smoothly around barrel toward ends.
- Hold hair on barrel for 8 to 12 seconds, adjusting for heat and hair type.
- Slide curl gently off the barrel.
- Pin curl in place and spray with flexible-hold hairspray.
- Let curls cool fully before removing pins.
- Separate curls softly with fingers and finish with light hairspray.
How Hair Type Affects Curling Without a Clamp
Curling hair without a clamp works for most hair types. But you must adjust heat, barrel size, and technique. Fine hair needs lower heat and gentle wrapping.
Thick hair requires higher heat and smaller sections for lasting curls. Naturally wavy hair benefits from different twists to improve or smooth curls.
Fine or Color-Treated Hair
Use a low heat setting between 300 and 350°F to protect delicate strands. Pick a medium or large barrel, around 1 to 1.25 inches, for loose, soft curls without too much pressure. Wrap hair gently around the wand without pulling to avoid breakage or damage.
Apply a flexible hold spray after curling to keep waves natural and easy to brush through. Let curls cool fully before touching them to help them set without heat damage.
Fine hair can fry quickly when overheated. So keep curls short, about 5 to 8 seconds per section.
Thick or Coarse Hair
Set your tool to a high heat, 400°F or more, to manage thick strands effectively. Use a smaller barrel, around 0.75 to 1 inch, to tighten curls and distribute heat evenly. Curl smaller sections at a time so heat penetrates fully and curls hold better.
Strong hold spray is your best friend for locking curls in place, especially in humid conditions. Don’t rush. Hold the hair on the wand for 8 to 12 seconds.
This helps the curl set deep. Large sections or low heat can make thick hair limp. Curls may fall out fast.
Use smaller sections and higher heat on thick hair. This helps curls last longer and look tighter.
Naturally Wavy or Curly Hair
Adjust curling techniques to either improve your natural waves or smooth curls for a different look. Twist hair around the wand in alternating directions. This creates more defined curls.
Avoid a uniform pattern. Use medium heat (350 to 400°F) to reshape waves without risking heat damage.
For a sleek look, wrap hair without twisting. Move the wand slower to make soft waves.
Lightweight volumizing spray at the roots adds body to waves that tend to lie flat. Always finish with a shine spray to give curls a glossy, healthy look after styling.
Common Mistakes and How to Fix Them When Curling Without Clamp
Uneven curls usually happen when you grab different hair amounts or hold the iron unevenly. Make sure to section your hair evenly before curling. Using a consistent size for each section helps curls stay uniform and last longer.
Loose curls that fall fast usually come from curling damp hair. Not holding the heat long enough also makes curls loose. Both cause curls to fall quickly.
Hair must be fully dry to avoid heat damage and hold the curl better. Hold the iron on each section for about 8 to 12 seconds, but avoid overheating.
Burns can occur because clampless irons lack the safety of a clamp holding hair in place. Keep your fingers away from the heated barrel and never touch the hot surface. Use a heat-resistant glove to protect your hand and improve control.
- Always dry hair completely before curling to protect it and hold shape
- Section hair evenly and use consistent amounts of hair per curl
- Hold iron for 8 to 12 seconds per section without overheating
- Wear a heat-resistant glove to avoid burns and maintain grip
- Keep iron barrel away from scalp and fingers at all times
- Use a heat protectant spray before styling to reduce damage
- Let curls cool fully before touching or styling further
Curls lose shape quickly if hair isn’t cooled or set properly. Let curls cool for several minutes before running fingers through or spraying hairspray. Also, avoid brushing curls right after curling; use your fingers to separate them instead.
Follow these steps to get smooth curls that last longer. They also help lower your risk of burns. These tips make curling safer and better.
A heat protectant spray before curling adds a important layer of defense. Taking your time with each section and protecting your skin improves the experience and results greatly.
Making Clampless Curls Last Longer and Look Professional
After curling your hair without a clamp, let each curl cool fully before touching it. Cooling locks the shape in place.
So hold the curl in your hand or pin it up for at least five minutes. Skipping this step means your curls can quickly fall flat or lose bounce.
Use a flexible hold hairspray to help set the curls without stiffness. Spray lightly from about 8 to 10 inches away to avoid crunchy spots. A good brand costs around $5 to $15 and keeps curls soft yet secure all day.
Layering products helps, too. Start by applying a light heat protectant spray to your hair. Curl your hair as usual.
Finish with a mist of sea salt spray or light texturizer. These products add grip so curls stay put longer and give you a natural finish.
Don’t use too much product or apply it too soon. Heavy sprays can weigh curls down and cause them to drop early. Apply hairspray only after cooling your hair completely for best results.
For a polished look, gently separate curls with your fingers after spraying. Avoid brushing, as this can cause frizz and lose curl shape. To add more volume, flip your head upside down.
Shake your curls lightly. Then finish with hairspray for hold.
Finally, avoid touching your hair a lot during the day. Oils and friction can break down the curl pattern. Keep your hands off, and enjoy curls that look fresh and last longer.
Safety Tips and When to Seek Professional Help
Using a curling iron without a clamp keeps your fingers near the hot barrel. This can cause burns. Be very careful when styling this way.
This increases the risk of burns, especially when wrapping hair tightly around the tool. You need to stay focused and move carefully to avoid touching the iron’s surface. You might wrap hair from tips to roots or the opposite.
Both ways can bring your hand near heat for seconds. This risks finger burns.
Protect your fingers and hair by following these tips. Use a heat-resistant glove made for styling. This glove blocks heat and prevents burns.
This glove can cost around $10 to $20 and acts as a barrier against burns. Work with small sections of hair rather than large chunks. So your hand doesn’t need to hold the iron for a long time.
Always set the hot tool on a heat-proof surface between curls. This stops fires and protects surfaces.
Never place it on fabric or wood. Avoid rushing and keep a clean workspace free of flammable sprays or other products.
Preventing heat damage to hair is just as important as protecting your skin. Use a heat protectant spray every time before curling.
Keep the curling iron’s temperature between 300°F and 375°F. Lower heat works better on fine or damaged hair. Thicker hair might need higher settings.
Keep a heat-resistant glove handy when curling without clamps to avoid burns on your fingers.
See a professional stylist if you get repeated burns or your hair feels brittle. Also get help if you struggle to hold the iron safely. Experts can improve your skill.
Stylists can teach proper curling techniques for your hair type. They may suggest clamp irons or special wands. This helps protect your hair better.
Professionals advise on preventing heat damage. They show how to get long-lasting curls safely. You save your hair and time.
A stylist consultation usually costs $30 to $60. It can prevent pain and hair damage later. The price is worth saving hair health.
Stop using the tool when your hair feels very dry or breaks. Ask a pro for advice to avoid more damage. Styling salons can also teach safer ways to create curls that suit your hair texture.
Step-by-Step Action Plan for Curling Hair Without a Clamp
Follow these simple steps to start curling your hair without the clamp. You’ll see your curls hold better and look natural.
- Before you start: Wash and dry your hair completely. Healthy, dry hair curls best without damage.
- 10 minutes before curling: Apply a heat protectant evenly to your hair. This prevents heat damage and helps curls last.
- Right before curling: Divide your hair into small sections. Smaller sections give you better control and tighter curls.
- While curling each section: Wrap your hair around the barrel slowly. Hold the tip with your fingers. Keep the wand vertical to get natural-looking waves.
- Hold for 8 to 12 seconds: Release gently without pulling. This locks the curl without flattening it.
- After curling all sections: Let your hair cool without touching it for at least 5 minutes. Cooling sets the shape.
- Final step: Lightly brush through curls or shake them out with your fingers. Use a light hairspray to hold the style.
Frequently Asked Questions
Does Curling Hair Without a Clamp Reduce Damage?
Yes, it can reduce damage by avoiding tugging and pinching strands, which lowers breakage risk. Wrapping hair gently around the barrel helps protect your strands more than clamping.
Can Clampless Curling Irons Create Tighter Curls?
Clampless irons usually create looser, more natural curls rather than tight ringlets. For tight curls, a clamp iron or smaller barrel size works better.
Is It Harder to Control Curls Without a Clamp?
You might struggle more to keep hair in place without a clamp. Holding curls can be a bit tricky without that extra grip.
The clamp helps secure each section as you curl it. Using smaller hair sections and a heat-proof glove can give better control.
Do Clampless Curling Irons Work Better for Short Hair?
Yes, clampless irons often work better for short hair because they avoid clamp marks. You can wrap and release shorter strands smoothly.
Can I Use the Same Heat Settings Without a Clamp?
Yes, use the same heat settings but keep hair moving to avoid heat damage. Don’t leave the iron on one spot too long without a clamp.
Does Curling Without a Clamp Save Styling Time?
It can save time since you don’t open the clamp each time. You just wrap your hair and let go without fiddling.
This speeds up curling many sections quickly. This allows quicker curling, especially when you’re practiced.
Key Points to Remember
Curling your hair without the clamp can give you soft, natural waves with less damage. Try the step-by-step plan to get the hang of it today. Enjoy your new styling skill and keep experimenting with different looks.