How to Use a Curling Wand with Clamp: A Complete Guide for Perfect Curls
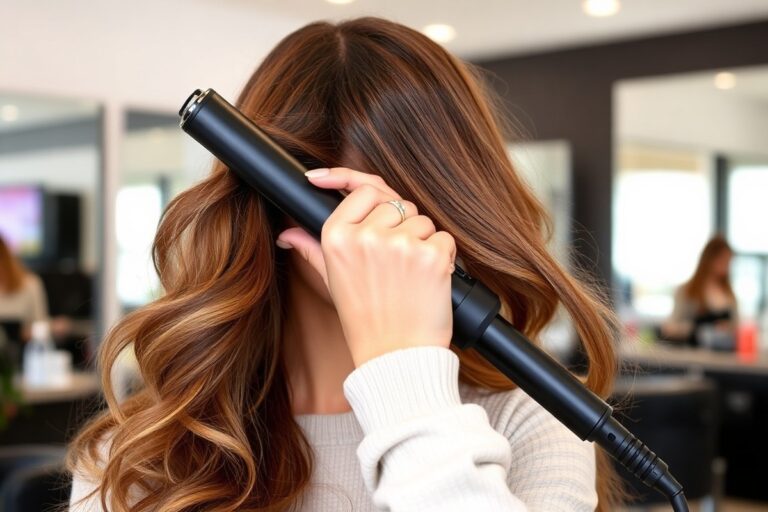
Wondering how to use a curling wand with clamp to get perfect curls? Start by heating the wand to the right temperature for your hair type. Next, section your hair into small pieces.
Clamp each piece securely. Hold it around the barrel for 10 to 15 seconds. This method locks in curls while preventing slippage.
Always dry your hair until it’s about 80% dry before you style. Wet hair won’t hold curls well and can get damaged. The clamp helps hold your hair securely for more even, long-lasting curls compared to clipless wands.
Choose the right barrel size depending on the type of curls you want. A smaller barrel creates tighter curls, while a larger barrel gives looser waves. This balance lets you control your hairstyle’s look with less effort.
Key Takeaways
- Use a 1-inch barrel for structured, bouncy curls on medium or longer hair.
- Warm the curling wand to 350, 400°F for normal hair types.
- Keep fine or damaged hair under 300°F to avoid heat damage.
- Section hair evenly and clamp one section at a time for uniform curls.
- Hold hair around the barrel for 10, 15 seconds, never longer.
- Use heat protectant spray before styling to shield hair from damage.
How to Use a Curling Wand with Clamp Step by Step

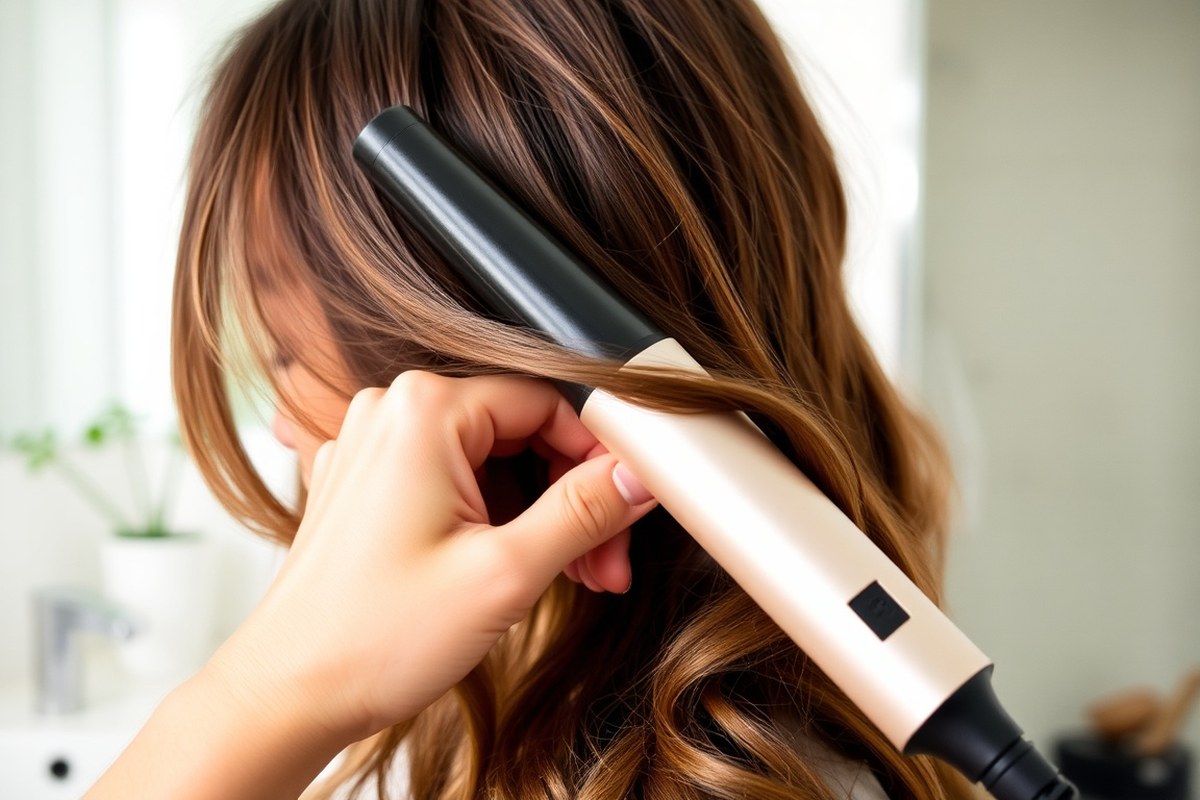
To curl hair, first clamp a small strand of hair. Next, wrap it around the barrel. Wait a few seconds, then release the clamp gently.
Holding the wand upright helps control the curl shape. Different hair types need different hold times to avoid damage or weak curls.
Preparing the Curling Wand and Hair
Plug in your curling wand and set it to the right heat for your hair type. Fine hair should use lower heat settings between 250°F and 300°F. Thicker hair can handle 350°F to 400°F. Make sure your hair is dry and protected with heat spray to prevent damage.
Heat the wand fully before starting. It usually takes about 2 to 5 minutes to reach the set temperature. A fully heated wand curls hair faster and more evenly, making styling easier and safer.
Sectioning Hair for Best Curl Results
Divide your hair into sections about 1 inch wide. Smaller sections give tighter, defined curls, while bigger sections create looser waves. Use clips to keep the sections apart and easy to work with.
Start curling the bottom layers first, moving upward. This way, you don’t accidentally undo curls higher up. Sectioning also helps you curl all strands evenly, giving a polished look.
Clamping, Wrapping, and Releasing Hair Safely
Take a 1-inch strand of hair near your roots. Hold the wand vertically next to your head. Clamp the strand securely before curling.
Wrap the strand smoothly down toward the ends while holding the clamp closed. Keep the hair taut but don’t pull too hard.
Hold the hair for about 8 to 12 seconds for normal hair types. Fine hair needs only 5 to 8 seconds.
Thick or coarse hair may require up to 15 seconds. Too long a hold risks heat damage, while too short causes loose curls.
Release the clamp gently by opening it and sliding the wand downward. Avoid pulling or tugging to keep curls intact. Hold the curl in your hand for a few seconds.
Letting it cool helps curls last longer. Then, release the curl carefully.
- Heat the curling wand to your desired temperature.
- Section dry hair into 1-inch wide parts and clip away the rest.
- Take one section and clamp the hair near the roots.
- Wrap the section around the barrel, holding the clamp closed.
- Hold for 5 to 15 seconds according to your hair type.
- Open the clamp gently and slide the wand downward to release.
- Let the curl cool in your hand before releasing it fully.
- Repeat on all sections until your hair is fully curled.
Choosing the Right Barrel Size for Your Hair and Curls

The size of your curling wand’s barrel changes the curl’s look and fit. Smaller barrels make tight curls, while bigger barrels create loose waves. Choose the barrel size based on your hair length.
Pick one that matches the curl style you want. This helps you get the best results.
Barrel Sizes and Curl Types
Barrels ¾ inch or smaller produce tight, springy curls. A 1-inch barrel gives balanced curls with some bounce and softness. Larger barrels like 1 ½ to 2 inches deliver loose, beachy waves.
The clamp holds hair close to the barrel. So curls have more structure than clamp-free wands.
To get defined curls, choose a smaller barrel. For natural waves, go bigger.
| Barrel Size | Curl Type | Typical Use |
|---|---|---|
| ¾ inch or less | Tight, springy curls | Short hairstyles, detailed curls |
| 1 inch | Medium curls, soft bounce | Medium length hair, classic curls |
| 1 ½ to 2 inches | Loose waves, natural look | Long hair, beachy waves |
Using sections about one inch thick helps you get tighter curls. Two-inch sections give softer, more relaxed waves. Adjust your hold time from five to ten seconds depending on how much curl you want.
Hair Length and Barrel Size Recommendations
For short hair like pixies and bobs, smaller barrels under 1 inch work best. These sizes curl shorter strands without bulk.
Medium hair works well with barrels of 1 to 1 ¼ inch. This includes lobs and shoulder-length cuts. They create curls that hold but don’t overwhelm.
Long hair needs wider barrels from 1 ½ to 2 inches. They shape the length with loose curls or waves that look soft, not tight.
| Hair Length | Recommended Barrel Size | Curl Style |
|---|---|---|
| Short | ¾ inch – 1 inch | Tight to medium curls |
| Medium | 1 inch – 1 ¼ inch | Soft curls, some volume |
| Long | 1 ½ inch – 2 inch | Loose waves, natural flow |
Matching the barrel size to hair length helps curls last longer and look polished. Wrapping hair close to the roots for long hair improves curl shape and hold.
Styling Tips Based on Barrel Size
Smaller barrels need thinner sections and shorter hold times. This avoids crispy or overly tight curls that look unnatural.
Bigger barrels suit thicker sections and longer hold times. Let the curls cool a moment before running fingers through for soft waves.
Always unwrap your hair slowly from the clamp to avoid unwanted kinks or dents in curls.
Use a 2-inch section for big loose curls with large barrels. Leaving the ends out slightly can create a relaxed, modern look. For tighter curls, wrap smaller sections fully around the barrel.
What Heat Settings Work Best for Your Hair Type
Choose your curling wand’s heat based on your hair’s thickness to protect it. Fine hair needs low heat to avoid damage.
Thick hair requires higher heat for curls to hold. Hold hair on the wand just long enough for curls to form without burning your strands.
Heat Range Recommendations
Fine or damaged hair should stay under 200°F to keep safe. According to Redken, delicate hair risks damage above this temperature.
Thick or coarse hair can handle heat between 200°F and 300°F. This range helps curls hold well without damage. Use this temperature for best curling results.
Start curling at the lowest heat your wand offers. Gradually raise it if your hair doesn’t form curls. This prevents unnecessary heat exposure and damage.
| Heat Setting | Temperature | Best Hair Type |
|---|---|---|
| Low | About 300°F | Fine or thin hair |
| Medium | About 350°F | Normal hair |
| High | About 400°F | Thick or coarse hair |
Use this table to decide your curling wand’s heat level. Adjust time you hold hair on the wand for best results.
Hold Time Guidelines per Hair Texture
Hold your hair on the wand depending on your hair’s type and heat chosen. Fine hair needs about 10 to 15 seconds at low heat. Medium hair fares well with 8 to 12 seconds on medium heat.
For thick or coarse hair, a higher heat means shorter hold times. Keep your hair on the wand about 5 to 8 seconds at high heat. Holding hair too long risks damage, especially on thicker hair.
Try these hold times and adjust as needed for your hair’s response. Stop curling once the curl sets and looks smooth.
Signs Your Heat Setting Is Too High
Your hair will look dry or feel brittle if the heat is too intense. You might see frizz or split ends after curling. These are signs to lower the heat or shorten the hold time.
Excessive heat risks lasting damage. Curls that look dull or break could mean your wand is too hot. Reduce the heat to protect your hair.
Check the wand’s temperature setting. Reducing temperature and time can keep your hair healthy while curling.
How to Prepare and Protect Hair Before Curling
Your hair must be completely dry before curling. Wet or damp hair can suffer damage from the heat. Blow-dry your hair thoroughly to avoid breakage and uneven curls.
Start by gently combing or brushing your hair to remove tangles. This makes it easier to work with small sections and helps curls look smooth and neat. Use a wide-tooth comb or your regular brush for this step.
Applying the right products protects hair from heat and keeps curls lasting longer. Use a heat protectant spray across dry hair before styling. You can add a light leave-in conditioner while brushing your hair.
Use it only if your hair feels dry or tangled. This helps smooth and hydrate your strands.
- Blow-dry hair fully until no dampness remains
- Comb or brush hair gently to remove all tangles
- Apply a heat protectant spray evenly on your hair
- Use a light leave-in conditioner if hair is dry
- Divide hair into sections for easier curling
- Ensure sections are small, about 1 to 2 inches wide
Divide your hair into manageable sections using clips or hair ties. Smaller sections make curling easier and allow the heat to reach each strand evenly. This step helps you avoid uneven curls and damage from excessive heat on one spot.
Checking for smoothness and dryness in each section before curling protects hair quality. Notice any damp spots?
Blow-dry those areas again until dry. Well-prepped hair curls more quickly and keeps its shape longer.
Techniques to Avoid Clamp Marks and Kinks in Curls
Clamp marks happen when the clamp pinches hair too tightly against the barrel. To avoid this, hold the clamp with just light pressure. Some stylists wrap hair with the clamp open.
They close it only at the end. This helps control the hair better. This reduces creases because the hair isn’t squeezed hard during curling.
Wrap your hair smoothly and evenly around the barrel. Avoid doubling the hair over itself where the clamp will press. Wrap a section fully around the barrel in one go.
Avoid twisting or looping as you wrap. This creates smoother curls. This prevents annoying kinks that happen from overlapping strands.
It helps to release the clamp slowly once you finish curling each section. Holding the clamp closed too long can leave a visible line.
Most curls look good when you hold the clamp closed for 5 to 10 seconds. Use a heat of 350°F to 400°F. Then gently slide the clamp off.
For thicker hair or coarse strands, use smaller sections and shorter clamp times. Large thick sections take longer to heat evenly and increase crease risk. With fine hair, be extra gentle with the clamp pressure to avoid dents.
Let the curl cool before touching it. Finger-combing curls while warm can ruin their shape. It can also cause extra lines to form.
Let curls cool before combing. Use a light hair spray afterward to hold the shape without stiffness.
Never curl wet or damp hair with a clamp iron or wand. It causes steam damage and uneven curls.
Finishing and Maintaining Your Curls for Longevity
After curling, use a light hold hairspray to keep curls from falling. Spray just enough to feel a mist, not a stiff layer. Too much hairspray can make curls hard and tangled, which ruins the look.
Serums or lightweight oils help tame frizz and add shine without weighing curls down. Apply a small drop with your fingers to the ends after your curls cool. This keeps curls smooth and flexible all day.
Handling curls gently during the day stops them from loosening fast. Avoid running your fingers through them too much. Instead, softly scrunch curls with your palms to refresh their shape without breaking them apart.
- Spray hairspray lightly, focusing on curls’ outer surface
- Use small amounts of anti-frizz serum or lightweight oil
- Cool curls completely before touching or styling further
- Scrunch curls gently to revive shape throughout the day
- Use a wide-tooth comb only if needed to detangle
- Avoid heavy creams that can weigh curls down
- Keep curls away from moisture and wind to last longer
For touch-ups, a curling wand on low heat heats curls fast without damage. Use small sections and wrap hair only briefly to avoid overexposure. This boosts bounce and refreshes waves without redoing all your hair.
At night, loosely gather hair or use a soft scrunchie to preserve curls. Avoid tight bands that cause dents or flatten curls. Sleeping on a silk pillowcase also reduces frizz and curl loss.
Common Mistakes When Using a Curling Wand with Clamp
Using a curling wand with a clamp can be tricky at first. One common mistake is curling damp or wet hair.
Heat hitting wet strands makes them sizzle and causes damage. It also leads to frizzy, uneven curls that don’t hold well.
Another usual problem is clamping too close to the scalp or applying too much heat. That can burn scalp skin or cause breakage near the roots.
To avoid burns, keep the clamp at least half an inch away from the scalp. Use medium heat settings if your hair is fine or fragile.
Beginners often struggle with hair slipping off the clamp. This happens if you hold tiny or damp strands or don’t close the clamp firmly.
Always use dry, detangled hair sections that are about 1 inch wide. Make sure the clamp closes tightly to grip the hair.
- Don’t curl damp hair; dry completely first
- Clamp hair sections about 1 inch wide for secure curls
- Keep clamp half an inch from scalp to avoid burns
- Use heat settings suited for your hair type
- Hold the clamp closed firmly while curling
- Wrap hair smoothly to avoid kinks
- Don’t over-curl same section repeatedly
Curls that lose shape quickly often result from pulling hair too hard or curling too briefly. Hold each section in the clamp for about 8 to 12 seconds for best hold.
Let curls cool completely before touching or brushing to lock in the shape. Avoid overloading hair with heavy products that weigh curls down.
Clamp marks happen when you apply uneven pressure with the clamp. Twisting hair inside the clamp can cause these marks too. Many beginners face this problem while styling.
You can reduce this by gently rolling the wand as you curl. Make sure the hair lays flat against the barrel without bunching up. That keeps curls smooth and shaped well.
Fixing these mistakes takes only small changes. Using the right section size and heat, plus drying hair first, prevents damage and slipping.
Holding each curl long enough and letting it cool helps curls last longer. This approach will quickly improve your results and keep your hair healthier.
Safety Tips and When to Avoid Using a Clamp Curling Wand
Never use a curling wand with a clamp on damp hair. Moisture inside hair strands heats quickly and creates steam.
This can weaken your curls and damage hair over time. Always dry your hair fully before you start curling to protect it.
Burns are common when using clamp curling wands. The clamp, barrel, and tip get very hot, often over 300°F. Keep your hand steady and avoid touching the barrel with your skin or scalp. Use the wand’s heat-resistant glove if it comes with one to avoid burns and drops.
You should lower the heat setting if you have thin or fine hair. High temperatures can break fragile hair. Look at your wand’s instructions for the best heat setting.
Wait for the wand to fully heat up. Only curl your hair once it’s ready. That usually takes a few minutes.
Use this easy list to stay safe with your curling wand. This helps keep your hair from getting damaged. Follow these tips every time you curl.
- Always dry your hair completely before curling.
- Use a lower heat setting for thin or fragile hair.
- Wear a heat-resistant glove on your curling hand.
- Keep your fingers and scalp away from the hot barrel.
- Divide hair into sections before you curl for control.
- Don’t stay on one section longer than 10 seconds.
- Unplug and store the wand safely after use.
Some hair conditions need different care before curling. Avoid curling if your hair is broken, very dry, or recently chemically treated. These can increase damage risk.
Ask a professional stylist to help if you want a new look. They can also help if your hair is damaged.
Getting advice avoids making things worse. They can recommend the safest approach and treatments.
Always keep the curling wand away from your skin and use a glove to prevent burns.
Handle your curling wand carefully. Hold it by the handle and clamp, not the barrel. Don’t leave it unattended when plugged in.
It heats quickly, so work in a controlled space with few distractions. This way, you prevent accidents and get smooth curls.
Your First Steps: Quick-Start Action Plan for Using a Curling Wand with Clamp
Follow this simple plan to start curling your hair with a clamp wand. Each step helps you see progress and avoid common errors.
- Before You Begin: Wash and dry your hair completely. Check that your hair feels smooth and not oily.
- First Use: Plug in the curling wand and pick a medium heat setting. Wait until the indicator light shows it’s ready.
- First Curl: Take a small section of hair and wrap it gently with the clamp. Release after 10 seconds and check for a smooth curl.
- Midway Check: Curl the rest of your hair, watching for any clamp marks or kinks. Adjust your grip or timing if marks appear.
- Finish: Let your curls cool fully, then run your fingers through for a soft look. Spray with a light hairspray for hold.
- After 2 Days: Use dry shampoo to refresh curls and keep them bouncy without rewashing.
Frequently Asked Questions
Can You Use a Curling Wand with Clamp on Wet Hair?
It’s best to avoid using the wand on wet hair. Wet hair can get damaged easily and won’t curl well. Always dry your hair thoroughly before styling.
How Do You Avoid Burning Your Hands with a Clamp Curling Wand?
Use the clamp to grip your hair instead of your fingers. Put on a heat-resistant glove on the hand wrapping hair around the barrel for safety.
How Often Should You Clean a Curling Wand with a Clamp?
Clean your wand once a month or after every few uses. Use a soft cloth with rubbing alcohol to remove product buildup for better heat transfer.
Can You Use a Curling Wand with Clamp on Thin Hair?
Yes, but use a lower heat setting to avoid damage. Thin hair curls faster, so keep the heat low and the hold time short.
Is It Better to Curl Hair Away from or Toward Your Face with a Clamp Wand?
Curling away from your face opens your features and looks natural. Try both ways to see which suits your face shape.
How Long Should You Hold Your Hair in the Clamp Curling Wand?
Hold each section for about 8 to 12 seconds. Holding longer can cause damage, and shorter might not set the curl well.
Key Points to Remember
Using a curling wand with clamp is simple once you learn the right steps. Start by practicing on small sections to build confidence. Keep your tool clean and safe to get the best curls every time.