How to Thin Hair Without Thinning Shears: 8 Proven Methods That Work
Figuring out how to thin hair without thinning shears is doable at home. You can use regular scissors, point cutting, or even a razor to reduce bulk. These methods help keep your hair looking natural and soft.
Start by sectioning your hair into small parts about 1 to 2 inches wide. Hold each section tight and snip carefully with scissors or a razor. This avoids cutting off too much hair at once and keeps your style even.
Always work slowly and check your progress in the mirror. Thinning this way gives you more control and saves money on special tools. It can also prevent damage that harsh thinning shears might cause to your hair texture.
Key Takeaways
- Divide hair into small sections before thinning for better control.
- Hold scissors vertically and make small angled snips to thin hair evenly.
- Point cutting adds texture and reduces bulk without harsh cuts.
- Use a razor with care by sliding it gently down the hair shaft.
- Practice on a mannequin head or someone else’s thick hair first.
- Keep hair taut while cutting to avoid uneven lengths and snags.
1. 8 Effective Techniques to Thin Hair Without Thinning Shears

You can thin your hair without thinning shears. Use regular scissors, point cutting, and layering techniques. These methods help reduce hair bulk gently.
These methods cut small sections or create texture to reduce bulk. They require patience and accuracy to avoid uneven results.
Here are eight effective techniques to thin hair without thinning shears:
- Slide cutting: Comb hair and slide scissors down strands to remove bulk smoothly.
- Point cutting: Snip vertical cuts at hair tips with comb support for natural texture.
- Section thinning: Comb small sections and carefully cut portions to control volume.
- Layer cutting: Create layers by cutting hair at angles to distribute weight evenly.
- Razor cutting: Use a razor to softly thin hair by slicing small sections.
- Backcombing and trimming: Tease thick areas lightly, then trim flyaways for softer shape.
- Styling with thinning products: Use light mousse or serum that smooths bulk without cutting.
- Blow-drying techniques: Dry hair downward with a brush to flatten volume naturally.
Slide cutting removes hair bulk smoothly by passing scissors along strands. Point cutting adds softness and texture but must be done in small amounts for subtle thinning.
With section thinning, handle hair carefully and work small strands to avoid uneven thickness. Razor cutting softens edges but needs a steady hand to prevent damage.
Layer cutting helps distribute the weight of thick hair better than a blunt cut. This creates natural-looking thinness without drastically changing length.
Backcombing followed by trimming breaks up thick sections for a lighter feel. Styling products like mousse or serum can tame volume by weighing hair down gently.
Blow-drying hair downward flattens the lift at the roots and reduces the bulky look. Using all these methods lets you safely thin thick hair. You can do it at home or with a stylist’s help.
This approach keeps your hair healthy. Take your time with each step and check your progress frequently to avoid cutting too much.
2. How to Thin Hair Using Regular Scissors Safely

You can thin hair at home using regular scissors with care and the right steps. Point cutting, done correctly, helps reduce bulk without messing up your hair’s length. Using sharp scissors and working slowly gives you control over the thinning process.
Preparing and Sectioning Hair for Cutting
Start with clean, dry hair because wet hair can look longer and trick you. Make sure your scissors are sharp to avoid rough cuts or split ends. Divide your hair into small, manageable sections using clips or hair ties.
Sectioning helps you focus on one area at a time. That way, you won’t miss spots or thin unevenly. For thick hair, dividing into at least four sections (top, sides, back) works well.
Correct Scissor Angle and Snip Placement
Hold the scissors vertically with the tips pointing up for point cutting. Cut small sections of hair at the ends with a slight angle. Only snip a little hair at a time for control.
Work slowly through the sections to avoid taking off too much. Cut vertically, making small snips about 1/4 inch deep, to avoid removing too much at once.
- Take a thin section of hair between your fingers, about 1/2 inch wide.
- Hold the scissors vertically and open them slightly.
- Snip the ends of the section carefully, cutting vertically at an angle into the hair.
- Move down the section, repeating small vertical snips every 1/2 inch.
- Go to the next section and repeat the process.
Avoid cutting straight across; snipping vertically reduces bulk naturally and blends better.
How to Avoid Uneven or Patchy Thinning
Take your time and cut small sections slowly to prevent uneven spots. Frequently step back and check your progress in the mirror. This helps you notice if certain areas look thinner or patchy before moving on.
Never cut too much at once, especially in one spot. Over-thinning can cause bald patches and an unnatural look. Smaller, gradual cuts let you keep control of the final result.
Maintaining Hair Length and Bulk Balance
Point cutting reduces bulk but keeps a lot of your hair’s length. Avoid taking large chunks out because that changes hair length too much. Leave longer sections near the ends for a natural-looking finish and movement.
To keep volume but reduce weight, lightly cut inner layers. Focus on thinning out the bulk without removing all the hair. This will keep your hair full but less heavy.
The goal is to soften thick, bulky hair without making it limp or flat. Check your work frequently and stop once you see less bulk without losing shape.
3. Razor Cutting for Thinning Hair: Tools and Techniques
Razor cutting offers a flexible, effective way to thin thick hair without thinning shears. It slices through hair to remove bulk and add texture, giving a softer look. Using the right razor and technique helps you avoid damage and achieve a natural finish.
Types of Razors Suitable for Hair Thinning
Hair thinning needs precise tools. Use a straight razor with a replaceable blade designed for hair cutting. Disposable razor blades or barber razors also work if they are sharp and clean.
A dull blade pulls hair and causes split ends. Avoid utility or box cutters since they are too rough for hair. The right razor feels light and easy to control.
| Razor Type | Blade Type | Price Range | Suitability |
|---|---|---|---|
| Straight razor (barber style) | Replaceable, sharp blades | $10 – $30 | Best for fine, precise thinning |
| Disposable razor | Single-use sharp blades | $1 – $5 each | Good for quick thinning at home |
| Electric razor | Rotary or foil blades | $20 and up | Not recommended for thinning, too aggressive |
Choosing a clean, sharp razor prevents damage and gives a neat cut. Replace blades often if you thin hair regularly at home.
Step-by-Step Razor Cutting Technique
Start with dry or slightly damp hair sectioned to about 1 inch thick. Hold the razor at a 45-degree angle to the hair strand.
Cautiously slice into the mid-length hair with short, light strokes. Avoid cutting near the scalp to prevent uneven patches or frizz.
Work from the back to the front, thinning small sections. Comb between passes to check how much bulk remains.
Safety Tips and Common Mistakes to Avoid
- Keep blades sharp and handle the razor steadily to avoid snags.
- Never plunge the razor deeply into thick hair; go slowly with light cuts.
- Don’t use razor cutting on extremely fragile or damaged hair to prevent breakage.
- Check for clean skin contact to avoid nicks near the neck.
- Sanitize razors before and after use to prevent infections.
Hair Types Best Suited for Razor Thinning
Razor cutting works well on thick, straight, or wavy hair that holds texture. It is especially good for bulky hair that feels heavy or looks boxy.
Fine or very curly hair may react badly with a razor, causing frizz or damage. Try a small test section before thinning all your hair.
4. Layering and Point Cutting to Reduce Bulk Without Shears
You can reduce hair bulk without thinning shears by using layering and point cutting. Layering removes extra weight while keeping your style’s shape. Point cutting softens the ends to blend layers smoothly for a natural look.
Identifying Sections for Layering
Divide your hair into manageable sections before cutting. Focus on thick parts that carry the most weight. Layering these areas will reduce bulk effectively without changing your style drastically.
Part your hair into four sections. Make two sections in front. Make two sections at the back.
Separate smaller subsections from these as needed. This allows precise control and avoids uneven thinning.
Executing Point Cutting Techniques Correctly
Point cutting involves cutting into the hair ends at an angle to add texture. Instead of straight cuts, snip into the hair vertically or diagonally. This softens bulky edges and helps blend layers naturally.
Use sharp regular scissors. Hold the scissors slightly open and snip into the ends at a 45-degree angle. Avoid cutting too much at once, trim small amounts to prevent choppy results.
Combining Layering with Point Cutting for Best Results
Layering removes extra weight, and point cutting blends those layers so they look natural. After cutting layers, use point cutting at the ends to break any harsh lines. This creates soft, flowing hair with less bulk but full movement.
Repeat point cutting along each layer to ensure smooth transitions between lengths. Comb the hair between cuts to check your progress. This reduces the chance of uneven spots or sudden heavy areas.
- Section the hair into quarters for easier handling.
- Lift a subsection near the crown and hold it straight up.
- Trim the ends horizontally to form one layer.
- Point cut by snipping vertically into the ends at a 45-degree angle.
- Release the subsection and blend it with surrounding hair.
- Repeat on remaining sections for uniform layering.
- Comb through and spot-trim any thick ends with point cutting.
How Often to Trim Layers to Maintain Thinness
Repeat trimming every 6 to 8 weeks to keep volume controlled. Hair naturally grows about half an inch per month, which can add bulk back over time. Maintaining layers prevents heavy regrowth that flattens your style.
Regular trims keep the layers fresh and prevent split ends. This helps your hair look lighter without the need for harsh thinning tools. Avoid cutting large sections all at once to maintain shape and health.
5. Non-Cutting Methods to Make Hair Appear Thinner
You can make thick hair look thinner without cutting it. You do this by changing how you style your hair. Taking good care of it also helps manage volume.
Certain products help reduce hair bulk by controlling frizz. They weight hair just enough to prevent puffiness. These products don’t make hair feel heavy.
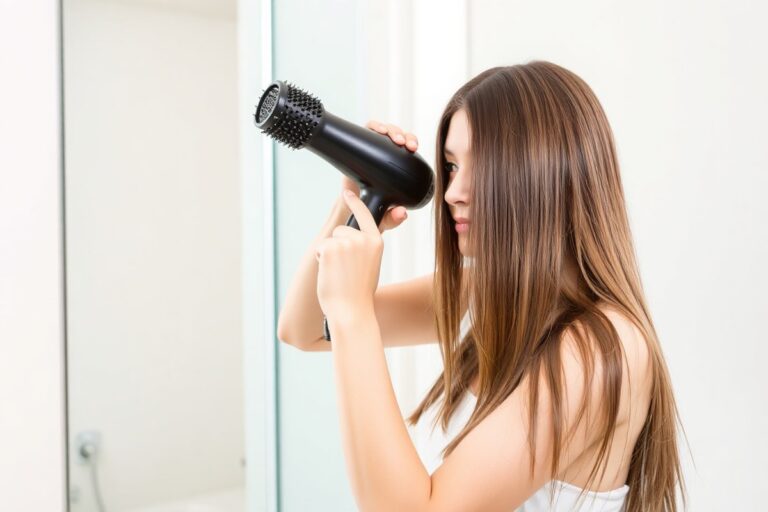
Blow drying with a round brush lifts roots and boosts volume. This adds fullness on top of your head. It makes hair look less bulky lower down.
Choose shampoos and conditioners that boost volume while keeping hair light. Look for products labeled “volumizing” or “lightweight.Apply a small amount of smoothing serum to control flyaways. Don’t put too much or it weighs hair down.
Too much product can make hair look thicker. Dry your hair completely before styling, or you risk frizz that adds puffiness.
- Start with clean, towel-dried hair before applying any product.
- Use a heat protectant spray to avoid damage during blow drying.
- Blow dry with a round brush, lifting hair at the roots for volume.
- Apply lightweight mousse or root lifting spray for added body.
- Smooth mid-lengths and ends with a small amount of serum.
- Finish with a cool blast from the dryer to set the shape.
- Avoid heavy oils or butters that can flatten hair.
Blow drying your hair with a round brush creates tension that smooths and separates thick strands. This limits the bulk’s appearance by making hair lie flatter beneath the lifted roots.
Use medium heat settings around 300℉ to 350℉ to avoid heat damage. Holding the brush under your hair and rolling downwards directs strands into softer layers.
Products that reduce bulk work by coating hair strands to smooth them. It’s best to test small amounts first to avoid buildup. Over-applying product can cause hair to clump and look even heavier.
Pay special attention to roots for volume and to ends for control. You don’t want greasy roots that flatten your style.
Too much product or heat can make thick hair look greasy and heavy, not thinner.
6. Preparing and Maintaining Hair for Effective Thinning
Start with clean, dry hair before thinning. Washing with a sulfate-free shampoo prevents frizz and helps keep your hair shiny but not bulky.
Avoid heavy conditioners that add weight. They can make your hair look flat instead of thinner.
Getting a professional trim first helps with hair thinning. Split ends and uneven cuts can make thinning look uneven or messy. Starting with healthy ends leads to better thinning results.
Comb your hair to remove tangles and section it into manageable parts. Smaller sections give you better control and more even results. Use clips to hold the sections you aren’t working on out of the way.
- Wash with sulfate-free shampoo and air dry completely
- Get a professional trim if you have split or uneven ends
- Comb hair well to avoid tangles
- Section hair into small, clipped parts
- Have good lighting for visibility during thinning
- Use the right tools like sharp scissors or a razor
After thinning, treat your hair gently. Use a moisturizing conditioner to keep strands healthy and soft.
Avoid washing your hair every day. Two to three times a week is enough to retain natural oils and reduce dryness.
Limit heat styling tools, or use a heat protectant spray if you need to style. Excessive heat can cause damage, making your thinning efforts less successful over time. Regularly deep condition your hair once a week to maintain strength and shine.
7. Common Mistakes When Thinning Hair Without Professional Tools
Thinning hair without professional shears often leads to uneven results. You might end up with patchy areas or accidentally over-thin thick hair. These mistakes happen when you rush or don’t section the hair properly.
Taking it slow and working in small sections keeps thinning even. Avoid cutting too much muscle at once.
Removing too much hair can cause gaps that don’t blend well. Always check the hair’s thickness from different angles during the process.
- Cut only 10% of the hair in one pass to prevent over-thinning
- Use clean, sharp scissors or a razor for smoother cuts
- Section hair into small, manageable pieces for more control
- Comb hair fully before cutting to find natural fall and avoid gaps
- Trim gradually and step back often to review the overall look
- Stop thinning after the first pass to avoid removing too much weight
Poor lighting can hide thin spots, so work near a window or bright lamp. Using dry hair helps you see the volume better before you cut. Wet hair looks thinner and can mislead you about the right amount to remove.
Finally, blending the ends after thinning avoids harsh lines or blunt cuts. Run scissors or a razor gently along the cut edges for a natural finish. Blending helps thick hair lie down and reduces bulk without sudden volume drops.
8. Deciding When to See a Professional Stylist for Hair Thinning
You should stop thinning hair yourself when you start seeing uneven or patchy results. Chunks look thinner or the hair feels rough and uneven?
A pro can fix that. Also, avoid cutting your hair if you plan a big style change or need intricate thinning.
Professionals offer skills and tools that make a real difference. They know how to use razors safely to thin thick hair without damage. Their experience helps create a balanced, natural look that’s hard to match at home.
Knowing when to call a stylist also depends on how confident you feel. You hesitate or worry about ruining your look.
That means you should see a pro. They can assess your hair type and thinning needs before making cuts.
The cost of professional thinning varies but expect to pay around $40 to $80 per visit. It often takes 30 to 60 minutes to thin hair evenly with the right tools. This saves time and frustration compared to trial and error at home.
Don’t use a razor for thinning unless you know how. Ask a stylist to do it instead.
Experts can thin hair with special razors that require precise control. Without training, you risk cutting too much or causing split ends. A skilled stylist knows how much bulk to remove to keep the hair healthy and manageable.
Step-by-Step Action Plan for Thinning Your Hair Without Thinning Shears
Follow these clear steps to safely thin your hair at home. Check results after each step to avoid over-thinning.
- Before you start: Wash and dry your hair completely. Clean, dry hair shows bulk clearly.
- Day 1: Use layering or point cutting techniques with regular scissors. Thin small sections to see how much is removed.
- Day 3: Try razor cutting on a few strands to add texture. Check if it reduces bulk without damaging the hair ends.
- Week 1: Style your hair using thinning methods like blow-drying with a round brush. Notice if volume looks more controlled.
- After 2 weeks: Use non-cutting tricks like changing your part or using lightweight products. Watch if hair feels lighter and looks less bulky.
- Week 3: Assess your results and avoid over-thinning. If hair still feels thick, repeat gentle cuts or razor thinning on small areas.
- After 1 month: Maintain your hair by trimming split ends regularly and using suitable hydration products. Healthy ends help hair stay smooth without extra bulk.
- When unsure: Schedule a professional stylist consultation. They can thin your hair safely if needed.
Frequently Asked Questions
Can I Use a Razor to Thin My Hair at Home?
Yes, a razor can thin hair by creating texture and reducing bulk. Use it carefully to avoid cutting too much or causing unevenness.
Does Layering Hair Always Reduce Volume Without Thinning Shears?
Layering usually reduces bulk by adding shape and removing weight from thick hair. It doesn’t cut individual strands thinner but makes hair feel lighter.
How Often Should I Thin My Hair Without Thinning Shears?
You should thin hair every 6 to 8 weeks depending on your hair growth. Frequent trimming helps maintain the reduced volume and prevents hair from feeling bulky again.
Can I Thin Thick Hair Using Only My Fingers?
Fingertip thinning is possible by cutting small sections point by point. It takes longer but helps control how much hair you remove without special tools.
What Role Does Hair Moisture Play in Thinning Hair?
Moisture softens thick hair, making it easier to work with when thinning. Wet or damp hair responds better to cutting or styling techniques that reduce volume.
Are There Hairstyles That Make Thick Hair Look Thinner Without Cutting?
Yes, styles like long layers, soft waves, or side parts can reduce the appearance of bulk. These styles help to distribute hair volume evenly for a sleeker look.
Wrapping Up
Thinning your hair without professional shears is doable with patience and care. Start with gentle cuts and observe your hair’s response. Try one method today to see how it changes your hair’s look and feel.