How to Shave with a Straight Razor: Complete Guide with Safe, Smooth Steps
Learning how to shave with a straight razor takes practice but starts with the right angle. Use a 30° angle and stretch your skin tight to prevent cuts and irritation. Keep your movements slow and steady for a smooth shave.
Open the razor fully so the blade forms an L shape with the handle. Let the blade do the work without pressing too hard.
Prepare your face with warm water to soften your beard and apply a good lather. This protects your skin and makes shaving easier.
Keep the razor sharp by stropping it before each shave. Honing the blade every 6 to 12 months keeps it sharp for better results. Take your time during each shave, especially when starting out, to improve your technique safely.
Key Takeaways
- Hold the straight razor at a 30° angle for the best balance in cutting.
- Open the razor to 270° so the blade and handle form an L shape.
- Stretch your skin tight to get a smoother, safer shave.
- Use warm water and shaving cream to soften the beard before shaving.
- Strop your razor before each shave to keep the edge sharp.
- Hone your straight razor every 6 to 12 months based on beard thickness.
How to Shave with a Straight Razor Safely and Effectively

Shaving with a straight razor takes patience and attention. The process usually lasts 10 to 15 minutes, including prep and careful strokes. Hold the razor around a 30-degree angle to your skin.
Apply light pressure so you don’t cut yourself. Keep your hand steady as you shave.
Different areas of your face require slight changes in stroke direction. You shave downward on your cheeks.
But use shorter, more controlled strokes around your chin and upper lip. Stretching your skin gently helps keep the razor sharp against your face and reduces irritation.
- Rinse your face with warm water to soften hair and open pores.
- Apply a thick, warm lather of shaving soap or cream evenly over the beard area.
- Hold the razor at a 30-degree angle to your skin, keeping a firm but gentle grip.
- Start shaving the cheeks with smooth, downward strokes, maintaining your angle.
- Shave the upper lip in short, careful strokes, pulling the skin tight with your free hand.
- Use short, controlled strokes around the chin and jawline, adjusting the angle as needed.
- Rinse the blade frequently in warm water to clear hair and lather build-up.
- After one pass, reapply lather and gently shave again if a closer finish is needed.
Keep your strokes deliberate and slow, especially if you’re new. Applying too much pressure causes nicks and irritation. Let the sharp blade do the work, not your arm strength.
Frequent rinsing of your razor keeps the blade clear and sharp during the shave. Adjust your angle slightly on curved or tricky areas to stay safe. You want your skin to feel smooth and clear.
Avoid redness or cuts for a good shave. It takes about 100 shaves to get this skill.
Choosing and Preparing Your Straight Razor and Tools
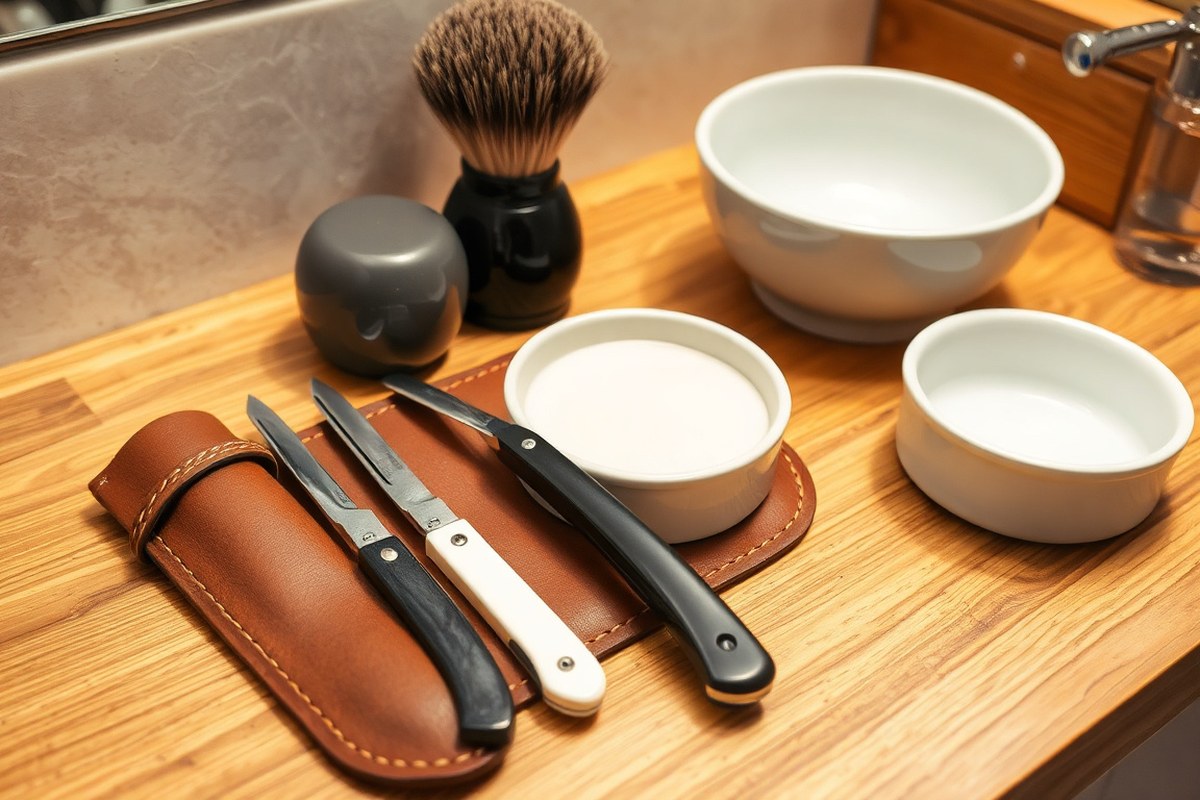
Choosing a straight razor depends on your skill and comfort level. Beginners should start with a razor around 6/8 inch wide. These models balance control and coverage well.
Carbon steel blades from Solingen, Germany, offer sharpness and easy maintenance. More experienced users might explore specialized shapes or heavier razors for different handling.
Besides the razor, get a good shaving brush and soap or cream. A badger hair brush or high-quality synthetic version helps produce thick, warm lather. This softens hair and lifts it for a close shave.
Use a shaving bowl or scuttle to whip your soap or cream into rich foam. Separate your gear into a checklist to avoid missing essentials.
| Best For | Product Type | Weight | Price | Material | Origin | Maintenance Needs | Additional Features |
|---|---|---|---|---|---|---|---|
| Beginners who learn stropping and honing | Straight razor | 1.76 oz | N/A | Carbon steel | Solingen, Germany | Dry after every use | Passes hanging hair test, stylist approved |
| Shavers with brush wanting scented cream | Shaving cream | N/A | $20 | N/A | N/A | Check bowl on arrival | Resealable bowl, warm sandalwood scent, rich lather |
Start your shave prep by soaking your brush in warm water for a minute. Load the brush into the soap or cream using circular motions. Work until you get a dense foam the consistency of whipped cream.
Too much water will make the lather runny; too little leaves it dry. A good lather should spread easily and feel moisturising against your skin.
Keep your straight razor dry after each use to prevent rust and dulling.
Prices vary widely. A full beginner kit like the Solomon costs about $150. It includes soap, strop, brush, and razor.
This saves you the hassle of hunting down each item separately. You can spend less if you buy items on their own.
But expect to invest in quality for better results and longevity. Proper care and preparation put you on the path to smoother, closer shaves.
Mastering Razor Handling: Hold, Angle, and Skin Stretching
Hold the razor with your thumb behind and three fingers on top. Angle the blade around 30 degrees against your skin. Use your other hand to pull skin tight for a cleaner shave with fewer cuts.
Correct Finger Placement for Grip
Place your index finger near the razor’s spine. Add your middle and ring fingers next to it. Hold the razor firmly for control.
Put your thumb behind the blade’s center, supporting it firmly. Rest your pinky on the razor’s handle or tang for balance and control.
This grip keeps the razor stable and lets you control pressure easily. Avoid gripping too tight. A steady but relaxed hold helps you glide the blade smoothly without tiring your hand.
Finding and Maintaining the 30-degree Angle
Lay the razor flat on your skin first at zero degrees. Slowly lift the spine away until only the blade edge touches. That angle should reach about 30 degrees.
Holding this angle prevents the blade from cutting too deeply or skipping hairs. Tilt slightly more up to 35 degrees if the blade drags or feels dull. Adjust back toward 15 degrees for sensitive areas or lighter strokes.
Keep short, controlled strokes while maintaining the angle. Let the blade do the work instead of pressing hard. Pressing can cause cuts and irritation.
Effective Skin Stretching Techniques
Pull the skin tight with your free hand before shaving. Stretch it upward or sideways based on where you shave. This tension makes the skin smooth and easier to shave.
Pull the skin just enough to avoid looseness, but do not over-stretch. Over-stretching can cause discomfort or uneven cuts. Tight skin reduces the chance of nicks and helps achieve a closer shave.
Keep stretching the skin as you move the razor in short downward strokes. This step is important, especially on curved or tricky facial parts like the jawline or neck.
Adjusting Grip for Tricky Facial Areas
Adjust your wrist slightly when shaving tricky spots like under your jaw. Keep the blade’s angle close to 30 degrees. This helps maintain a flat blade against the skin.
Move your fingers along the razor spine for better control if needed. Maintain skin tension with your free hand while adjusting your blade angle.
For the neck, tilt the blade more and use lighter pressure. The skin tends to be looser and more sensitive. Use shorter strokes and slow your pace for better precision and fewer cuts.
Always return to the standard grip and angle for less challenging areas. This helps keep your shave consistent and controlled throughout your entire face.
- Place your index, middle, and ring fingers on top of the blade near the spine.
- Put your thumb behind the blade’s center for support.
- Rest your pinky on the razor handle or tang for balance.
- Lay the blade flat on your skin (0 degrees).
- Tilt the blade slowly until you reach about a 30-degree angle.
- Use your free hand to stretch the skin tight in the shaving area.
- Shave with short, controlled strokes while keeping skin taut.
- Adjust grip and blade angle slightly for tricky spots like jawline and neck.
Preparing Your Face and Beard for a Smooth Shave
Wash your face using warm water and a gentle cleanser first. This removes oils and dirt that clog your razor or irritate skin. Use water around 100°F to open pores softly without redness.
Applying a hot towel helps soften the beard and facial skin. Soak a clean washcloth in hot water. Wring out the extra water.
Hold it on your face for two to three minutes. Heat and steam soften your hairs for easier cutting.
This lowers pulling on your skin. It also reduces irritation and cuts.
Building a thick, creamy lather is key to a smooth shave. Use a quality shaving soap or cream with a badger or synthetic brush. Wet your brush with warm water.
Swirl it on soap or cream. Whip air into the mix in your bowl or palm. Your goal is a rich, fluffy foam that sticks well and cushions your skin.
- Wash your face with warm water and gentle cleanser
- Heat a wet towel in the microwave for 30 seconds
- Hold hot towel on your face for 2 to 3 minutes
- Use a shaving brush to build a thick, creamy lather
- Apply the lather evenly over your beard area
- Re-wet and re-lather if your beard feels dry or coarse
Apply the lather evenly using circular strokes. This lifts and coats each hair while adding moisture to the skin. Let the lather sit for a minute to soften coarse beard hair before shaving.
Reapply warm water and make fresh lather when your beard feels dry or stiff. This keeps it slick and conditioned.
Good prep feels like a warm, smooth surface without tightness or dryness. Poor prep leads to pulling, razor burn, and more effort needed to cut hairs. Spend time prepping your face and beard before shaving.
This helps you get a closer shave. It also cuts down irritation.
Using Stropping and Honing to Keep Your Razor Sharp
Keep your straight razor sharp by stropping before every shave. Hone your razor every one to three months. This helps maintain a clean, smooth edge.
Stropping aligns the blade’s edge, while honing restores its sharpness. Both steps lengthen your razor’s life and improve shave quality.
Recognizing Razor Sharpness Needs
You’ll know your razor needs stropping if it feels dull or catches on your skin. Stropping before and during shaving smooths the blade’s edge, making it glide easily. A razor needs honing when stropping no longer sharpens it well enough.
Signs your blade needs honing include tugging at hair, uneven cuts, or difficulty shaving closely. These issues mean the edge has dulled or developed small chips. Leaving the razor without honing can increase nicks and skin irritation.
Proper Stropping Technique
Stropping uses a leather strop to polish the blade’s edge. Do this before each shave.
Again during if needed, to keep the edge aligned and smooth. Stropping only takes about two minutes when done correctly.
Follow these steps for safe, effective stropping:
- Lay the strop flat on a sturdy surface or hang it securely.
- Hold the razor by its handle, keeping the blade flat against the leather.
- Place the blade at the strop starting point with the spine leading.
- Run the blade away from the edge on the leather, from heel to tip.
- Flip the blade over the spine to strop the other side without dragging the edge.
- Repeat 15 to 20 times per side with smooth, controlled strokes.
- Check the blade by feeling if it slides smoothly across your nail or skin.
Never drag the blade edge backward on the strop; it dulls the razor.
Basic Honing Methods for Beginners
Honing sharpens your blade by grinding and reshaping the edge using a stone. Most beginners use a whetstone with 4000 to 8000 grit.
Honing is a skill you can learn. But many prefer professional sharpeners for first timers.
To hone your razor yourself, soak the whetstone in water for about 10 minutes. Hold the blade at a 15-20 degree angle to the stone. Move the blade gently and evenly along the stone’s surface in a circular or sweeping motion.
Repeat equal strokes on both sides, usually 10 to 15 times. Rinse the blade and stone well, then strop the blade to polish the edge. The entire process takes about 20 minutes for beginners.
Maintenance Frequency Recommendations
Strop your razor before every shave to keep the edge smooth and sharp. If the razor edge starts to pull or drag, stropping won’t fix it. Hone your razor soon, within weeks or months.
This keeps your blade sharp and safe. Most users hone their blades every 1 to 3 months.
Infrequent shaving might mean you can hone less often. Heavy use or coarse hair requires more frequent honing. Always dry your razor completely after cleaning it.
Then apply a thin coat of oil. This prevents rust and protects the blade.
Don’t skip stropping before shaves. It prevents most cuts and razor wear.
Performing the Shave: Passes, Strokes, and Areas of the Face
A straight razor shave usually takes two or three passes over your face. Each pass cuts hair in a different direction for a closer, smoother result. Different face parts need different stroke lengths and directions.
You must adjust to avoid irritation and cuts. This helps protect your skin while shaving.
First Pass: Shaving with the Grain
Start by shaving in the direction your hair grows, called “with the grain.” This pass removes most of the stubble gently. Use long strokes on the cheeks, moving horizontally, since the grain there is mostly vertical.
Shave the jawline and neck using strokes that follow your hair growth, often diagonally or sideways. Keep your skin taut and use very light pressure to prevent nicks. This pass lays the foundation for the closer shaves that follow.
Second Pass: Across the Grain
For an even closer result, do a second pass across the grain. This involves cutting hair perpendicular to the first pass direction.
On your cheeks, use horizontal strokes if you shaved vertically first. On the neck or jawline, try lateral or diagonal strokes.
Keep your strokes short and controlled, especially on tricky areas, to avoid irritation. Across-the-grain shaving helps get closer without shaving against the grain’s full resistance. Adjust your grip and angle slightly to follow the new stroke direction.
Third Pass (Optional): Against the Grain
The third pass is optional but gives you the closest shave. This pass means shaving directly opposite your hair growth.
It’s most effective on the cheeks and neck but risky on sensitive skin areas. Use very light pressure, short strokes, and make sure your skin is tight.
Skip the against-the-grain pass if your skin is prone to razor burn or cuts. When you do it, reverse your first pass directions exactly. This pass takes more skill to avoid nicks.
You need to be patient with the sharp blade. Move slowly to prevent irritation.
Techniques for Chin and Upper Lip
These areas have curved shapes and different grain patterns, so use short, gentle strokes. Pull your skin taut with your free hand to get a smooth surface for the razor. On the chin, shave downward and sideways with light pressure.
The skin of your upper lip is delicate and can be difficult to shave. Use your free hand to gently stretch the skin downward. Shave downward from your nose using short, quick strokes to avoid irritation.
- Identify hair growth direction on each face area by hand-feeling stubble.
- Start with the first pass, shaving gently with the grain and keeping skin tight.
- Move to the second pass, shaving across the grain with shorter, controlled strokes.
- Decide if you want the third pass against the grain based on your skin sensitivity.
- Stretch skin with your free hand for curved or sensitive areas like chin and upper lip.
- Use light pressure on all passes to avoid cuts and irritation.
- Adjust razor angle and grip slightly when changing shaving directions.
Preventing and Handling Nicks, Cuts, and Skin Irritation
Nicks and cuts happen when the blade angle is too steep. They also occur if your skin isn’t pulled tight enough. Both make the blade catch skin unexpectedly.
Using too much pressure also causes these problems. The neck is a common spot for cuts because the skin there is thin and uneven. Taking your time and gentle strokes helps avoid injury and irritation.
Razor burn and skin irritation usually come from a dull blade or shaving too fast. Shaving against the grain without preparing your skin can cause flare-ups. Proper prep helps reduce irritation and bumps.
Use light pressure and fresh, sharp blades to keep your skin smooth and comfortable. After shaving, rinse with cool water to calm any redness.
For small cuts, applying a styptic pencil or alum block quickly stops bleeding. Clean the area with cold water first. Avoid rubbing or applying harsh chemicals.
Without the right tools, pressing a clean tissue on the nick works well too. It helps stop bleeding and cleans the cut gently. Deeper cuts that don’t stop bleeding within 10 minutes need professional care.
- Hold the blade so it forms about a 30-degree angle with your skin. You want it shallow enough to glide smoothly but sharp enough to cut hair.
- Stretch skin tight with your free hand during each stroke
- Shave slowly, especially around your neck and jawline
- Use a fresh or well-sharpened razor every time
- Moisturize your skin before and after shaving to reduce irritation
- Apply a cold compress if you feel burning after shaving
- Stop using a razor immediately if you get severe irritation or deep cuts
Patience pays off as you learn. Rushing leads to missed spots or cuts. Be consistent with good prep and gentle strokes, and you’ll reduce problems quickly.
See a doctor if redness or swelling spreads after shaving. Also get help if you notice pus, increasing pain, or fever. Learning the right angle and pressure needs practice, but it protects your skin.
Post-Shave Care: Soothing Skin and Maintaining Results
After shaving, rinse your face with cool water to close pores. Pat your skin dry gently with a clean towel. Apply a small amount of alcohol-free aftershave balm to your skin.
It soothes irritation. It also keeps your skin hydrated.
Choose products with natural ingredients like aloe vera or witch hazel for sensitive skin. Avoid heavily scented aftershaves that can cause stinging or dryness. Using a light moisturizer daily helps keep your skin smooth and prevents flaking.
Cleaning your razor right after use is key to maintaining sharpness and hygiene. Rinse the blade under warm water to remove hair and cream. Dry your razor carefully with a soft cloth.
Or let it air dry fully. This helps prevent rust.
- Rinse razor under warm water immediately after shaving
- Dry thoroughly with a soft towel or air dry outside the case
- Store razor in a dry, ventilated area away from steam
- Apply a light coat of razor oil once a week to prevent rust
- Use an aftershave balm with soothing ingredients after every shave
- Moisturize daily to avoid dryness and irritation
- Avoid shaving against the grain if prone to ingrown hairs
Applying too much pressure when drying your razor can bend the blade, so handle it gently.
This routine prevents ingrown hairs by reducing irritation and keeping hair follicles clear. Taking these small steps adds only a few minutes but improves your skin and razor longevity. Over time, you’ll notice your skin stays healthier and your straight razor stays sharp much longer.
Step-by-Step Action Plan
Follow these steps to start shaving with your straight razor confidently and safely.
- Before you start: Gather your tools including a sharp razor, strop, shaving brush, cream, and aftershave. Make sure your razor is honed and stropped properly.
- Day 1: Prepare your face by washing with warm water and applying shaving cream. Check that your skin feels soft and hydrated before you begin.
- Day 1: Hold the razor at about a 30-degree angle and stretch your skin tight. Take slow, short strokes with light pressure to avoid cuts.
- After your first shave: Treat your skin with an alcohol-free aftershave balm. Notice if your skin feels soothed without irritation.
- Week 1: Practice your shaving passes carefully. Start shaving with the grain. Then try going across or against if you feel ready. Your beard should look clean without redness.
- Week 2: Hone and strop your razor regularly to keep it sharp. A properly stropped blade glides smoothly without tugging.
- Week 3: Adjust your technique by paying attention to blade angle and skin tension. Shaving becomes more comfortable and close with each session.
- Ongoing: Keep your razor clean and dry after each use. Avoid rust and damage by storing it safely and stropping before every shave.
Frequently Asked Questions
How Long Does It Take to Learn Shaving with a Straight Razor?
It typically takes around 100 shaves to master the technique. You usually get comfortable after shaving two or three times a week.
This takes a few months. Confidence grows with regular practice.
Do I Need to Buy Special Shaving Cream for a Straight Razor?
You don’t need special cream, but a rich, thick lather helps. It softens your beard and protects skin better during the shave.
Can I Use a Straight Razor If I Have Sensitive Skin?
Yes, but you must be careful to avoid irritation and cuts. Use gentle strokes and avoid pressing too hard on the skin.
How Often Should I Replace My Straight Razor Blade?
Straight razors don’t use replaceable blades; they need honing and stropping instead. Most men hone every 6 to 12 months depending on beard thickness and frequency of use.
Can I Shave Against the Grain with a Straight Razor for a Closer Shave?
Shaving against the grain is possible but risky for irritation and cuts. It’s best to master with the grain first and try against the grain with caution.
Do I Need a Special Mirror to Shave with a Straight Razor?
A standard bathroom mirror usually works fine, but good lighting is key. You want a clear view to control angles and strokes precisely.
Key Points to Remember
Shaving with a straight razor takes care and practice to master. Take your time and focus on angle and skin prep. Grab your razor today and try a slow, careful shave to see how it feels.