How to Sew in Hair Extensions: A Complete Step-by-Step Guide That Works
Learning how to sew in hair extensions can change your hairstyle instantly. Sewing them in gives a natural look without glue or tape. You need human hair wefts and a curved needle threaded with strong extension thread.
Start by preparing clean, detangled hair and braiding it into tight cornrows. Sewing the wefts onto these braids in neat rows holds the extensions firmly. Be sure to keep the tension even to avoid tracks showing or scalp discomfort.
Using 100% real human hair extensions helps them blend naturally with your own hair. High-quality hair also lasts longer and lets you style with heat tools safely. When done right, sew-in extensions last 6 to 8 weeks.
They give you fresh volume or extra length. You can style them just like your natural hair.
Key Takeaways
- Always use curved needles to sew extensions for better control and safety.
- Measure and cut your thread to about 48 inches before starting to sew.
- Create tight, flat cornrow braids to form a secure base for sewing.
- Attach extensions by stitching in a continuous, neat pattern along braids.
- Leave out 1 to 4 inches of natural hair to blend extensions smoothly.
- Wash sew-in extensions every 7 to 10 days with sulfate-free shampoo.
What Are Sew-In Hair Extensions and How Do They Work?

Sew-in hair extensions are a way to add length and volume. Your natural hair is braided close to the scalp in cornrows. Then, hair wefts are sewn onto these braids with a needle and strong thread.
This method uses a curved sewing needle and weaving thread. The wefts are stitched directly onto the braid rows, making the extensions secure. This hold can last several weeks with proper care.
Sew-ins protect your natural hair by keeping it locked under the extensions. This method avoids glue or harsh chemicals that can damage hair. You get a more natural look since the hair blends smoothly with your own.
Compared to clip-in or tape-in extensions, sew-ins last longer. They also allow you to style your hair more freely without worrying about slippage. Sew-in styles work best if you want full coverage or a big volume boost.
There are variations like partial sew-ins, where only part of your hair is braided and sewn. Closures or frontals can cover the hairline to mimic a natural scalp look. These styles help protect edges and make the extensions less obvious.
The key to a good sew-in is a neat and tight braid base. The thread should be strong but gentle to avoid too much pulling. A poorly done sew-in might cause scalp tension or make the wefts visible.
This technique can cost around $100 to $300 at salons depending on hair quality and length. Doing it yourself takes practice, especially threading the needle and sewing evenly. But once done right, sew-in extensions give you long-lasting, natural results you can enjoy for weeks.
Tools, Materials, and Hair Selection for Sew-In Extensions
Essential Sewing Tools and Their Functions
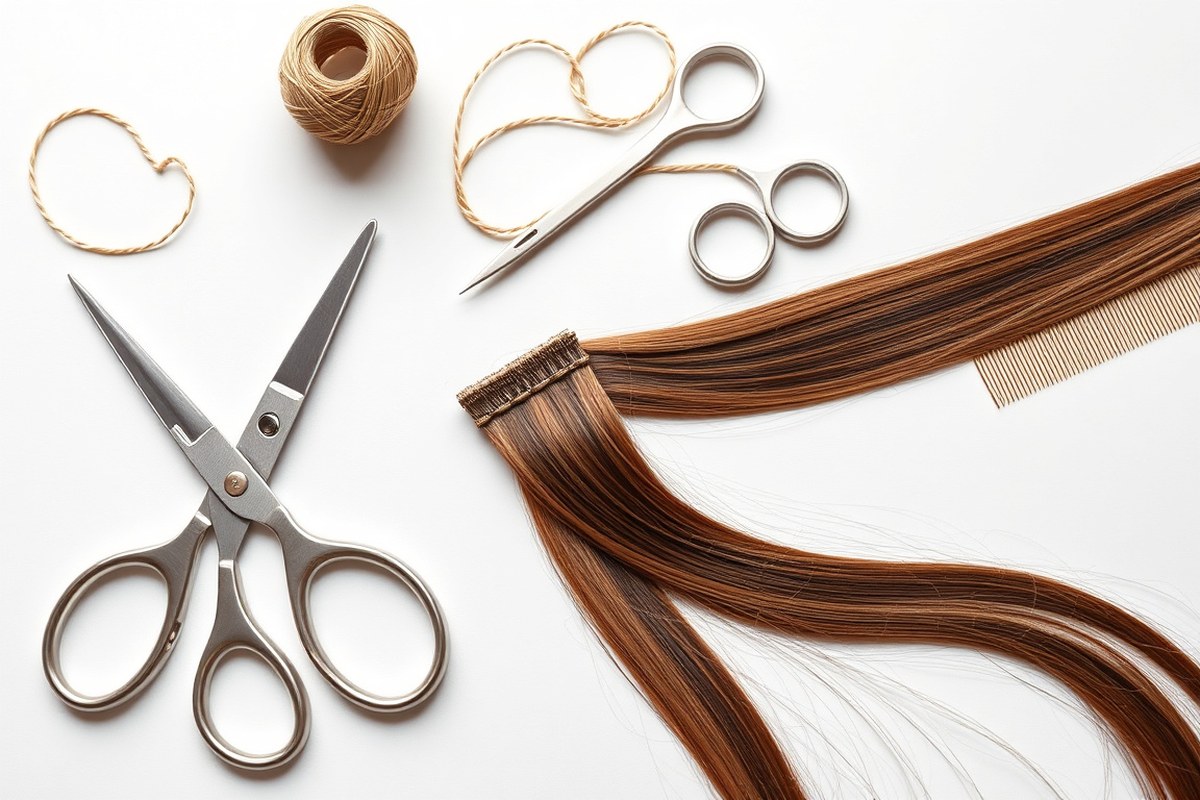
You need a few key tools to sew in hair extensions well. These include a curved sewing needle. You also need nylon thread matching your hair.
Use scissors, clips, and a rat-tail comb too. Each tool helps keep your work neat and secure.
The curved needle fits nicely through cornrow braids without snagging. Nylon thread is strong but gentle on hair, preventing breakage. Clips hold your leave-out section, keeping hair out of the way while sewing.
- Curved sewing needle for easy access through braids
- Nylon thread in a color close to your hair shade
- Rat-tail comb for precise sectioning and parting
- Sharp scissors to trim thread and excess hair wefts
- Hair clips to hold sections securely during sewing
Use a good mirror setup to see your work clearly and avoid mistakes.
Choosing the Right Hair Extensions by Type and Quality
Human hair extensions give a natural look and allow heat styling. Remy hair is a top choice because it keeps the cuticle intact and lasts longer. Synthetic hair is cheaper but less versatile and can’t handle heat tools.
Remy hair holds curls well. It can handle heat up to 450°F. This makes it great for many styles.
Synthetic options are budget-friendly but limited to cold styling only. Consider how often you want to style or wash your extensions before buying.
| Hair Type | Benefits | Considerations |
|---|---|---|
| 100% Human Hair | Natural look, feels real, versatile styling | Needs regular care and gentle handling |
| Synthetic Hair | Cost-effective, easy to maintain | Less natural, no heat styling |
| Remy Hair | High quality, cuticle aligned, long-lasting | More expensive but worth the durability |
Always choose 100% human or Remy hair for a smooth blend and longer wear.
Best Thread and Needle Options for Durability
Using the right needle and thread keeps your sew-in strong and comfortable. Pick a curved needle made for weaving. It slides easily under the braids without pulling hair.
Choose nylon thread that matches your hair color. Cut a piece about 18 to 24 inches long to work without tangling. This thread is strong enough to hold the wefts firmly for weeks.
Thread the needle carefully, knot one end, and stitch close to the braid base. This technique secures the wefts tightly without stressing your natural hair or the extensions.
Preparing Natural Hair for Sew-In Extensions
Preparing your natural hair well is key before sewing in extensions. You need to wash, dry, detangle, and section your hair carefully. This helps the extensions blend well and stay secure without damage.
Washing and Conditioning for Healthy Scalp
Use a sulfate-free shampoo when you wash your hair. Gentle cleansing protects your scalp and your natural hair. Apply a rich conditioner to restore moisture and reduce dryness.
Deep condition your hair regularly for extra nourishment. This helps keep your hair strong before and during the sew-in. Clean, well-conditioned hair prevents breakage under the sewn tracks.
Drying Hair to 90-95% Before Braiding
Completely drying your hair before braiding is very important. Damp hair can stretch and weaken when braided tightly. Use a blow-dryer on a medium heat setting to reach 90-95% dryness.
At this stage, detangle your hair gently with a wide-tooth comb. Start at the ends and work up to the roots. This stops breakage and makes braiding smoother and more even.
Sectioning Hair for Leave-Out and Cornrows
Section your hair clearly before braiding and sewing extensions on. Map out the leave-out section where your natural hair stays visible. This cover hides the braid tracks and blends the weave with your hair.
Divide the rest of the hair into clean, even parts for flat cornrows. Tight, close-to-the-scalp braids make a strong base for sewing. Leave no loose strands to avoid bumps under the extensions.
Follow these steps to get your hair ready:
- Wash hair using sulfate-free shampoo, focusing on the scalp.
- Apply a rich conditioner, avoiding buildup on the roots.
- Use a deep conditioning treatment at least once a week.
- Gently towel dry, then blow-dry at medium heat until 90-95% dry.
- Detangle hair carefully with a wide-tooth comb from ends to roots.
- Create clean sections: one for leave-out, others for cornrows.
- Braid the cornrows flat against your scalp, leaving the leave-out free.
- Apply a light leave-in conditioner or braid spray to keep hair moisturized under extensions.
Choosing and Creating the Braid Base for Extensions
Choosing the right braid base is key for a secure sew-in. The braids must be tight enough to hold the extensions firm. You also want them flat and close to your scalp to avoid lumps or pulling.
Popular Braiding Patterns Explained
Straight-back cornrows are the most common braiding pattern for sew-ins. They run horizontally across your head and provide an even surface. This pattern helps keep the extension wefts flat and stable.
Box braids can work too but usually aren’t as flat or tight. They create more bulk under the extensions, which may be uncomfortable. Chain braids, where braids link to one another, can help secure difficult spots.
Techniques for Tight, Flat, and Close-to-Scalp Braids
Start by parting your hair into clean, even sections. Use a rat-tail comb for straight lines. These parts make your braids neater and help your extensions lay flat.
Keep your braids as close to your scalp as possible without feeling pain. Tension should be firm to keep extensions from slipping. It must be gentle to avoid hurting your scalp.
Balance is key for a safe hold. You should feel support, not sharp pulling.
Secure the end of each braid with a small elastic band to prevent unraveling. Cornrows should be tight but still comfortable enough for you to touch your scalp without soreness.
- Part your hair into neat sections using a tail comb.
- Begin each cornrow braid close to the scalp, adding hair gradually.
- Pull hair tight enough to feel firm but stop if it hurts.
- Keep the braid flat by pushing hair down as you go.
- Finish the braid and secure the end with a small elastic band.
How to Avoid Scalp Discomfort While Braiding
Avoid pulling your hair too tight. Overly tight braids can cause headaches or even scalp redness. Stop braiding before discomfort starts to protect your hair follicles.
Work in smaller sections to reduce tension across your scalp. Take breaks if you feel any sharp pulling or soreness during braiding. Use moisturizing products to keep your scalp healthy and reduce itchiness.
After braiding, your head should feel snug but not painful. If pain or bumps last more than 48 hours, the braids are too tight.
Have a professional fix them. Don’t wait to get help.
How to Sew the Wefts Onto Braids Step-by-Step
Sewing the hair wefts onto braid bases requires the right tools and careful stitching. Use a curved needle threaded with doubled nylon thread that matches your hair color. This setup ensures a strong hold and blends well with your natural hair.
Proper stitching keeps the wefts secure without damaging your braids. The blanket stitch is the best for this job. It attaches the weft firmly at a 45 to 60-degree angle.
The angle follows the natural flow of your hair. This helps the extensions look more natural and stay secure.
- Tie a knot at the end of your doubled nylon thread to stop slipping.
- Place the weft flat on top of the braid row, hair flowing down.
- Insert the needle under the braid and pull it up through the edge of the weft.
- Wrap the thread over the top edge of the weft and stitch back under the braid.
- Repeat the blanket stitch evenly every half inch along the weft.
- Finish each row by tying a secure knot to lock the thread.
- Use a needle to weave the thread into the braid and trim any loose ends.
Don’t sew the stitches too tight. Tight pulling can cause tension and break your natural hair.
Make sure the thread lies flat without bunching. So the extension feels smooth and natural.
The end knots are critical. They hold the weft in place and prevent unraveling. Use the needle to tuck knots between the braid to hide them and avoid discomfort.
Keep your needle close to the braid base while sewing. This helps avoid snagging your hair. Snagging can cause pain and damage.
Layering Multiple Rows and Blending Extensions Naturally
Adding multiple rows of weft hair increases volume and length in a natural way. You can sew in two to four ounces of hair depending on your natural hair thickness. Space rows evenly, about 1 to 1.5 inches apart, to mimic how hair naturally falls.
Leave out small sections of natural hair, about 1 to 4 inches wide. These leave-out pieces help your extensions blend with your hair. They also suit your face shape well.
This gives a natural, smooth look. Using a flat or curling iron afterward makes the joined hair look smooth and natural.
- Measure and section your hair: Start by dividing hair into rows about 1 to 1.5 inches apart. This spacing helps add volume without making rows too obvious or bulky.
- Braid the base rows: Create flat cornrow braids along each section. Keep them tight but comfortable for a strong foundation.
- Leave out sections: Leave natural hair out around the edges or crown. They should be about 2 to 3 inches wide. This helps blend with the extensions. This allows you to blend extensions for a natural finish.
- Select the number of wefts: Use two to four ounces of extension hair for fullness. More wefts increase thickness but take more time to sew.
- Sew in each weft row: Start attaching the extension wefts from the bottom braid. Sew each row to the braids carefully. Work your way up to the crown. Make sure stitches are close but not too tight to avoid tension.
- Layer the wefts: Add multiple rows, spacing each about 1 to 1.5 inches apart. Layering creates volume and smooth length transition.
- Blend the leave-out hair: Use a flat iron on your leave-out hair and extensions. Or use a curling iron to help them match. This makes them fall together nicely. This softens the seam and makes the style look natural.
- Trim and shape: Cut any extension ends that don’t match your natural hair length. Layer extensions to mimic your hair’s cut for a smooth blend.
Spacing and layering this way prevent heavy lumps under your hair. Leave-out size depends on your hair density and face shape, usually 1 to 4 inches wide. Final styling with heat tools connects your natural hair and extensions for a flawless look.
Common Sew-In Mistakes and How to Fix Them
A common sign your sew-in is done incorrectly is uneven braids. This causes the wefts to sit unevenly and show visible tracks. Make sure braids are tight and even.
They should lie flat on your scalp. This helps before sewing the extensions in.
Sewing the wefts too tightly is another mistake. It can cause scalp pain and hair to lift, especially at the nape. Your scalp feels sore or hair feels pinched.
That means the install is too tight. Loosen the thread slightly, or redo problem sections with less tension.
Visible or loose wefts usually mean the sewing technique wasn’t clean. Go back and resew any loose wefts using smaller stitches close to the braid. This keeps the hair secure and hides tracks better.
Choose the full sew-in method. Or leave your natural hair out around the edges. This covers the tracks well.
- Blow-dry hair to 90, 95% dry before braiding
- Make neat, flat braids sized evenly
- Avoid sewing too tightly or pulling threads too hard
- Check for loose or visible wefts and fix them immediately
- Cover tracks with leave-out hair if you prefer a natural look
- Use shorter stitches in weak spots for better hold
Keep in mind, tangled wefts usually start from debris or improper care. Brush extensions gently and regularly during maintenance.
To fix lifting tracks, tie knots in the thread. Then stitch the segments down securely.
A sew-in that is too tight may cause headaches. You might also see redness on your scalp. You should remove the extensions if pain persists.
Tight installs can damage your hair. Wait several weeks before reinstalling to avoid more breakage or stress.
Maintaining and Caring for Sew-In Extensions
Wash sew-in extensions about once or twice a week to keep them fresh. Washing too often can cause the extensions and braids to loosen or frizz. Use a mild shampoo diluted with water, and rinse gently with lukewarm water.
After washing, apply a deep conditioner to the natural hair under the weave. This stops dryness and breakage.
Focus on your scalp and roots. Avoid piling conditioner on the actual wefts, which can weigh them down.
Moisturize your natural hair often with light leave-in conditioner. Use natural oils like jojoba or argan oil. They help keep your hair soft and healthy.
Put a small amount of product on your scalp. Apply it also along the braids.
This keeps your hair hydrated but not greasy. This helps prevent scalp itchiness and promotes healthy hair growth during wear.
- Use wide-tooth combs or fingers to detangle gently
- Limit heat styling to 2 or 3 times per week
- Always apply heat protectant spray before using hot tools
- Keep heat tools below 350°F to avoid damage
- Wear low-stress styles like buns or ponytails to protect edges
Styling your sew-in with heat tools requires caution. Use a heat protectant spray every time to shield hair fibers from damage. Avoid setting your flat iron or curling wand above 350°F. Higher heat can weaken the extensions and natural hair.
When you style, avoid tugging or pulling the extensions, which might loosen the braids. Instead, opt for gentle hairstyles like loose buns or soft braids. These reduce tension on your scalp and protect your hairline.
Keep your sew-in clean but never soak it; water can loosen the braid foundation.
Step-by-Step Action Plan to Sew in Hair Extensions
Follow these steps to sew in your extensions smoothly. Each step shows how to check your progress.
- Before You Start: Gather all tools and hair for the sew-in. Make sure the hair matches your natural texture.
- Day 1: Wash and deep condition your natural hair. It should feel clean and soft before braiding.
- Day 2: Braid your hair into a tight, neat base. Check that the braids lie flat and are even.
- Day 2 – Sewing: Sew the wefts onto the braid base using a curved needle. The wefts should feel secure but not too tight.
- Day 2 – Layering: Add more rows if needed, starting from the nape. The extensions should blend naturally without gaps.
- Day 3: Style your sew-in gently and check for any loose threads. Tighten or resew spots that feel loose.
- Week 1: Maintain your extensions by moisturizing your scalp and avoiding heavy products. Your scalp should feel comfortable, not itchy.
- After 2 Weeks: Inspect the sew-in for any damage or slippage. Plan a touch-up if you see loose wefts or braids.
Frequently Asked Questions
How Do You Choose the Right Thread for Sewing in Extensions?
Use nylon or polyester thread for strength and durability. Avoid cotton because it can break or cause irritation. Matching the thread color to your hair helps the stitches blend in naturally.
Can I Sew in Extensions on Wet or Damp Hair?
You should sew in extensions only on dry hair. Wet or damp hair can stretch and loosen the braid base later. Dry hair also helps the braids hold tighter and last longer.
What Size Needle Works Best for Sewing in Extensions?
A curved sewing needle about 6 to 7 inches long works best. The curve helps you sew close to the scalp for a secure hold. Using a blunt-end needle can prevent scalp pokes and damage.
How Often Should I Redo My Sew-In Extensions?
Typically, redo sew-ins every 6 to 8 weeks to prevent damage. Leaving them longer can cause tangling and hair breakage at the roots. Regular maintenance keeps both your natural hair and extensions healthy.
Is It Safe to Sleep with Sew-In Hair Extensions?
Yes, but you should cover your hair with a satin bonnet or scarf. This reduces friction and prevents frizz or loosening of the braids. Sleeping without protection can shorten your sew-in’s lifespan.
Can I Swim with Sew-In Extensions in My Hair?
Swimming is possible, but rinse hair immediately after to remove chlorine or salt. Chlorine can dry your natural hair and damage extensions. Wearing a swim cap provides extra protection during water activities.
The Bottom Line
You can create a natural sew-in look by following these clear steps. Start by preparing your hair and braiding carefully. Then sew the wefts securely before blending and caring for your extensions.