

How to Operate a Dyson Vacuum: Complete Guide with Tips and Maintenance
Wondering how to operate a Dyson quickly and easily? Start by assembling your vacuum following the included guide carefully.
Make sure each part clicks securely to avoid issues during use. Check for any packaging materials inside the bin or filter area before starting.
Next, power on your Dyson vacuum using the main switch or trigger, depending on the model. Some cordless Dyson vacuums require charging first; check the battery level before starting. If the battery is low, charge it fully to get the best cleaning time.
Now, choose the right suction setting for your floor type or mess. Adjusting suction ensures better cleaning and saves battery life on cordless models.
For thick carpet, use higher suction settings to remove dirt effectively. Hard floors may need lower suction.
Key Takeaways
- Always assemble your Dyson until parts click to ensure proper fit and function.
- Check battery charge on cordless models for at least 3 to 5 hours before use.
- Adjust suction power based on surface type to improve cleaning and save energy.
- Use the power button or trigger to start or stop your vacuum quickly.
- Inspect and attach the correct tool for the area you want to clean.
- Keep the dust bin empty to maintain suction and avoid clogging.
How to Start Operating Your Dyson Vacuum Quickly
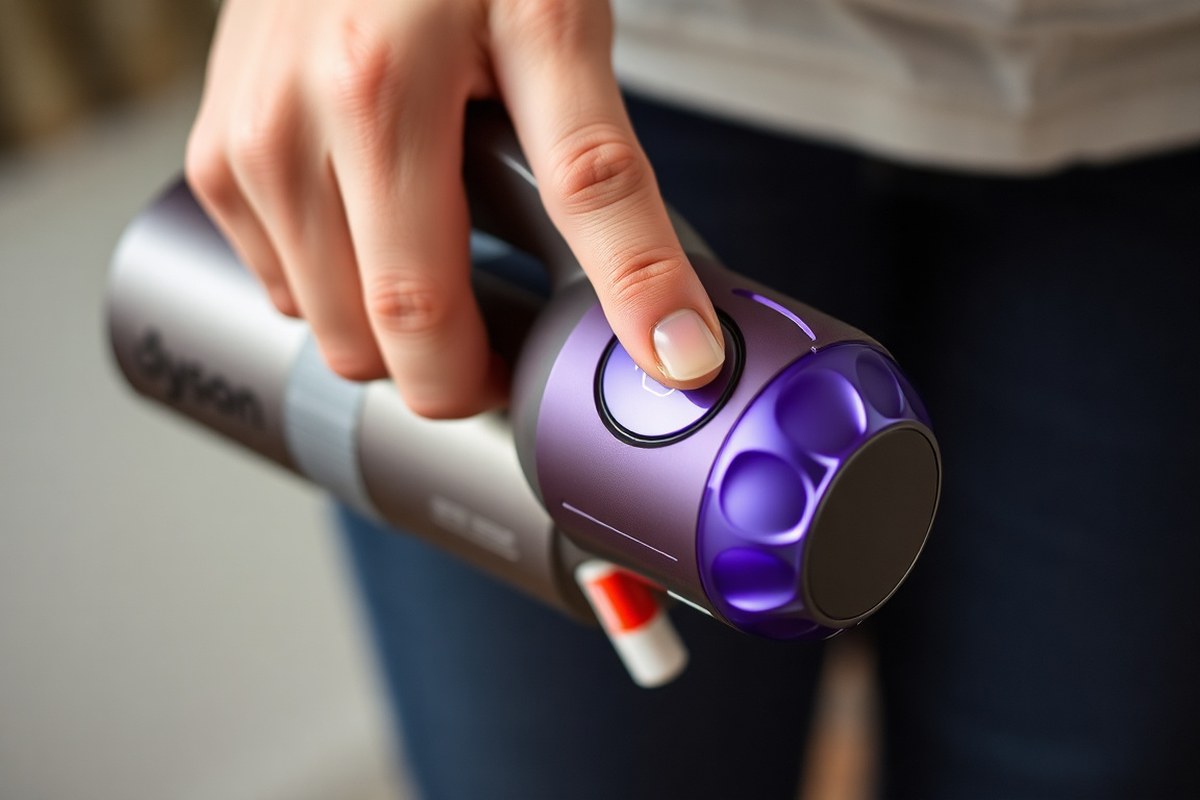
Getting your Dyson vacuum ready to clean is simple. First, check that your vacuum is put together right.
Make sure it’s fully charged if it’s cordless. Knowing which power mode to select helps you clean efficiently without wasting battery or energy.
Here’s a clear list of steps to get your Dyson vacuum running right away.
- Make sure the vacuum is fully assembled and the dust bin is empty.
- Plug in the vacuum for corded models or check the battery level on cordless ones.
- Press the power button, usually located on the handle or body. Hold it briefly until it starts.
- Select the cleaning mode using the controls. For light cleaning, choose Eco or low power.
- For carpets or tough messes, use higher power. Try Boost mode if your Dyson offers it.
- Attach the appropriate tool for the surface you plan to clean next.
- Start vacuuming slowly to get a feel for the suction and handling.
- Pause or turn off the vacuum by pressing the power button again when you finish.
Pressing the power button turns the vacuum on. Models like the Dyson V11 or V15 detect will show battery life on a screen. Take a moment to choose the power mode based on your floor or dirt level.
Low power saves battery on hard floors. Boost mode is best for deep carpet cleaning.
Prepping your vacuum ensures it runs smoothly and lasts longer. For cordless models, a full charge can take about 4 hours. So start with a charged battery.
Turning it on is as easy as pressing a button, but don’t rush. Picking the right mode improves cleaning and avoids wasting battery or getting stuck in tough spots.
Identifying and Using Dyson Vacuum Attachments Correctly

Common Dyson Vacuum Attachments
Dyson vacuums come with several tools designed to clean different surfaces and tight spaces. The Crevice Tool fits narrow gaps and corners where dirt hides. The Dusting Brush has soft bristles for delicate surfaces like lampshades or blinds.
The Motorized Brush Bar is a powerful tool for deep-cleaning carpets. Some models also include a mini motorized tool to remove pet hair from upholstery. These attachments work with most Dyson cordless and corded vacuums.
- Crevice Tool, cleans tight corners and edges
- Dusting Brush, for delicate or textured surfaces
- Motorized Brush Bar, tackles dirt in carpets
- Mini Motorized Tool, removes pet hair from furniture
- Hair Screw Tool, grabs hair from cushions and carpets
- Soft Roller Cleaner Head, best for hard floors
Attaching and Detaching Tools Safely
Each Dyson attachment clicks firmly onto your vacuum’s wand or hose. Align the connector and push until you hear a click. To remove, press the red release button on the handle and pull the tool away.
Avoid forcing tools on or off, as this can damage the locking mechanism. Check for blockages before attaching tools to keep airflow smooth. Tools should fit securely but detach smoothly.
Always switch off the vacuum before changing attachments to avoid injury or damage.
Recommended Attachments by Cleaning Task
Carpets get the best cleaning from the Motorized Brush Bar. Its spinning bristles pull dirt and pet hair out of fibers. For upholstery, use the Mini Motorized Tool to lift hair and dust from couches and cushions.
Delicate surfaces like wood floors and blinds need the Dusting Brush to avoid scratches. The Crevice Tool gets dirt out of narrow spaces like baseboards and window tracks. Use the Hair Screw Tool for tangled hair and debris.
- Carpets: Motorized Brush Bar
- Hardwood floors: Soft Roller or Dusting Brush
- Upholstery and curtains: Mini Motorized Tool
- Tight spaces: Crevice Tool
- Pet hair: Hair Screw Tool or Mini Motorized
Using Flexible Adaptors for High and Low Areas
Some Dyson models offer flexible adaptors or extension wands. These help reach high ceilings, ceiling fans, or under low furniture. They bend or extend to clean awkward spots easily.
Attach a crevice tool or dusting brush to a flexible wand. This helps you clean hard-to-reach spots without stretching.
You avoid bending too much while doing it. Store these adaptors with the vacuum to have them ready.
Flexible tools prevent strain and let you clean safely in tight or awkward spots.
Assembling and Preparing Your Dyson Vacuum for Use
Getting your Dyson vacuum ready involves unboxing, assembling the parts, and ensuring it’s fully prepped. You’ll connect the hose, wand, and cleaning heads correctly to make sure it functions smoothly. A cordless model also requires charging before use.
Unboxing Your Dyson Vacuum
Check the box for all parts right after unboxing. You should find the main vacuum body, wand, hose, and cleaning tools. Keep the packaging handy in case you need any instructions or warranty info.
Handle the vacuum carefully while removing it from the box. Keep the manual nearby for guidance on model-specific details. Lifting the vacuum by the handle helps avoid damage to cables or attachments.
Look for smaller components like the charger or dust bin that may be packed separately. Make sure everything matches the parts list in the manual. Missing parts will prevent proper assembly and cleaning.
Attaching the Wand and Hose
Start by connecting the hose to the vacuum body. Slide the hose into the designated opening until you hear a click. The click means the parts locked securely in place.
This helps avoid leaks. It also keeps suction strong.
Next, attach the wand by sliding it into the other end of the hose. Push the wand until you hear another click, locking it. This connection extends your reach and allows the vacuum to pull air properly through the hose.
Make sure the vacuum is unplugged before attaching the wand. For cordless models, switch the vacuum off first. This keeps you safe.
This avoids accidental starts, which can cause injury or damage. The hose usually adds 22 to 24 inches of reach.
Fitting Cleaning Heads and Tools
Choose the cleaning head or tool suited for your task. For example, a brush head works well on carpets while a flat tool fits under furniture. Align the head with the end of the wand or hose and push it in firmly.
You’ll know the tool is attached correctly when you hear a click. This ensures the tool stays in place during use. Some tools, like the mattress attachment, have angled designs to help clean specific surfaces.
Switch out tools by pressing their release buttons before removing them. Never pull tools off without unlocking them. Incorrect removal can break attachment points or the release mechanism.
Charging Before First Use (Cordless Models)
Plug in the charging dock to a power outlet near your cleaning storage space. Slide your cordless Dyson vacuum onto the dock. The vacuum’s charging light will turn on, indicating it’s charging.
Charge your model fully before first use for optimal battery life. This usually takes about 3.5 to 4.5 hours, depending on the model. Using the vacuum while partially charged reduces cleaning time and power.
Never remove the vacuum from the dock before the charging light shows it’s fully charged. Charging status is usually shown by solid or blinking LED lights on the vacuum or dock. Follow the user manual for specific signals on your model.
- Unbox carefully and verify all parts are present.
- Connect the hose to the vacuum body with a click.
- Attach the wand to the hose until it locks in place.
- Select and attach the desired cleaning head or tool firmly.
- For cordless models, place the vacuum on the charging dock.
- Charge the battery fully before the first use for best performance.
- Ensure all connections are secure before turning the vacuum on.
Charging Dyson Cordless Models and Managing Battery Life
Charge your Dyson cordless vacuum right after each use. Plug it into the charger or dock it on the wall mount if it has one. A full charge usually takes between 3 and 5 hours, depending on your model.
Once charged, expect about 30 to 60 minutes of cleaning time. Runtime depends on the suction power you use and the vacuum model.
Higher power settings eat battery life faster. So watch your usage to get the best out of it.
Don’t let the battery drain completely before charging. This can wear out the battery quicker over time. Recharge your vacuum right after you finish vacuuming.
Do this even if the battery still has some power left. This helps keep the battery in good shape.
Keep the charging contacts clean and dry. Dust or dirt can prevent a full charge. Wipe the contacts gently with a dry cloth every few weeks to maintain good battery connection.
Your vacuum might need a new battery if it won’t hold a charge well. Over time, batteries lose their ability to keep power. You can buy replacement batteries directly from Dyson or certified dealers.
A few simple maintenance steps also help keep your battery working well. Avoid exposing the vacuum to extreme heat or cold. Store it indoors at room temperature when not in use to protect the battery cells.
Some Dyson vacuums include a wall mount for charging and storing. This mount keeps everything neat and ready in one place.
Using this mount makes charging easy and keeps the vacuum ready to use. Make sure the mount is plugged in securely.
Always check your vacuum’s user manual for any model-specific charging tips or updates. Following Dyson’s guidance ensures your vacuum runs well and lasts longer. Battery care is a small step that helps you get the best performance day after day.
Adjusting Suction Power and Cleaning Modes for Best Results
Dyson vacuums let you adjust suction power and modes to fit your cleaning needs. You change suction by pressing a button or flipping a switch, depending on your model. Some newer Dyson vacuums adjust suction automatically.
They pick the best level for your floor type. This saves you from changing settings yourself.
Choosing the right cleaning mode matters because carpets and hardwood floors need different suction power. Higher suction works well for thick carpets or heavy messes.
Lower suction saves battery on delicate surfaces or light cleaning jobs. Always pick the cleaning mode before you start to avoid poor results.
Automatic modes take the guesswork out of suction power. On certain Dyson models, the vacuum senses the floor and shifts power. This helps extend battery life and keeps your floors safe from damage.
Your model may not have this feature. You’ll need to pick low, medium, or max suction manually.
| Cleaning Situation | Recommended Suction Mode | Why |
|---|---|---|
| Hardwood or tile floors | Low to Medium | Protects floors and saves battery |
| Low pile carpet or rugs | Medium | Effective dirt removal without wear |
| High pile or shaggy carpets | High/Max | Powerful suction lifts deep dirt |
| Small spills or minor messes | Low | Prevents overcleaning and saves energy |
| Pet hair and dander | Medium to High | Strong suction removes embedded hair |
Attach the right cleaner head for the surface. Use the hard floor cleaner for tiles or hardwood.
Pick the carpet head for deep cleaning rugs and carpets. Changing modes becomes easier when paired with the right head, improving results.
Clean filters regularly to keep suction strong; a clogged filter cuts power drastically.
Adjusting suction modes can also affect battery life. Lower modes keep the vacuum running longer on cordless models.
Max mode is best saved for tough spots or heavy dirt. Try starting with medium mode and raise suction as needed to balance cleaning power and runtime.
Maintaining Filters and Emptying the Dust Bin Effectively
Emptying the dust bin after each use keeps your Dyson vacuum working well. Doing this stops clogs that reduce suction power. Always handle the bin carefully to avoid stirring up dust.
Cleaning the filters every month is key to good vacuum performance. Dirty filters block air flow and strain the motor.
Your Dyson filters usually wash with water only, no detergents. Let them air dry for at least 24 hours before putting them back.
Wet or dirty filters can cause poor suction and sometimes strange smells. Replacement filters cost about $15 to $25, depending on your model. Check your user manual or Dyson’s website for filter details.
They show the exact type and care instructions for your vacuum. This keeps your vacuum running well.
Follow these steps to empty the dust bin and clean your filters safely and correctly:
- Turn off and unplug the vacuum or remove the battery if cordless.
- Hold the vacuum over a trash can to catch falling dust.
- Press the release button to open the dust bin’s base and let contents fall out.
- Wipe the bin with a dry cloth if you see dust buildup inside.
- Locate the filters, usually near the cyclone or dust bin; remove them carefully.
- Rinse filters under cold water until clear, then shake off excess water.
- Set filters on a clean towel to air dry fully for at least 24 hours.
- Reinsert dry filters and securely close the dust bin before use.
This simple routine keeps your vacuum running strong. Skipping filter cleaning or letting dust piles build can reduce suction within weeks. Dust may escape when the bin is full.
So emptying it often avoids this problem. Don’t wash filters with detergent or put them in a dryer. These actions can damage the filter.
Just rinse the filter with water. Following these steps helps your Dyson vacuum last longer with better cleaning power.
Troubleshooting Common Dyson Vacuum Issues Fast
Loss of suction is usually caused by blockages or dirty filters. Check the hose, wand, and brush bar for clogs or debris. Remove any dirt buildup and clear the airway for smooth airflow.
Inspect the filters regularly and wash them every 1 to 3 months. Let the filters dry completely for at least 24 hours before reinstalling. This keeps your vacuum running strong and prevents suction drops.
Start by checking the power connection or battery charge on your Dyson. For corded models, verify the plug and outlet. For cordless models, ensure the battery is seated correctly and fully charged.
Strange noises often mean an obstruction is blocking the brush bar. Check for hair or debris tangled around the brush.
Turn off the vacuum and remove any hair or threads wrapped around the brush bar. This restores smooth brush rotation.
Battery runtime problems happen when batteries age or lose capacity. Try fully charging the battery and test the runtime.
Running much shorter than usual? Buy a replacement battery from Dyson.
Here is a simple troubleshooting flowchart to follow:
First, check the vacuum power: is it on? No power? Check the plug or battery for issues.
Next, inspect for blockages in hoses, wand, and brush bar. Clear any you find.
Then examine the filters. Remove and wash them if dirty, drying fully before reinstalling. Look for tangled debris on the brush bar and clear it to restore spinning.
Finally, if battery life is poor, test charge time and runtime. Replace the battery if needed.
This checklist helps you fix most common Dyson issues quickly. Blockages and filter care keep suction strong.
Battery health ensures proper runtime. Regular checks avoid surprises during cleaning.
Tips for Using Dyson Vacuums on Different Surfaces and Situations
Dyson vacuums work well on many surfaces. But you need to change the tool or setting to get the best results.
Using the right attachment and power level saves time and protects delicate floors and fabrics. For stairs, upholstery, or tight spots, specific tools help you clean well without damage.
Cleaning Carpets and Rugs
Use the motorized brush bar attachment to clean carpets and rugs deeply. It has hard bristles that stir up dirt, pet hair, and dust trapped in fibers. Push the vacuum slowly and evenly to let the brushes do their job.
Set the suction to high for thick carpets. For thin or delicate rugs, lower the suction level. You can also switch to a floor tool with softer bristles.
These steps protect your rugs from damage. Avoid using strong brushes on sensitive rugs to keep them from getting damaged.
Do not forget to vacuum pet beds and fabric area rugs with the mini motorhead attachment. It handles stubborn dirt and hair without hurting the fabric.
Using on Hardwood and Tile Floors
Choose the flat floor tool designed for hard floors. This tool picks up dust and debris without scratching the surface. Vacuum around bases of furniture to get all the dust, even in corners.
Most Dyson models adjust suction automatically between hard floors and carpets. Use lower suction on fragile hardwood floors to prevent harm.
Alternatively, use a soft brush head for polishing. This keeps your floors looking shiny and safe.
- Turn off the brush bar if your vacuum has that option for hard floors
- Go slow near edges where dirt collects
- Use the laser dust detection feature on models like V15 to spot dust
- Vacuum with overlapping strokes for even cleaning
- Pick up fine debris with a soft dusting brush for delicate floors
Soft brushes help safely remove dust on finished wood without scratching. Hard bristles are too rough for polished floors.
Reaching High, Low, and Tight Spaces
The crevice tool works best for tight, hard-to-reach spots. Use the hose attachment on stairs or inside cars. Both help clean those narrow places well.
Extend the flexible crevice tool to clean inside vents and between car seats. It bends to fit tight angles.
Use the upholstery tool to clean sofas, mattresses, and cushions without soaking them. It removes dust and debris efficiently, leaving fabric fresh. Hold the vacuum close but avoid pressing hard to protect materials.
Remember: Avoid using the motorized brush on delicate upholstery because it may cause damage.
To clean ceilings or unreachable shelves, use the hose with an extension wand. This keeps you balanced while cleaning dust and cobwebs.
Dealing with Pet Hair and Upholstery
Dyson pet hair tools make removing fur easier on carpets and furniture. Use the mini motorized brush head with stiff bristles to grab hair embedded in fabrics. Brush slowly to pull out hair from pet beds and upholstery.
For delicate upholstery, pick the soft dusting brush instead of a motorized head. It sweeps away loose fur and dust without harming fabric or leather. Work in sections for better coverage.
- Start with the mini motorhead on rugs or cushions
- Switch to the soft dusting brush on lampshades or drapes
- Vacuum pet hair regularly to prevent buildup
- Use a hose extension for hard-to-reach corners
- Clear hair from brushes often to maintain suction
Your First Week: A Simple Dyson Operation Plan
Follow these easy steps to get comfortable with your Dyson vacuum. You’ll see clear signs that each step works.
- Day 1: Assemble your Dyson using the manual. Make sure all parts fit snugly without gaps.
- Day 1: Charge your cordless model fully. A steady green light means charging is complete.
- Day 2: Test suction settings on different floors. You’ll feel stronger suction on higher modes.
- Day 3: Attach the appropriate tool for carpets or hard floors. That tool should glide smoothly and pick up dirt well.
- Day 4: Empty the dust bin after each use. You should see dust and debris drop cleanly into the trash.
- Day 5: Check and clean the filter if needed. Hold the vacuum up to light to see if the filter is clear.
- Day 7: Troubleshoot any noise or suction issues. Try adjusting settings and reread the quick troubleshooting guide.
Frequently Asked Questions
What Is the Best Way to Clean the Low Reach Adaptor?
Wipe it with a damp cloth after use to remove dust. Avoid using water directly to protect the motor and electronics.
Can I Use My Dyson Vacuum to Clean Car Interiors?
Yes, it works well with all attachments, including tight car spaces. Use the narrow tools for seats and the brush for carpets.
How Do I Secure Dyson Attachments During Use?
Attachments click firmly onto the wand or cleaner head with a slight push. Make sure you hear the click to ensure it’s secure.
Can I Replace My Dyson Vacuum Battery Myself?
Yes, many Dyson models allow battery replacement with a screwdriver. Always buy compatible batteries and follow Dyson’s instructions.
Does the Mattress Tool Work on Upholstery Other Than Beds?
Yes, it cleans sofas and chairs well. Its angled design helps reach into fabric folds.
Are Dyson Vacuum Filters Dishwasher Safe?
No, Dyson filters should be hand-washed to prevent damage. Rinse under cold water until clean and air-dry completely before reinserting.
Final Thoughts
Your Dyson works best when you follow steps clearly and regularly. Keep checking your vacuum’s parts and battery to avoid issues. Try using your vacuum today on one floor and notice the difference it makes.


