How to Make Curls Using a Flat Iron: 8 Essential Tips for Perfect Waves
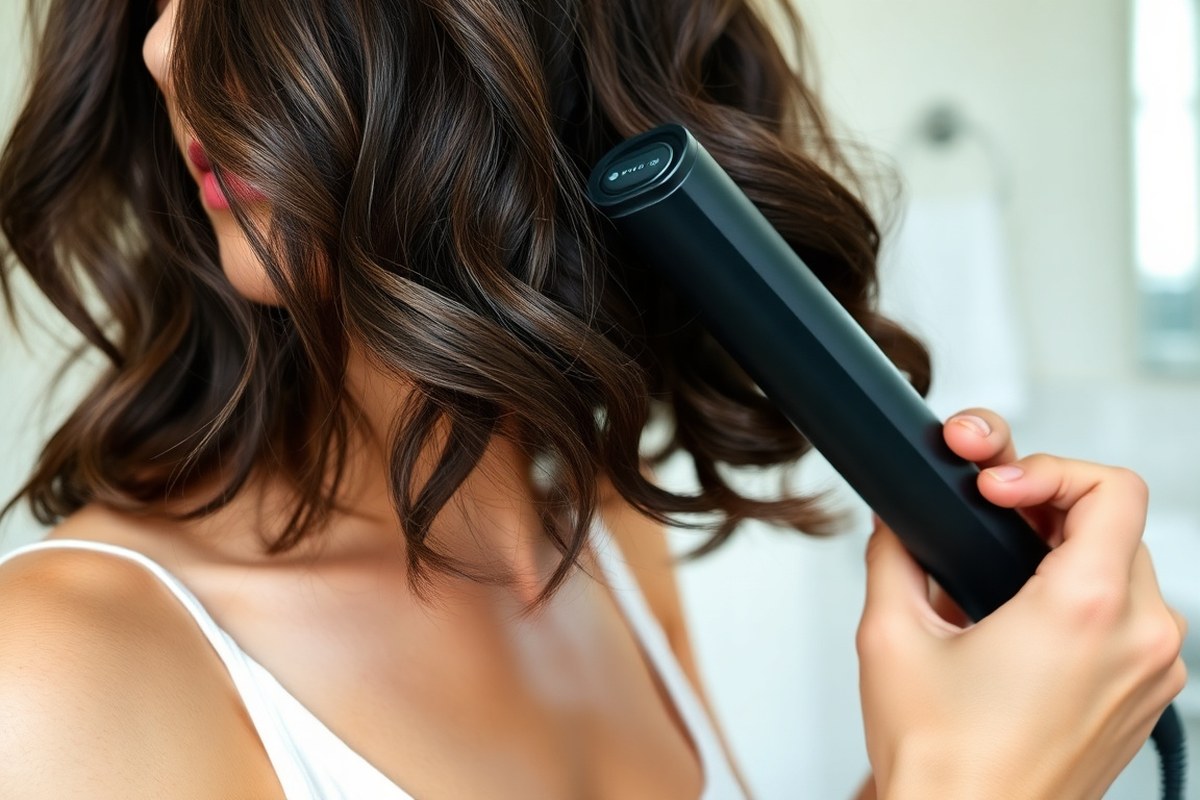
How to make curls using a flat iron is easier than you think. Clamp a small hair section with the flat iron. Twist it gently as you slide down.
Go slow to get the curl right. This method creates curls without needing a curling wand or rollers.
Begin with clean, dry hair. Pick a flat iron with round edges about 1 inch wide. This size helps create natural curls.
Smaller sections curl more easily and last longer. Twisting the iron 360 degrees outward helps add volume around your face.
Also, use the right heat for your hair type. Too hot can cause damage, and too cool won’t hold curls well. Setting the correct temperature keeps curls smooth and lasts longer.
Key Takeaways
- Use 1-inch plates with rounded edges for smooth, defined curls.
- Twist the flat iron 360° outward while sliding it down your hair.
- Work with small hair sections to get lasting, bouncy curls.
- Set temperature to 350, 370°F for medium hair, lower for fine hair.
- Start curling near mid-length to protect roots from heat.
- Alternate curl directions for a natural, dimensional look.
1. How to Curl Hair Using a Flat Iron Step-by-Step
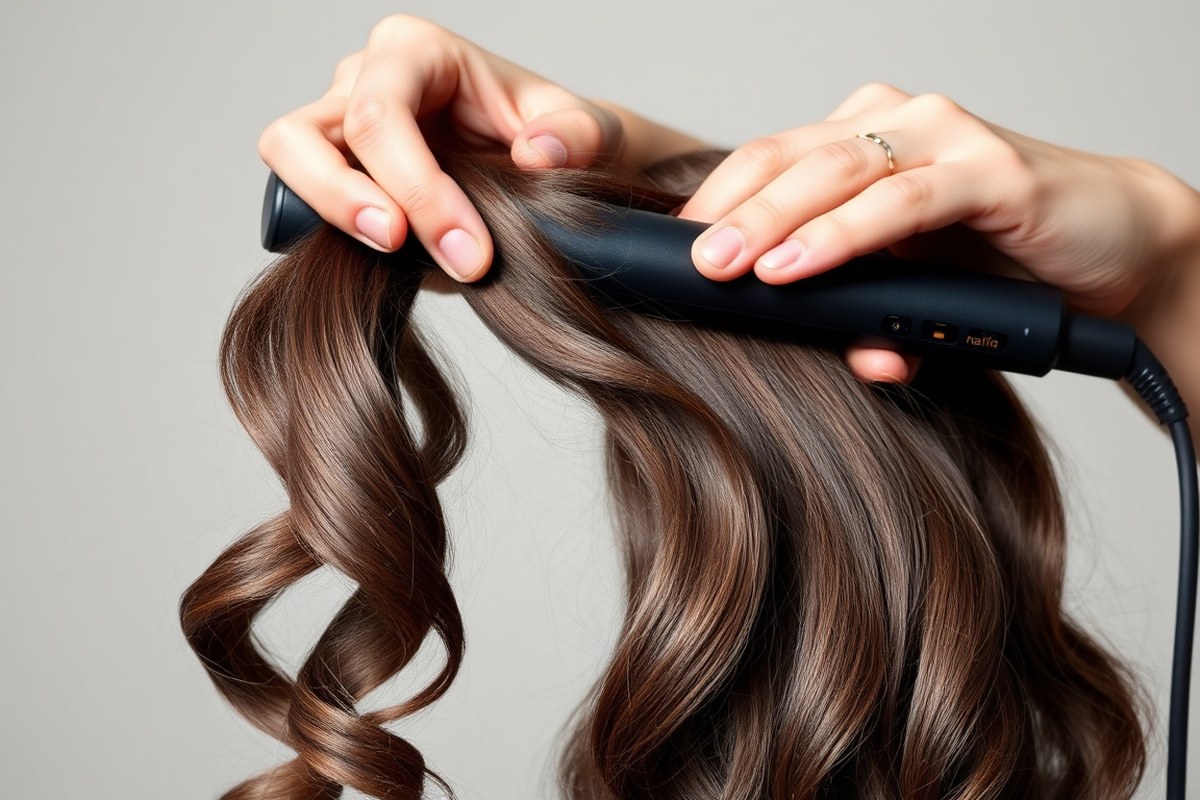
Curling hair with a flat iron takes steady hands and proper skills. Take 1-inch sections of dry hair and clamp near the roots.
Turn the iron 180 to 360 degrees away from your face, then slowly pull it down. Hold the iron for 5 to 8 seconds to form curls safely.
Preparing the Hair and Tools
Hair must be completely dry before you start curling. Damp strands can burn and curl unevenly, risking damage.
Spray a heat protectant evenly to reduce breakage. Look for products with copolymer-based formulas that cut heat damage by about 38% at 392°F.
Preheat your flat iron to a temperature suitable for your hair type. Use heat around 300°F for fine hair. For thick or coarse hair, use heat up to 400°F. Adjust based on your hair type.
Choose a flat iron with rounded plates and smooth edges for curling. This design helps prevent creases. It also lowers the chance of hair breakage.
Sectioning for Consistent Curls
Divide your hair into narrow, organized sections about 1 to 2 inches wide. Narrow sections help heat distribute evenly and create more polished curls. Use clips to hold other hair out of the way, making the process smoother and faster.
Start from the bottom layer and work your way up to the top. This method ensures every strand curls properly and you don’t miss spots. Proper sectioning also saves time and limits excessive heating of any one area.
Clamping, Twisting, and Gliding
Clamp the flat iron about one inch from the root of the section. Hold the iron firmly but don’t grip too tight to avoid dents in your hair. Twist the iron away from your face in one smooth motion.
Turn it 180 to 360 degrees depending on curl tightness. Move with control for best results.
After twisting, glide the iron down the hair slowly and steadily. Glide the flat iron down each section for 5 to 8 seconds. This timing helps curls stay well-defined and last.
Avoid overheating by not holding too long. Flip the iron horizontally for loose waves.
Turn it vertically for tighter ringlets. Changing angles creates different curl styles.
Finishing Each Curl
Release the section carefully from the iron and avoid touching the hot curls immediately. Hold each curl in your hand as it cools for 2 to 3 minutes. Or let the curl hang naturally during cooling.
This helps curls set well. Cooling curls locks in their shape.
This helps curls last longer. With the right product, curls can last up to 24 hours.
Repeat the process section by section, alternating the curl direction on adjacent sections. This alternates curl directions and adds volume, increasing fullness by as much as 40%. After curling, gently finger-style to reduce frizz.
Use a flexible-hold spray to keep curls longer. Avoid harsh brushing to keep curls neat.
- Start with clean, dry hair. Apply heat protectant evenly throughout.
- Divide hair into 1-2 inch sections and clip away unused hair.
- Clamp the flat iron about one inch from your roots on the section.
- Twist the iron 180-360 degrees away from your face to wrap the hair.
- Glide the iron down slowly, holding for 5-8 seconds to form curls.
- Release the curl carefully, letting it cool in your hand or hang free.
- Repeat for all sections, alternating curl directions for more volume.
2. Choosing the Best Flat Iron and Heat for Your Hair Type

Choosing the right flat iron depends on your hair type and curling goals. Pick ceramic plates if you have fine or color-treated hair because they keep the heat steady.
Titanium plates heat quickly and suit thick or coarse hair. But their temperature swings can cause uneven curls.
Plate size also matters. One-inch plates work best for curling because they can wrap hair easily and create smooth curls.
Wider plates are better for straightening, but they may make curls uneven. Look for a flat iron with rounded edges or curved plates to make curling easier.
| Factor | Problem | Solution |
|---|---|---|
| Plate Material | Titanium temp can fluctuate ±20°F, causing curls to vary | Use ceramic plates for ±10°F heat stability |
| Sectioning Effects | Large hair sections increase uneven curls by 3 times | Divide hair into 1-inch sections with clips |
| Heat Settings | Temps above 400°F create stringy spots in 32% of curls | Match temperature to hair type between 250°F and 375°F |
Most flat irons work for curls if plates are one inch wide. The sides must be rounded to help shape curls better. This shape helps avoid pinch marks while curling your hair.
Setting the correct temperature is key. Fine hair curls best around 300°F to prevent damage. Medium hair holds curls well between 350°F and 370°F. Coarse hair usually needs 370°F to 400°F to form strong curls.
The wrong temperature or plates can ruin curls. Too hot or unstable heat will create uneven or frizzy curls. Too low heat won’t hold the shape.
Ceramic irons hold a steady temperature better than titanium. So they’re safer for fine or fragile hair.
Always start curling at the lowest temperature that still shapes your hair well to prevent damage.
3. Four Popular Curl Styles You Can Create with a Flat Iron
You can create many curl styles with one flat iron by changing your technique. Each style uses a different grip, section size, and twist of the iron. These four styles cover tight spirals, beach waves, loose waves, and bouncy curls.
Creating Tight Spiral Curls
Tight spiral curls look springy and neat. To get small, defined curls, work with small sections about 1 inch wide. Using higher heat helps set tight curls, especially for thick hair.
Set your flat iron to 380°F, 400°F for thick hair, or 350°F, 360°F for fine strands. Hold the iron vertically.
Clamp it close to the root. Twist the iron 360° away from your face while gliding down slowly.
Follow these steps for spiral curls:
- Divide hair into 1-inch sections for tighter curls.
- Heat the flat iron to the right temperature for your hair type.
- Clamp the flat iron at the root of a section.
- Rotate the iron a full 360° outward while moving slowly down the hair.
- Release the curl carefully at the end.
- Repeat for all sections, alternating directions if you want volume.
Forming Casual Beach Waves
Beach waves have that laid-back, tousled look. Clamp larger sections loosely and only twist the iron halfway. Alternate the wave direction between sections to keep the style natural and textured.
Start near the scalp and clamp the iron. Twist it 180°. Glide down at a steady, moderate speed.
This method takes less time and makes hair look easy and voluminous. Adding texturizing spray after curling can boost the beachy effect.
Steps to get beach waves:
- Section hair into 2-inch wide pieces.
- Clamp the flat iron near the scalp but not tightly.
- Rotate the iron 180° away from your face.
- Slide the iron down the hair section steadily.
- Alternate curling direction on the next section.
- Finish with a light texturizing spray for volume.
Making Loose Natural Waves
Loose waves look soft and easygoing, like you skipped heat styling. Use bigger sections and avoid twisting the iron fully. Glide slowly without turning the iron all the way; this helps shape gentle curves.
Lower your temperature to 350°F or below for fine or medium hair. This reduces heat damage and keeps waves smooth. Loose waves work great for longer hair and casual styles.
Try this method for soft, natural waves:
- Separate hair into 2- to 3-inch sections.
- Clamp flat iron near roots without twisting.
- Slowly glide the flat iron down the section.
- Let hair cool without touching to let waves set.
- Apply minimal product to keep waves soft.
Polished Bouncy Curls Technique
Polished bouncy curls look smooth, voluminous, and defined. Section hair smaller and clamp the iron fully for a strong curl shape. Turn the iron halfway (about 180°) as you glide to create springy curls.
Work in small sections, twisting the flat iron to wrap hair around it more firmly. Finish with a holding spray to keep curls bouncing all day. This style suits formal looks and adds shine.
Here’s how to make polished bouncy curls:
- Part hair into 1- to 1.5-inch sections.
- Clamp full section near the roots firmly.
- Turn the flat iron 180° while gliding down.
- Control the speed to let curls set well.
- Repeat section by section for uniform curls.
- Finish with holding spray to lock curls in place.
4. How to Protect Your Hair from Heat Damage When Curling
Protecting your hair from heat damage starts with a good heat protectant. Choose a thermal spray or cream designed for heat styling. This adds a protective layer, reducing moisture loss and shielding hair from direct heat.
Adjust the flat iron temperature based on your hair type. For fragile or color-treated hair, keep temperatures below 350°F. Fine or medium hair curls best around 300°F to 350°F. Thicker, coarser hair may handle 375°F to 400°F.
Don’t hold the flat iron on one section too long. Around five to eight seconds works for fine or medium hair. Thicker hair curls last about ten to twelve seconds.
Don’t hold the iron longer. This helps you avoid hair damage.
- Apply heat protectant evenly before curling
- Use a flat iron with ceramic plates and rounded edges
- Set heat according to your hair’s condition and type
- Section hair into manageable sizes for even heat
- Hold the flat iron on each section no longer than 7, 10 seconds
- Avoid clamping too tightly to prevent flat spots
- Let curls cool before touching to set the shape
Using a flat iron with rounded, ceramic plates helps curls look smooth and natural. Keep your sections loose when wrapping hair around the iron to avoid tight kinks. Avoiding holding the iron still prevents flat spots and keeps your curls bouncy.
Skipping heat protection or using too-high temperatures can lead to dry, brittle hair or breakage. Keep your iron moving and stay mindful of your hair’s limits. This way, you’ll get beautiful curls and keep your hair healthy for the long term.
5. Tips for Making Your Flat Iron Curls Last Longer
Let your curls cool completely before you touch or style them. Cooling closes hair cuticles and locks in curl shape. This makes curls last longer.
It can boost their hold by up to 68%. Don’t brush or shake warm hair.
This softens curls. They lose their bounce this way.
Use a flexible hold hairspray after your curls cool down. Spray from about 6 to 8 inches away to avoid stiffness while still setting the curls. A spray that holds without crunching your hair keeps curls bouncy and touchable.
Expect to spend about $8 to $20 on a good flexible hold spray. This spray works well for curls.
Prep your hair before curling with products designed for hold and heat protection. A lightweight mousse or curl-improving cream applied to damp hair can improve curl shape and resilience. These sprays cut down on frizz and heat damage.
Heat can make curls droop faster. They also protect hair fibers.
Avoid curling large sections. Smaller sections warmed for about 6 to 8 seconds help curls form tightly and last longer. Press tight hair firmly in the flat iron plates.
This makes defined curls. These curls keep shape for hours. Flat irons that heat evenly, like a 1-inch model, support this method well.
Refreshing curls during the day is helpful, but do it carefully. Spray a light mist of water or curl refresher on curls. Then, scrunch gently.
This wakes up the curl shape. Avoid reapplying heat too many times because repeated heat weakens curls and causes dryness.
Don’t hold the flat iron on hair for more than eight seconds. This avoids heat damage. It keeps curls from going limp.
6. Adjusting Curling Techniques for Different Hair Lengths
Short hair needs smaller sections about ¼ inch wide to curl well. Use a lower heat setting around 300°F to avoid burning such delicate strands. Clamp the flat iron at the root.
Twist it once around. Glide it down to create tight, defined curls that hold better on short hair.
Medium hair works best with ½-inch sections, allowing you to balance tension and ease of curling. Heat between 320°F and 360°F usually gives good results without causing damage.
Wrap the flat iron around the hair twice for looser curls. Twist the iron smoothly while sliding down the hair shaft.
For long hair, take larger sections 1 inch or more across to manage the extra length. You need higher heat, about 350°F to 380°F. Long hair is thicker and harder to curl completely. Twist the flat iron more times along the strand.
Move slowly to spread the heat evenly. This makes loose waves or big curls that last longer.
Changing your twist technique also depends on your hair length. Shorter hair curls best with a single quick twist.
Long hair benefits from multiple smaller twists as you glide down. This keeps the curls uniform and prevents tangles or uneven waves.
Be gentle if your hair feels dry or damaged. Use lower heat and smaller twists to reduce breakage risk.
For very fine or damaged hair, use smaller sections. Avoid holding the flat iron on each strand too long.
7. Common Curling Mistakes and How to Fix Them
Curls looking uneven or too tight often happen because of speed and heat errors. Moving the flat iron too fast leaves loose curls. Too slow or too much heat curls can look stiff or cause damage.
To fix tight or uneven curls, slow your flat iron glide. Hold each section for about 5 to 7 seconds. This helps curls form more evenly and last longer.
Use a flat iron with rounded edges for smooth curls. Hold it horizontally to get bouncy waves. Hold the iron vertically for softer curls.
Curls dropping quickly or frizzing means hair was too damp. Or it may lack the right products to set. Make sure hair is dry and products are applied properly.
Hair needs to be dry and protected with heat spray before curling. Finishing with a light hold hairspray can help curls bounce longer.
- Don’t use very high heat on fine or damaged hair, set between 300°F and 350°F
- Keep sections about 1 inch thick for even heat distribution
- Work with dry hair only, moist strands drop curls fast
- Use heat protectant every time before curling
- Avoid clamping too tightly or you’ll get dents
- Don’t reheat the same section too many times
- Let curls cool on your fingers or clips before brushing
Heat damage happens when the iron stays too long on one spot or heats too high. Using medium heat and moving smoothly reduces breaks and frizz. Test on a small piece and adjust heat if curls look dry or break.
Frizz is also from skipping protection or brushing curls before they cool. Let curls set at least 5 minutes before styling further. Using moisture-rich leave-in conditioners and finishing oils can keep strands smooth and shiny.
8. Step-by-Step Guide to Loosening Tight Flat Iron Curls
To loosen curls made with a flat iron, gently separate them. Use your fingers or a wide-tooth comb for best results. Take your time to avoid pulling too hard.
You can add a lightweight spray to create softer movement. You can touch up curls with a little heat on the edges.
This reshapes tight curls into waves gently. It keeps damage to a minimum while softening the look.
Using Your Fingers or Brush to Soften Curls
Wait until your curls have fully cooled before touching them. This helps the curls hold better while you work on loosening them.
Use your fingers or a wide-tooth comb to carefully separate the curls. This breaks up tight curls into more natural waves without frizz.
After finger-combing, shake your head lightly to boost volume. This adds fullness without ruining the curl pattern. It keeps your curls defined and bouncy.
Applying Light Hold Spray or Texturizer
Choose a lightweight styling spray or texturizer that won’t weigh your hair down. This helps the curls move freely.
Spray a small amount evenly over your hair after loosening the curls. Then run your fingers through to spread the product gently. The spray also shields hair from humidity and keeps curls from re-tightening during the day.
Gentle Heat Touch-Up
Set your flat iron to a lower temperature, around 250°F to 300°F. This avoids extra heat damage while reshaping curls. Hold the flat iron on the outer edge of each curl for 2 to 3 seconds. Slowly slide it to add slack and change the curl to a wave.
Focus on ends first to loosen them quickly, then soften the full curl shape as needed. For best results, follow these steps to safely loosen tight flat iron curls:
- Make sure curls are completely cooled to lock in shape.
- Separate curls by gently running your fingers or a wide-tooth comb through.
- Spray a light hold or texturizing spray evenly on the hair.
- Run fingers through hair again to spread the spray without clumping curls.
- Heat your flat iron to a lower temperature (250°F to 300°F).
- Quickly slide the flat iron on curl edges for 2 to 3 seconds at a time.
- Repeat on ends and middle of curls until you get soft waves.
- Finish with a light mist of hairspray if you want hold without stiffness.
Warning: Avoid using high heat when reshaping curls to prevent heat damage.
Step-by-Step Action Plan to Master Flat Iron Curls
Follow these steps to get curls using a flat iron that last and look great.
- Before you start: Wash and dry your hair completely. Smooth, dry hair holds curls better.
- Heat your flat iron: Set it to the right temperature for your hair type. Hair feels warm but not hot to the touch.
- Section your hair: Divide it into small sections. You should be able to curl each section easily without tangles.
- Curl each section: Clamp the flat iron close to your roots. Twist it away from your face. Slowly glide the iron down the hair length. The hair forms a smooth curl as it slides.
- Apply a light hairspray: Spray each curl right after styling. You’ll notice the curls stay in shape without stiffness.
- Cool your curls: Let them rest for 5 to 10 minutes before touching them. This helps curls set firmly.
- Loosen curls if needed: Run your fingers through curls gently to soften tight spirals. You’ll get a natural, bouncy look.
- Maintain curls overnight: Wrap your hair in a scarf or use a loose bun. Curls survive longer with less friction.
Frequently Asked Questions
Can You Use a Flat Iron on Wet Hair to Make Curls?
It’s best to dry your hair completely before curling. Curling wet hair can cause damage and uneven curls.
How Do You Create Volume at the Roots While Curling with a Flat Iron?
Lift small sections at the roots and angle your iron upward. This adds lift and prevents flat curls.
What’s the Best Way to Clean Your Flat Iron After Curling?
Unplug it and wait for cooling. Use a damp cloth or rubbing alcohol to remove product buildup gently.
Can You Use a Flat Iron to Curl Very Short Hair?
Yes, but curls will be tighter and smaller. Use thinner sections and lower heat for short hair.
Is There a Recommended Hair Product to Apply Before Curling with a Flat Iron?
Use a heat protectant spray to reduce damage. A light texturizer or volumizer helps curls hold better.
How Often Can You Safely Curl Your Hair with a Flat Iron?
Limit to 2-3 times per week to avoid damage. Always apply heat protection and condition regularly.
Wrapping Up
You can make curls with a flat iron by using the right heat and technique. Protect your hair by using a heat protectant every time. Try curling one section of hair today to see how it feels and looks on you.