How to Clean a Blow Dryer Properly: Step-by-Step Guide for Long-Lasting Performance
Knowing how to clean a blow dryer keeps it working well and safe. Dust and hair block the air vents, making the dryer heat up and slow down.
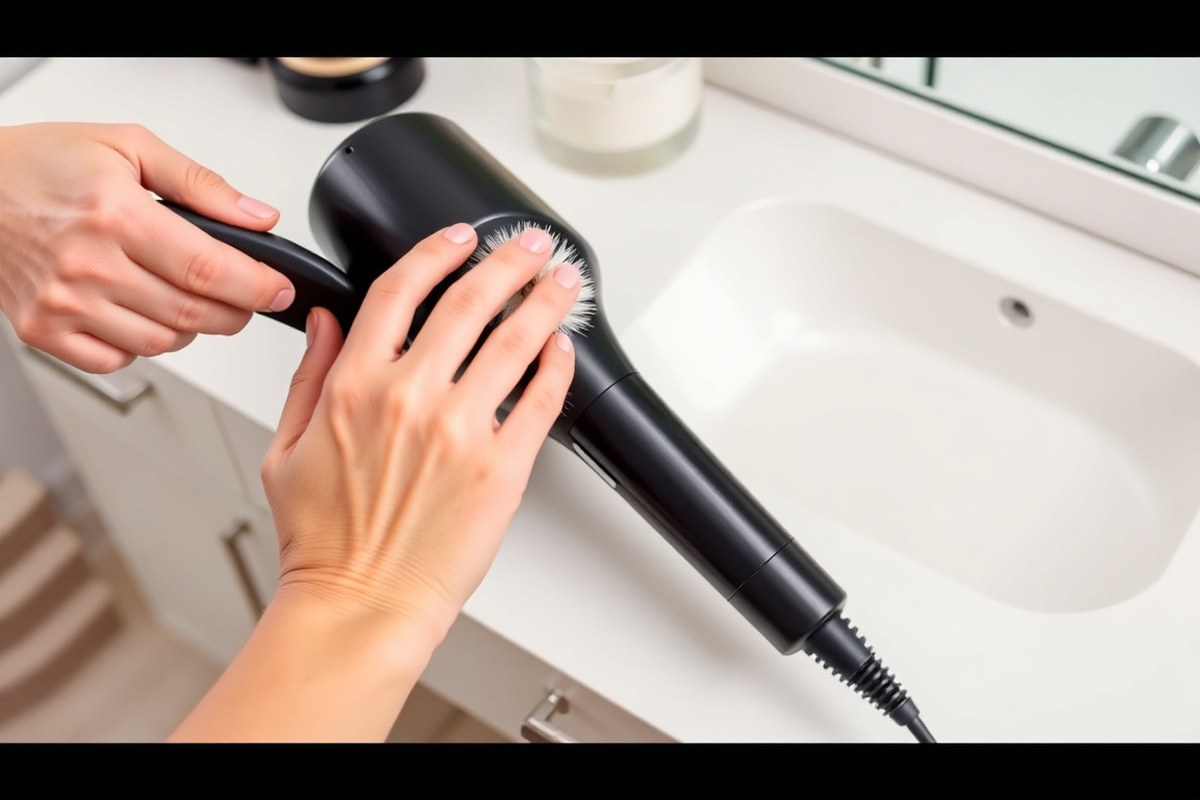
To clean yours, first unplug it and remove the filter if it has one. You want to clear out dust gently with a soft brush or vacuum.
Next, wash any detachable parts like the filter or nozzle with warm, soapy water. Let these parts dry fully before putting them back, which can take up to a day.
Avoid using sharp tools to clean vents since they might break the dryer’s covers. By cleaning every 2-3 months, you help your dryer last longer and avoid burning smells.
Key Takeaways
- Unplug your blow dryer before any cleaning starts.
- Brush or vacuum dust from vents and filter monthly.
- Soak removable parts in warm, soapy water for 5, 10 minutes.
- Let all parts air dry completely before reassembly.
- Use a soft cloth and mild cleaner to wipe the exterior.
- Clean attachments with a vinegar-water mix for 15 minutes to remove smells.
How to Clean a Blow Dryer Step by Step

Cleaning your blow dryer carefully keeps it working well and prevents safety risks. You’ll want to start with unplugging it and letting it cool down completely. Removing the filter or any detachable parts helps you clean inside better and avoids damage.
Use a soft brush to clear out dust and hair from the filter and vents. When the filter is removable, rinse it gently and dry it fully before replacing. Drying your blow dryer thoroughly after cleaning stops moisture from causing problems.
- Unplug and cool your blow dryer. Never clean it while plugged in to avoid electric shock.
- Remove the filter. Twist off the lint filter at the back or unscrew if needed.
- Brush out dust and hair. Use a soft toothbrush or small brush on the filter and air vents.
- Rinse the filter under lukewarm water. Only do this if the manual says it’s safe to wet the filter.
- Let the filter dry completely. Leave it to dry on a clean towel for several hours before reassembling.
- Wipe the blow dryer’s exterior. Use a damp cloth to clean the outside shell and handle.
- Check the nozzle and vents with compressed air. Blow out any dust you can’t reach with the brush.
- Reassemble the blow dryer. Make sure every part is dry before attaching the filter and any covers.
Trying to force a stuck filter risks breaking it. So be gentle or check your manual.
Should your filter not come off, vacuum it carefully in place. Make sure no water or moisture stays inside before plugging the dryer back in.
Tools and Materials Needed for Blow Dryer Cleaning

You need a few simple tools to clean your blow dryer safely. Make sure the dryer is unplugged before you start to avoid electric shock. Avoid using water on the inside parts to prevent damage.
Some tools can scratch or break your dryer, so choose soft and gentle materials. Household items like vinegar can help clean the outside but never pour liquids inside. A soft cloth or brush is perfect for removing dust without harming the dryer’s surface.
- Soft-bristle toothbrush or small brush
- Microfiber or soft cotton cloth
- Mild cleaning solution or half vinegar, half warm water mix
- Compressed air canister (optional for vents)
- Toothpick or wooden stick for tight areas
- Can opener or small screwdriver (for removable filters)
- Vacuum cleaner with brush attachment (optional)
The soft-bristle brush loosens dust and hair from vents without scratching plastic. Use a microfiber cloth dampened with vinegar mix for the dryer’s outer shell. The mild solution cleans without harsh chemicals.
Compressed air can blow dust from hard-to-reach spots. It works well without opening the dryer. This avoids deeper disassembly if you want to keep things simple.
Some filters come off with a small screwdriver. A toothpick gently removes lint from vents. Avoid metal scrapers or anything that can break inside.
A clean blow dryer looks free of dust and hair and works quietly without strange smells. Taking 10 to 15 minutes gives the best results without rushing and risking damage.
Never use water or soaking liquids inside the blow dryer. It can cause electrical faults.
How Often Should You Clean Your Blow Dryer and Why
Cleaning your blow dryer once a month helps keep it working well and lasts longer. Dust, lint, and hair build up on the filter and vents over time. This buildup blocks airflow and makes the dryer overheat or lose power.
Overheating happens when dirt clogs the vents or filter. Your blow dryer may shut off automatically to avoid damage.
A burning smell often signals lint buildup inside the dryer. Cleaning stops these problems and protects the internal parts.
Skipping regular cleaning may cause weak airflow or no power at all. Dirt buildup forces the motor to work harder, which shortens its life.
In extreme cases, overheating damages the dryer’s wiring or fuse. Repairing or replacing it costs more than a simple cleaning.
If you use your dryer daily, clean the filter and vents every 2 to 4 weeks. For lighter use, check the filter monthly.
Look for visible dust or lint and clean whenever you see buildup. Busy places like salons need cleaning even more often.
Make cleaning quick by unplugging the dryer and removing the back cover. Brush or vacuum out dust and hair carefully.
After cleaning, reattach the cover and test the dryer by running it for a few minutes. It should blow strong air without overheating or odd smells.
Cleaning Different Types of Filters and Air Vents
Cleaning your blow dryer’s filters and air vents keeps it running well and safe. Each type of filter needs a slightly different way to clean it. You can also clear vents even if the filter won’t come off.
Removable Twist-Off Filters
Twist-off filters usually look like a small disk on the back of your dryer. Turning it counterclockwise will take it off.
Brush away dust first. Then wash the filter with warm water and mild soap, if the manual allows. Make sure it dries completely before putting it back.
These filters can trap hair and lint. Clean them at least once a month, or more if you have pets.
Fixed or Snap-On Filters
Some dryers have filters that snap on and off easily but don’t twist. Press the tabs or pull gently to remove them.
Your filter might not come off. Use a soft brush or vacuum hose to remove dust. You can also wipe it with a cloth slightly dampened with rubbing alcohol.
Don’t soak snap-on filters in water unless the manual says it’s safe. Alcohol cleans and dries quickly without damage.
Cleaning Air Intake Vents and Internal Areas
Air intake vents connect to the outside of your hair dryer’s motor. They can get clogged by dust and hair.
Use a vacuum cleaner with a hose attachment. Suck up dust around the vent opening.
Also clean inside the vent opening as much as possible. A soft brush helps loosen stuck debris.
Hold the cooler settings button for about 5 seconds while the dryer is off. The fan will spin fast to blow out dust inside.
When to Use Compressed Air or a Vacuum
Compressed air works well for filters with metal mesh or fixed types you can’t remove. Blow dust out gently from all sides.
A vacuum cleaner is safer when dirt is heavy or close to small parts. It removes dust without risk of pushing debris further inside.
Always unplug your dryer before using air or vacuum tools. After cleaning, wipe surfaces with a cloth dampened with rubbing alcohol. Let it fully dry before using.
Here’s a quick look at features for cleaning your dryer filters and vents:
| Filter or Vent Type | How to Remove | Cleaning Tool | Cleaning Tips |
|---|---|---|---|
| Removable Twist-Off Filters | Turn counterclockwise to remove | Brush, soap and water | Dry completely before reinstalling |
| Fixed or Snap-On Filters | Press tabs or pull gently | Vacuum, soft brush, damp alcohol cloth | Avoid soaking unless manual allows |
| Metal Mesh Filters | Usually removable | Vacuum cleaner, compressed air | Use gentle air bursts, avoid water |
| Air Intake Vents | Not removable | Vacuum hose, soft brush, compressed air | Use cooler button to run fan for self-cleaning |
This approach avoids pushing dust deeper inside your dryer. Using the right tools keeps your blow dryer clean and working longer.
Drying and Reassembling Your Blow Dryer Properly
Never reassemble your blow dryer until all parts are completely dry. This step is important to avoid short circuits or motor damage. Let each component, especially the filter, dry fully in air before putting them back together.
Air Drying the Filter Fully
The filter is often the dampest part after cleaning. So it needs time to air dry. Put it on a dry towel in a well-ventilated spot.
Keep it away from direct sunlight and heat sources. Let it air dry naturally. This process usually takes about 12 to 24 hours depending on humidity and room temperature.
Don’t use a hair dryer or heater to dry the filter fast. Rushing this step can damage the filter. Let it dry on its own.
Excess heat can warp plastic parts or loosen glue inside the filter. Allowing natural air drying prevents damage and ensures no moisture remains inside.
Avoiding Moisture Inside the Motor
Moisture entering the motor can cause rust and electrical shorts. After cleaning, gently wipe the outer casing but avoid wetting the motor area. Leave the motor housing to dry in an upright position so air can circulate freely.
Let the blow dryer sit for at least a few hours before reassembly. Cleaning with damp cloths means the filter will take longer to dry.
Plan for extra drying time before using the dryer. Never power on the dryer if you suspect any wetness inside the unit.
Correctly Aligning and Locking the Filter Cover
After everything is dry, carefully place the filter back onto the dryer. Make sure it fits snugly in its slot without forcing it. Proper alignment helps the motor breathe easier and keeps dust out.
Secure the filter cover or back cap firmly, but don’t overtighten screws or clips. Tightening too much can crack the plastic or jam the cover.
This may cause air leaks or the dryer to malfunction. Tighten parts gently but firmly.
Follow these steps to dry and put your blow dryer back together safely:
- Remove the filter carefully and place it on a dry, absorbent cloth.
- Leave the filter to air dry for 12 to 24 hours in a well-ventilated room.
- Wipe the dryer’s exterior and motor housing with a dry cloth only.
- Position the blow dryer upright to let internal parts dry thoroughly.
- Check the filter and dryer are fully dry before starting reassembly.
- Fit the filter back onto the dryer, aligning it properly with the slots.
- Lock the filter cover into place without using excess force.
- Inspect the assembled dryer before use to confirm no parts are loose.
Don’t plug in or run the dryer until the filter is totally dry. Make sure all parts are dry to avoid damage. Never use the dryer when wet inside. Running it damp risks electric shock and permanent damage.
Common Mistakes to Avoid When Cleaning a Blow Dryer
Using metal tools to clean a blow dryer can easily cause damage. Metal can scratch or break delicate parts inside, especially the fan or heating elements. Instead, use cotton swabs or soft brushes to gently remove dust and debris.
People often make the mistake of using water on the interior parts. Water and electricity don’t mix and adding moisture inside can cause short circuits or permanent harm.
Wipe the exterior with a damp cloth. But keep the interior dry and use dry methods for internal cleaning.
Another common error is not unplugging the blow dryer before cleaning. This risks electric shock and could also harm the dryer’s motor. Always make sure the unit is unplugged and completely cool before you start.
- Avoid tight cord wrapping that strains wires and causes breaks
- Never spray cleaner directly inside the dryer; use a cloth instead
- Don’t push hard on vents or filters, which can bend or crack them
- Avoid using sharp objects that can damage internal wiring
- Make sure the dryer is cool before cleaning to prevent burns
Pressing too hard when cleaning can leave dents or block air flow. Use gentle motions, especially around vents and filters. You want the air to move freely for the best drying power.
Skipping regular cleaning is a big mistake that makes your dryer work harder. Clogged vents can cause overheating or shorter life. Cleaning every few weeks lets your dryer run well and safely.
How to Maintain Your Blow Dryer Between Deep Cleanings
Keeping your blow dryer clean between deep cleanings is simple and saves time. You can do quick checks and light cleaning without taking it apart. These daily or weekly steps stop buildup and keep your dryer working well.
Wiping Exterior Surfaces Regularly
Use a soft, damp cloth to wipe the outside of your blow dryer. This removes hair, dust, and product smudges that can collect. Avoid harsh cleaners that might damage the finish.
Try to wipe the handle, air intake, and barrel after every few uses. This stops sticky buildup and keeps your dryer looking clean. A quick wipe takes only a minute but helps a lot over time.
Using the Cool Shot to Blow Out Loose Dust
Plug in your dryer. Switch to the cool setting. Air will blow out through the vents.
Your finger or a small brush can dislodge dust first. Run this for 30 seconds to a minute.
This method pushes out loose lint and hair without opening the dryer. It’s a fast way to clear airflow and stops clogs that slow drying. Do this weekly, especially if you use your dryer daily.
Cleaning Attachments Like Nozzles and Diffusers
Remove any attachments and wash them with warm, soapy water. Rinse them well and dry completely before putting them back. This removes product residue and dust that stick to these parts.
Keep attachments clean by washing them every one to two weeks. Here’s a short checklist for daily or weekly care:
- Wipe blow dryer’s exterior with a soft cloth
- Use cool air to blow out loose dust and lint
- Remove and wash nozzles or diffusers with soap and water
- Air dry attachments completely before reattaching
- Check and clean air intake for blockages
Following these steps helps avoid lint buildup effectively. It also reduces the need for deep cleaning and keeps your dryer working at full power.
When to Seek Professional Help or Replace Your Blow Dryer
Strong smells, overheating, or odd noises signal your blow dryer needs urgent cleaning or professional service. These issues usually mean dirt or hair buildup inside is blocking airflow.
Stop using the dryer if you see these signs. Clean it or get help right away.
Try cleaning the filter and vents first to remove blockages causing heat buildup or strange smells. Stop using the dryer if it overheats or smells burnt still.
The issue may be internal damage or worn parts. That’s when professional repair or replacement is necessary.
Power issues like not turning on often come from electrical problems. A broken switch may also cause power cuts. Cleaning won’t fix these.
Test the power cord and switch with a multimeter. Or have a licensed technician check the wiring.
Replace your blow dryer if repairs cost almost as much as a new one. Good models usually cost $50 to $100. Replace the dryer if it stays too hot after cleaning.
Also replace if cooling fans don’t run right. This suggests faulty internal parts that are unsafe or inefficient to fix.
Have a simple rule: clean first and watch for improvement. Think about repair or replacement if the problem doesn’t go away.
Repair can save money but only if the fix is minor and done by a pro. Otherwise, a new dryer often lasts longer and uses less energy.
Always unplug your blow dryer before inspecting or cleaning to avoid electrical shock.
Step-by-Step Action Plan to Clean Your Blow Dryer
Follow these simple steps to clean your blow dryer and keep it working well. Each step helps you spot if the cleaning worked.
- Before you start: Unplug your blow dryer and let it cool. This keeps you safe and avoids damage.
- Day 1: Remove and clean the filter with a brush or cloth. You’ll see less dust and hair after this.
- Day 1: Use a soft, dry cloth to wipe the outside of your dryer. It should look clean and shiny.
- Day 1: For stubborn dirt inside vents, use a cotton swab or compressed air. Air flow will improve when done well.
- Week 2: Check your blow dryer filters and vents again for dust build-up. Repeat cleaning if needed to keep it clear.
- Month 1: Do a full deep clean using the detailed steps you learned. Your dryer will feel cooler and work better.
- Every month after: Keep wiping the outside and brushing away dust. This prevents big build-ups later on.
Frequently Asked Questions
How Do I Clean the Interior of My Blow Dryer Safely?
Unplug the dryer. Take out the back filter. Use a soft brush to clear dust and hair.
Avoid using water inside, as moisture can damage the electrical parts. Use compressed air to blow out stubborn dirt from vents for better airflow.
How Do I Clean Electric Hair Brushes Properly?
Soak the brush in warm water with a dryer sheet to break down product buildup. Use a cloth to wipe the bristles after soaking. Avoid soaking electric parts to prevent damage.
Can I Put Vinegar Inside My Blow Dryer?
No, avoid putting vinegar or any liquid inside the blow dryer. Moisture can harm internal components and cause short circuits. Stick to dry methods like brushing and blowing with compressed air.
How Do I Disinfect My Hair Comb Effectively?
Soak the comb in warm soapy water. Add vinegar or rubbing alcohol. Leave it for 10 minutes.
Rinse well and dry completely before use. This kills germs and removes styling product buildup safely.
How Often Should I Clean the Vents on My Blow Dryer?
Clean the vents about once a month if you use the dryer regularly. This prevents lint buildup that can overheat the dryer and reduce performance. Simple brushes and compressed air work well.
Can Cleaning My Blow Dryer Improve Hair Health?
Yes, regularly cleaning stops dust and buildup from blowing onto your hair. This protects hair from damage and helps the dryer work efficiently. Clean tools mean better styling results.
Final Thoughts
Cleaning your blow dryer regularly keeps it safe and working well. Start with basic cleaning today to see quick results. You’ll enjoy using your dryer longer and with less worry.