How Can I Make Shampoo at Home: 8 Essential Steps for Safe, Effective DIY Hair Care
How can I make shampoo at home? You can whip up a simple shampoo using natural ingredients.
Start with a gentle base like liquid castile soap. Then add oils, herbs, or essential oils to suit your hair type and needs.
Making your own shampoo helps you avoid harsh chemicals and control what touches your scalp. Mix small batches to test how your hair reacts. Always check ingredients for allergies first.
Do a patch test on skin. Only use fully if no reaction appears.
Use clean tools and containers to keep your shampoo safe from bacteria. Store homemade shampoo in the refrigerator since it doesn’t have preservatives.
This keeps it fresh for about 4 to 6 weeks. So make just enough to last you a month.
Key Takeaways
- Choose a natural soap base like liquid castile soap for homemade shampoo.
- Add essential or herbal oils to match your hair type and needs.
- Test ingredients on your skin before using shampoo to avoid allergic reactions.
- Make shampoo in small batches to monitor how your scalp reacts.
- Use clean tools and containers to prevent contamination.
- Store homemade shampoo in the fridge for up to 6 weeks.
1. What Ingredients Do I Need to Make Shampoo at Home?
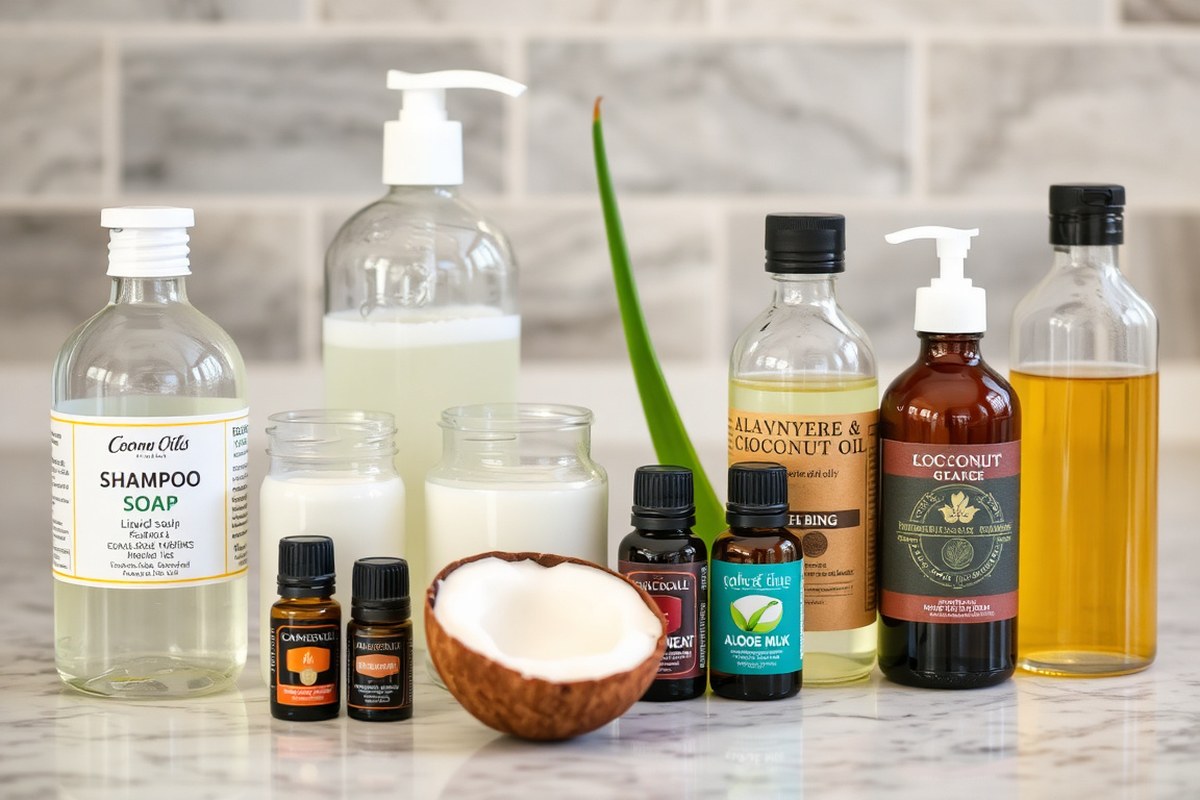
Making shampoo at home means choosing the right ingredients for cleaning and nourishing your hair. Natural liquids like liquid castile soap are the easiest base. Castile soap gently cleans without harsh chemicals and is widely available.
Another option is coconut milk, which softens hair with natural oils and vitamins. Homemade coconut milk tends to work better than canned for many hair types.
The next step is adding carrier oils and essential oils. Carrier oils bring moisture and protect hair from drying out. Essential oils add scent and extra benefits like scalp soothing or hair growth support.
Use them in small amounts to prevent irritation. Oils mix well with castile soap and help balance cleaning with conditioning.
- Liquid castile soap: gentle, natural shampoo base
- Coconut milk: softening and moisturizing
- Carrier oils: coconut, argan, jojoba, almond
- Essential oils: lavender, rosemary, tea tree, cedarwood
- Glycerin: adds moisture and smoothness
- Preservatives: optional, natural options include vitamin E and rosemary extract
| Carrier Oil | Hair Benefits | Best For |
|---|---|---|
| Coconut Oil | Moisturizes, reduces protein loss | Dry, damaged hair |
| Argan Oil | Softens, adds shine, controls frizz | Normal to dry hair |
| Jojoba Oil | Balances scalp oil, lightweight moisture | Oily or fine hair |
| Sweet Almond Oil | Soothes scalp, adds softness | Sensitive scalp, all hair types |
Essential oils require safe use. Test a small skin patch 24 hours before using them. Start with about 10 to 15 drops per cup of shampoo base.
Avoid unsafe oils like cinnamon or clove if you have sensitive skin. For hair growth, rosemary and lavender oils are popular choices. Tea tree oil helps with dandruff and scalp health.
Preservatives are not always necessary for small, fresh batches. You can store shampoo in the refrigerator for up to two weeks without preservatives.
For longer storage, natural preservatives like vitamin E oil or rosemary extract help slow down spoilage. Avoid adding water directly unless you use a preservative.
2. How to Make Basic Homemade Shampoo: Step-by-Step Guide
How to Make Basic Homemade Shampoo: Step-by-Step Guide
Making shampoo at home needs a simple, clear process. Follow exact measurements and mixing steps for the best results. Proper storage keeps your shampoo fresh and effective for weeks.
Measuring and Preparing Ingredients
First, gather your ingredients: liquid castile soap and distilled water. You can add optional items like honey or essential oils.
Use a kitchen scale or measuring spoons to measure precisely. Room-temperature ingredients mix more evenly, so let refrigerated items warm up slightly before use.
Prepare your workspace by cleaning all tools and containers with hot, soapy water. Rinse well and dry to avoid contamination. Choose a clean glass or BPA-free plastic bottle for your shampoo.
Mixing and Blending Techniques
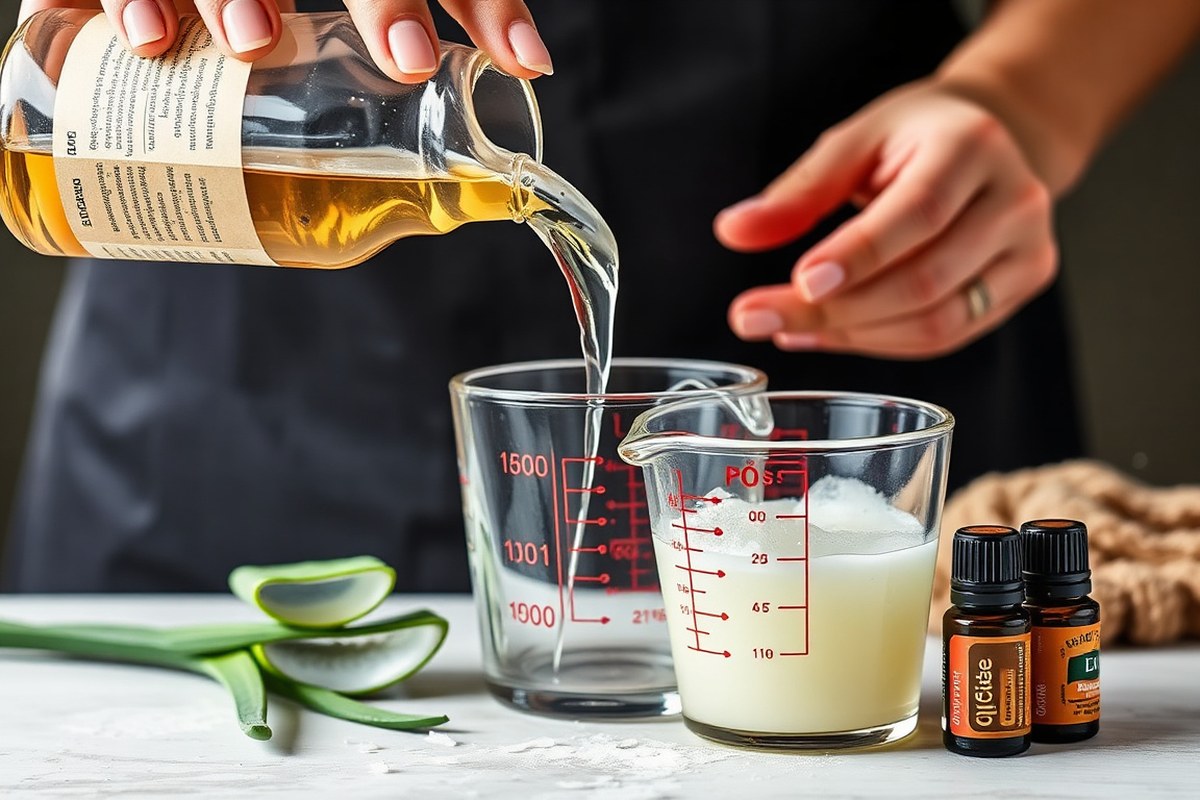
Pour distilled water into a mixing bowl, then add liquid castile soap. Stir gently using a non-metal spoon to avoid excessive bubbles.
Add your chosen additives slowly, like honey or essential oils. Mix everything until it looks smooth and consistent.
Combine ingredients in this order for a smooth blend: water, soap, then additives. Avoid shaking harshly to keep froth low. Stir until everything looks uniform.
- Measure 1/2 cup distilled water and pour into a clean bowl.
- Add 1/4 cup liquid castile soap gently to the water.
- Mix slowly with a spoon until combined but not bubbly.
- Add 1 tablespoon honey if using, and stir thoroughly.
- Drop in 10 drops of essential oil, like lavender or peppermint.
- Pour the blend into your storage bottle using a funnel.
- Seal the bottle tightly and shake gently before first use.
Shake well before each use but avoid vigorous shaking to reduce bubbles.
Best Storage Practices
Store your homemade shampoo in a cool, dry place, away from direct sunlight. A bathroom cabinet shelf works well without heat or humidity extremes. For best results, use within 4 to 6 weeks.
Washing your shampoo bottle thoroughly before refilling prevents bacteria growth. Label your bottle with the date you made the shampoo. So you know when to replace it.
Watch for any changes in smell, color, or texture. Throw away the shampoo if you notice any of these.
3. How to Customize Shampoo for Different Hair Types
You can tweak your homemade shampoo to fit your hair type and scalp condition. Dry hair needs more oils for moisture.
Oily hair benefits from gentle cleansing and astringent ingredients. Dandruff shampoos should soothe the scalp and reduce flakes without stripping natural oils.
Here’s a quick table of ingredients for your hair type. Use these based on what your scalp needs.
Each helps with different hair issues. These swaps help your shampoo work better for you and your hair.
| Hair or Scalp Type | Ingredients to Add | Effect |
|---|---|---|
| Dry Hair | Jojoba oil, coconut oil, honey | Moisturizes and reduces frizz |
| Oily Hair | Baking soda 1-3 tsp, lemon juice, tea tree oil | Clarifies scalp, reduces oiliness |
| Dandruff Prone | Aloe vera, tea tree oil, chamomile | Soothes scalp, reduces flakes |
| Frizzy Hair | Sweet basil, lavender oil | Controls frizz, adds shine |
| Normal Hair | Olive oil, bergamot oil | Maintains balance and light shine |
For dry hair, start with 1 tablespoon jojoba or coconut oil per cup of shampoo base. Add 1 teaspoon honey for extra smoothing. For oily hair, add 1 to 3 teaspoons baking soda to shampoo.
This helps remove oil build-up. Mix well before use. Use lemon juice or tea tree oil drops to balance the scalp’s natural oils.
Dandruff needs gentle, calming ingredients. Aloe vera gel cools and soothes irritation.
Chamomile or tea tree oil help reduce flakes and inflammation. Use no more than 10 drops of essential oils per cup of shampoo to avoid irritation.
You can boost shine and reduce frizz by adding sweet basil or lavender oils. Try 5, 7 drops per batch and test for sensitivity. Always mix well and shake before each use.
Scalp massage during shampoo helps too. It improves blood flow and encourages healthy hair growth.
4. What Are the Safety Tips and Allergy Tests for Homemade Shampoo?
Testing homemade shampoo before using it is key to avoid allergic reactions and irritation. Careful handling during making and storage also keeps your shampoo safe to use.
Some ingredients can cause trouble for sensitive skin or certain conditions. So knowing what to skip helps prevent problems.
Performing a Patch Test
Try a patch test on a small skin area before full use. This helps check for allergies and sensitivity to your shampoo mix. It’s important, especially for kids or those with delicate scalps.
Follow these steps exactly to do a safe patch test:
- Clean a small skin area, like the inside of your wrist, with water and mild soap.
- Apply a small amount of the homemade shampoo to this spot.
- Leave it uncovered and wait for 24 hours without washing it off.
- Check the area for redness, itching, swelling, or rash.
- Should none of those appear, the shampoo is likely safe for your scalp.
- Stop using the shampoo immediately if you see any irritation or discomfort.
- Wash the area gently with water and a mild cleanser to remove the shampoo safely.
Patch testing costs no money but requires a full day of waiting. It’s the best way to spot allergic reactions early before using the shampoo all over.
Avoiding Irritants and Unsafe Ingredients
Steer clear of harsh detergents like sulfates that strip hair oils. Some homemade shampoo ingredients can dry hair or cause itching. Avoid ingredients known to trigger allergies, such as certain essential oils or preservatives.
Skip these common irritants for safer shampoo:
- Sulfates like sodium lauryl sulfate
- Formaldehyde releasers or parabens
- High-concentration essential oils, especially cinnamon or citrus
- Artificial fragrances and dyes
You should also avoid ingredients that you or your family members know cause allergy. With a sensitive scalp, test new additives individually and watch your reaction.
Proper Hygiene and Handling Practices
Wash your hands and clean surfaces before you start making shampoo. Use sterilized bottles or jars to hold your homemade shampoo to prevent bacterial growth. Old shampoo bottles work well once you rinse them thoroughly with hot water.
Keep the shampoo in a cool, dry place and avoid direct sunlight exposure. This helps maintain freshness and lowers the risk of spoilage.
Refrigerate if you use natural ingredients that spoil fast or if you don’t use a preservative. Plan on using the shampoo within a week.
Don’t double-dip your fingers into the shampoo jar while using it. Instead, pour some onto your hand or a clean spoon to keep contamination low.
5. How Long Does Homemade Shampoo Last and How Should I Store It?
Homemade shampoo usually lasts about one to two weeks at room temperature. Without commercial preservatives, it can spoil quickly. To stretch its life, store it in a cool, dark place away from sunlight and heat.
Refrigeration helps a lot. Keeping shampoo in the fridge can extend its shelf life up to one month.
Cooler temperatures slow down bacteria growth. Use a tightly sealed container to avoid contamination and moisture buildup.
Natural preservatives can add a few extra weeks of freshness. Adding a few drops of vitamin E oil or citric acid helps prevent spoilage. Essential oils like tea tree and rosemary have antimicrobial effects.
These oils help keep shampoo fresher for a bit longer. They add a mild preservative touch to your homemade shampoo.
Keep small batches in sealed bottles in the fridge and use them fast for best results.
Store shampoo in glass or BPA-free plastic bottles with airtight lids. Avoid large batches if you cannot use them within two weeks. Frequent exposure to air and hands can introduce bacteria, cutting shelf life.
6. How Can I Make Shampoo Bars and What Are Their Benefits?
Shampoo bars are solid shampoos made like soap bars but designed for hair. They use oils and butters that clean hair without the extra water found in liquid shampoos. Making them takes more steps but offers a concentrated, travel-friendly, and eco-friendly option.
Key Ingredients for Shampoo Bars
Shampoo bars mostly use oils like coconut, olive, castor, shea butter, and coconut butter. These moisturize and clean hair gently without stripping natural oils. Unlike liquid shampoos, they don’t contain extra water or fillers.
You’ll typically add a lye solution for saponification, which turns oils into solid soap. Adding castor oil boosts lather, while shea butter adds moisture and softness to hair. These ingredients also give the shampoo bar its solid texture and creamy feel.
Shaping and Curing Process
Making shampoo bars requires careful shaping and curing to create a solid, long-lasting bar. After mixing oils with lye water and essential oils, pour the mixture into molds to set. Then, cure the bars in a dry place for 4 to 6 weeks.
This helps them harden. It also ensures they stay mild on your skin.
Here’s how to make a basic shampoo bar:
- Measure 10 oz coconut oil, 10 oz olive oil. Add 5 oz castor oil and 5 oz shea butter.
- Slowly mix 6 oz lye into 16 oz cold distilled water (wear gloves).
- Combine oils and lye water, stirring until thickened (trace stage).
- Add 1 oz essential oils for fragrance or scalp benefits.
- Pour mixture into silicone molds shaped like bars.
- Cover with a towel, let sit for 24 hours to harden.
- Remove from molds and cure bars on a rack in a dry place.
- Wait 4 to 6 weeks to fully cure, allowing mildness and longevity.
Usage and Storage Tips
Wet your hair well before using shampoo bars. Rub the bar between your palms or directly on your scalp.
Work it into a lather and rinse well. These bars concentrate cleansing agents, so less is needed than liquid shampoo.
Store shampoo bars in a dry spot between uses. A soap dish with drainage or a mesh bag helps bars dry faster and last longer. Avoid leaving them in standing water to prevent softening or dissolving.
Shampoo bars last longer than liquid shampoo since they have less water and no preservatives. They also cut down plastic waste and are easy to carry for travel. Some find they help reduce scalp irritation by avoiding harsh chemicals common in commercial shampoos.
7. What Are the Common Mistakes and How Can I Fix Them?
Homemade shampoo can separate or become runny because of the wrong balance between liquids and thickeners. Chill the mix in the fridge for 20 minutes. Then whip it again.
This step helps the shampoo texture improve. This firms up the shampoo without adding more ingredients that could change how it works.
Your scalp might react badly or hair feel greasy. This could mean the shampoo’s pH or ingredients are off. Castile soap used in many homemade shampoos has a pH around 8 or 9.
Hair’s natural pH is about 4 or 5. These levels don’t match well. Fix greasiness by adding more castile soap.
Use less oil or essential oils to balance it out. This makes the shampoo cleaner and lighter on your hair.
- Shampoo separates: refrigerate and whip to thicken again
- Hair feels greasy: reduce oils or double the soap ratio
- Scalp irritation: check for allergic ingredients or balance pH
- Runny shampoo: adjust liquid-to-thickener ratio slowly
- Wrong pH: use pH strips and balance with mild acid or base
- Dry scalp: add moisturizing oils carefully without overdoing it
- Too thick shampoo: gently add water to reach preferred consistency
Getting your recipe right means learning what your hair and scalp really need. Always test small batches first to avoid wasting ingredients. Adjust ingredients gradually and track what changes you make.
For a heavy shampoo, cut essential oils in half. Try that change and check how your hair feels.
Fixing pH issues requires measuring with strips. Add a little apple cider vinegar to lower the pH if it’s too high. This brings the pH closer to 4.5.
Add the vinegar a few drops at a time to avoid overcorrecting. The right pH keeps your scalp happy and your hair shiny, not dry or itchy.
8. How Do I Transition from Commercial to Homemade Shampoo?
Switching to homemade shampoo takes time. Your hair and scalp need about two to four weeks to adjust from commercial shampoos. At first, your scalp might feel oilier than usual.
It could also feel drier. Your hair may look different in texture or shine. Your scalp is used to chemicals that strip oil in a set way.
This causes the change. Your scalp needs time to adjust.
During this period, keep your scalp healthy by massaging natural oils or herbal rinses into it. For example, apply aloe vera gel or chamomile tea after washing. These ingredients soothe the scalp and control dryness or flaking better than commercial conditioners.
Wash your hair every other day instead of daily. This helps if your scalp feels oily. You give your scalp time to balance oil.
Expect the transition to include stages. The first week, you might notice more buildup or itchiness. Between weeks two and three, your scalp starts regulating natural oils better.
But hair may still feel different. By week four, most adjustment is done. Your hair should start to look more natural over time.
It will feel healthier too. Use the right homemade shampoo recipe.
Make changes gradually and watch your hair’s response before switching recipes completely.
Dry hair needs extra moisture in shampoo. Try adding coconut milk or honey. These help prevent hair brittleness.
Add lemon juice or apple cider vinegar rinses if your hair turns greasy. These balance the scalp’s pH.
Rinse after shampooing. These small tweaks prevent unexpected dryness or oiliness during the switch.
Keep an eye out for persistent scalp problems like severe itching, redness, or hair loss. Those signs mean you should talk to a dermatologist.
Homemade shampoos suit many but aren’t right for everyone or all scalp conditions. A professional can help decide if other treatments or products are safer and more effective.
Patience is key. Homemade shampoos may foam less than regular ones. They might not clean the same way at first.
This is normal for new users. This difference isn’t a sign of poor cleaning but natural ingredients working differently. Keep using your homemade shampoo during the adjustment period.
Doing so leads to healthier hair over time. Be patient with results.
Step-by-Step Action Plan to Start Making Your Own Shampoo
Follow these steps over the next few weeks to switch confidently to homemade shampoo. Track your hair’s response at each stage for best results.
- Day 1: Gather ingredients for a basic shampoo recipe. Choose gentle cleansers like castile soap and add oils for your hair type.
- Week 1: Make a small batch and test it on your hair. Notice how clean and soft your hair feels after washing.
- Day 10: Try customizing with essential oils or herbs for your scalp needs. See if your scalp feels less itchy or oily.
- Week 2: Perform a patch test with any new ingredient to check for allergies. Wait 24 hours and watch for irritation.
- Week 3: Transition from commercial shampoo by gradually mixing homemade shampoo with your usual one. Hair might feel different but should improve.
- Week 4: Store your shampoo properly in a cool, dark place. Check the smell and texture before each use to confirm freshness.
- After 1 Month: Adjust your formula based on what worked or didn’t. Fine-tune ingredients to get your best hair day every day.
Frequently Asked Questions
How Can I Make Shampoo at Home Without Harsh Chemicals?
Use natural ingredients like castile soap, honey, and apple cider vinegar. These clean gently without synthetic chemicals or harsh detergents. Adding essential oils gives your shampoo a nice scent and extra benefits.
Can Homemade Shampoo Promote Hair Growth?
Yes, ingredients like rosemary or peppermint oil may help stimulate hair growth. Mixing these with a mild liquid soap creates a nourishing shampoo. Consistency is key for seeing results over time.
Is It Possible to Make Shampoo Suited for Oily Hair at Home?
Use a stronger cleansing base like castile soap and add lemon juice or tea tree oil. These ingredients help control excess oil and reduce buildup. Adjust amounts carefully to avoid drying your scalp.
How Do Homemade Shampoo Bars Differ from Liquid Shampoos?
Shampoo bars are solid, last longer, and reduce plastic waste. They concentrate cleansing agents and often include conditioning oils. Bars need to be stored dry between uses to keep firm.
What’s the Best Way to Test If Homemade Shampoo Causes Allergies?
Apply a small amount behind your ear or on your wrist. Wait 24 hours and watch for redness, itching, or swelling. This simple allergy test reduces risks before full use.
Can I Add Preservatives to Homemade Shampoos Safely?
Yes, natural preservatives like vitamin E oil can extend shelf life. They slow down spoilage but don’t make shampoo last indefinitely. Refrigerate your shampoo if it lacks synthetic preservatives.
Wrapping Up
Making shampoo at home gets easier with a clear plan and some patience. Start small and adjust to find what your hair loves. Begin your first batch today and see what natural care can do.