How to Sharpen Scissors: 8 Proven Methods with Angles & Safety Tips
How to sharpen scissors is simple when you know the right angle and tools. The key is working at about a 60-degree angle on most scissors. Sharpening with the proper materials keeps your blades cutting smoothly without damage.
Start by taking your scissors apart if possible. Clean the blades before sharpening to remove any dirt or grime. Using sandpaper with 150 to 200 grit works well.
It suits home sharpening needs. This grit range keeps the blades sharp longer.
Sharpen slowly and evenly along the entire blade edge. You want to maintain a consistent angle as you move from tip to handle. This ensures every part of the blade gets the attention it needs to cut better.
Key Takeaways
- Use a 60-degree angle for sharpening most office and kitchen scissors.
- Disassemble scissors before sharpening for better access and safety.
- Clean dirt and rust from blades before sharpening for best results.
- Choose 150-200 grit sandpaper to sharpen scissors effectively at home.
- Sharpen blades slowly while keeping a consistent angle from tip to base.
- Use foil cutting as a quick test to check if blades are sharp.
1. How to Sharpen Scissors Effectively at Home

Sharpening scissors at home works best with simple tools like sandpaper or a sharpening stone. You want to keep a steady angle, usually about 60 to 70 degrees for most scissors.
The goal is to grind the blade edges evenly to bring back their sharpness. Avoid sharpening the inside edge to keep the blades aligned and cutting smoothly.
Taking your time and sharpening step-by-step will protect your scissors and make them cut better. Open the scissors wide. Run the blade edge across the abrasive surface.
Repeat until the edge feels sharp. Test the scissors on thin paper.
This tells you when you’re done. Keep working if needed.
- Open your scissors wide and place one blade flat against 150-200 grit sandpaper.
- Draw the blade smoothly from base to tip on sandpaper. Use a 60-70 degree angle. Do this 10 to 20 times.
- Flip scissors and repeat the same motion with the other blade.
- Wipe both blades clean with a dry cloth to remove metal filings and dust.
- Check the sharpness by cutting thin paper; if it snips cleanly, you’re done.
- Repeat sharpening steps carefully. Avoid over-sharpening to protect the blade.
- Tighten the pivot screw if blades feel loose, helping maintain sharp cuts.
2. Tools and Materials Needed for Sharpening Scissors
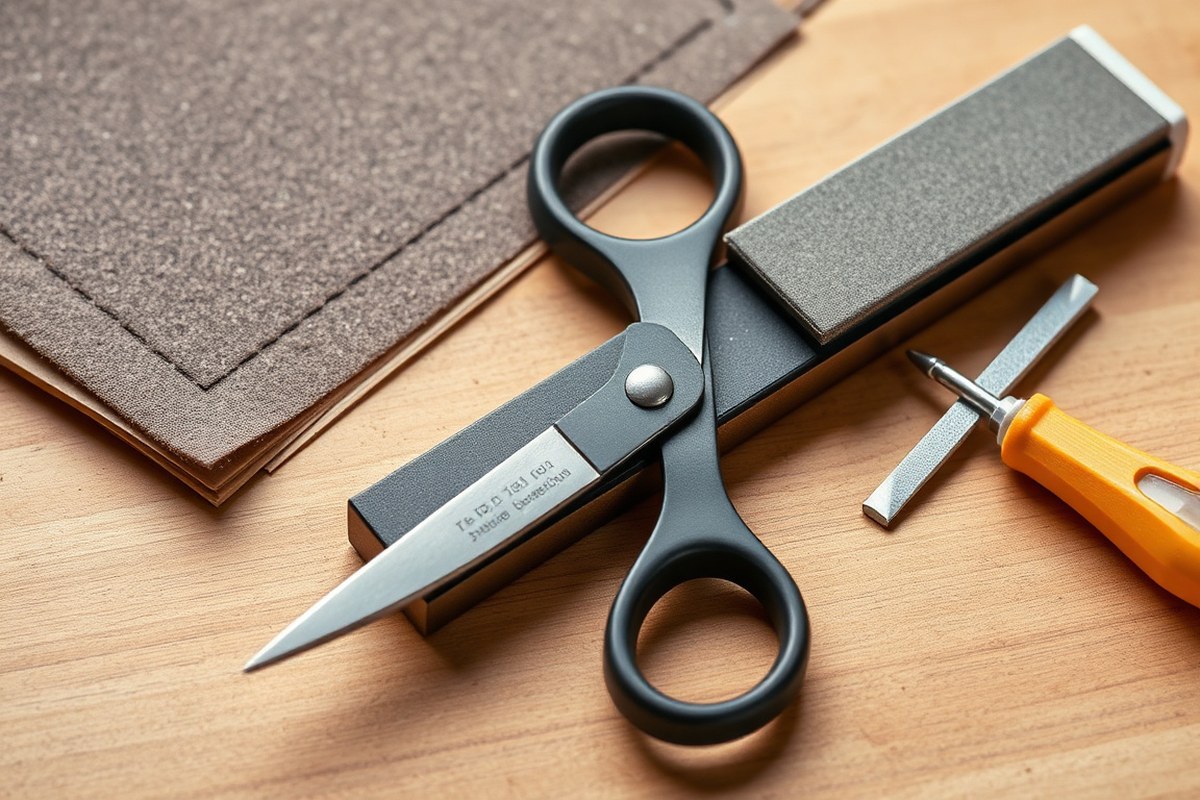
To sharpen scissors, you need a few essential tools. The most common tool is sandpaper. It’s easy to find at home.
Hardware stores sell it too. Sandpaper with 150 to 200 grit works well.
It smooths out edges. It doesn’t remove too much metal.
A sharpening stone or whetstone is another great tool. A dual-sided stone has 1000 grit on one side. The other side is 3000 grit.
It fixes dull or nicked scissors. Use the coarse side first to remove damage. Then use the fine side.
It helps polish the blades. These stones usually cost between $15 and $30 and last a long time.
You can use common household items instead. This works if you lack sandpaper or sharpening stone. They include:
- Aluminum foil folded several times to create a rough surface
- A glass jar edge as a smooth sharpening surface
- The tip of a nail file or emery board for fine precision
- Wire cutters for very tough jobs, though not ideal for kitchen scissors
- A drill bit made of hardened steel for quick blade touch-ups
These options work well but generally need more careful handling to avoid uneven sharpening. Scissors that cut thick material need stronger tools.
A sharpening stone or coarse sandpaper lasts longer. For lighter tasks, regular sandpaper or household items keep your scissors sharp enough.
Sharpen scissors slowly and evenly to avoid damaging one edge or the pivot.
Each tool shapes the blade differently. Sandpaper lets you work on the blade by cutting through it multiple times. A sharpening stone requires sliding the blade at a consistent angle.
Wet stones should be soaked in water for 5-10 minutes before use. When finished, rinse and dry the scissors completely to avoid rust. Maintain scissors regularly using these tools.
This keeps them sharp for three to five years. Wear level can change this.
3. Understanding Sharpening Angles for Different Scissors
Different scissors need different sharpening angles to perform well. The angle depends on their purpose and blade type. Matching the original angle makes the edge sharp and long-lasting.
Common Scissors Types and Their Angles
Office, kitchen, garden, and hairdressing scissors each have typical sharpening angles. Office scissors usually cut paper and plastic, so they need a moderate angle. Kitchen scissors cut food and packaging, so their angle is a bit steeper.
Garden scissors handle tougher material like plants, requiring a sharper angle for durability. Hairdressing scissors often have precise beveled edges that vary between types.
Hairdressing scissors have two main edge types, with angles differing accordingly. The beveled edge is the most common, needing careful sharpening to keep precise cuts. Different angles affect how clean or rough the cut feels on hair.
| Scissor Type | Typical Sharpening Angle (Degrees) | Cutting Use |
|---|---|---|
| Office Scissors | 30 to 35 | Paper, cardboard, plastic packaging |
| Kitchen Scissors | 35 to 40 | Food, string, packaging |
| Garden Scissors | 40 to 45 | Plant stems, tougher material |
| Hairdressing Scissors (Beveled Edge) | 15 to 25 | Hair, precise cutting |
| Hairdressing Scissors (Other Edge Types) | Varies, often around 20 | Special cuts and thinning |
Using the right angle keeps the scissor sharp and reduces wear. Most scissors have one angle per side. But some hair scissors differ on each half.
Why Sharpening Angle Affects Cutting Performance
The edge angle controls how sharp the blade feels and how long it lasts. A lower angle like 15 degrees creates a sharper, finer edge. It cuts well but dulls faster and can chip if the scissors hit hard objects.
A steeper angle near 45 degrees is less sharp but stronger. Garden scissors need this to cut woody stems without bending. Office and kitchen scissors fall in the middle for balance between sharpness and durability.
Wrong angles cause uneven edges and poor cuts. Sharpening too flat or too sharp can make scissors feel dull quickly or snap during use.
How to Maintain the Correct Angle While Sharpening
Keep your sharpening tool aligned with the blade’s original angle. Look closely and try to match the slant you see on your scissors. Use the same angle for each pass to keep the edge consistent.
For hairdressing scissors with beveled edges, sharpen only the beveled side at the right angle. Use gentle, even strokes or a repetitive cutting motion on steel wool or aluminum foil. This keeps the angle steady and restores the clean cut.
Checking sharpness often helps. Stop and cut paper or fabric after a few passes.
If it still tears or snags, keep working at the same angle. Avoid changing angles, or you could ruin the blade’s edge.
4. Disassembling and Preparing Scissors for Sharpening
Taking scissors apart helps you sharpen each blade evenly and clean them better. Removing the middle screw lets you separate the blades safely. Cleaning the blades before sharpening removes sticky buildup that can block smooth cuts.
Tools Needed to Disassemble Scissors
You just need a few simple tools to take scissors apart. A small flathead or Phillips screwdriver usually works for most scissors. A soft cloth can help you grip the blades and protect them during handling.
Keep a container nearby for small screws to avoid losing them. Sometimes scissors have a bolt and nut instead of a screw.
So a small wrench might be helpful. Gather these tools before you start to keep everything handy and organized.
Step-by-Step Disassembly Process
Disassembling scissors involves careful handling to avoid damaging the blades or losing parts. Work on a clean, flat surface with enough light. Follow these steps in order for safe removal.
- Lay the scissors flat and open them slightly to access the middle screw.
- Use the appropriate screwdriver to turn the screw counterclockwise.
- Hold the blades firmly but gently to prevent slipping while unscrewing.
- Remove the screw completely and place it in your storage container.
- Carefully separate the two blades by sliding them apart.
- Check for any washers or spacers and set those aside too.
- Inspect blade edges for nicks or bending before preparing to sharpen.
Blades that won’t separate may need a bit more unscrewing or gently wiggling apart. Avoid forcing the blades to prevent bending.
Cleaning and Inspecting Blades Before Sharpening
Clean blades are easier to sharpen and cut better afterward. Sticky adhesive from tape, labels, or boxes often builds up between blades. Wipe the blades with a rag dampened with warm, soapy water to dissolve this residue.
Use a bit of rubbing alcohol if soap doesn’t remove sticky spots. Dry the blades fully with a towel to avoid rusting. Check closely for any bent tips or deep blade nicks that sharpening won’t fix well.
Blade damage like this means you may want to replace scissors instead of sharpening. Straight blades at a 60° angle usually sharpen well for office use. Properly cleaned and prepped blades will sharpen more evenly and last longer.
5. Top 8 Easy Methods to Sharpen Scissors at Home
Sharpening scissors at home can be simple and effective with common tools. The easiest ways include using sandpaper, sharpening stones, or even household items. Follow these step-by-step methods to get your scissors cutting like new again.
Sharpening with Sandpaper
Sandpaper actually sharpens the blades by grinding away dull metal edges. It’s affordable and easy to find at hardware stores or in your home tool kit. Use a medium-grit sandpaper, about 150 to 200 grit, for best results on most scissors.
- Cut small pieces of sandpaper to fit a flat surface.
- Hold the scissors open and cut through the sandpaper several times.
- Apply light pressure to let the blades grind against the paper.
- Repeat this about 10-15 times, then test the sharpness.
- Use a finer grit paper (400 or higher) to polish the edges if needed.
- Wipe the blades clean with a dry cloth.
Don’t press too hard cutting the sandpaper. It can bend or dull the blades faster.
Using a Sharpening Stone or Whetstone
Sharpening stones offer precise blade sharpening by removing metal evenly. They cost around $10, 30 and last a long time.
Choose a stone with medium to fine grit designed for knives or scissors. Keep the blades at the correct angle, usually around 70 degrees for nail scissors.
- Soak a whetstone in water for 5-10 minutes before use.
- Hold the scissors open at the sharpening angle against the stone.
- Slide each blade along the stone in a smooth motion away from the cutting edge.
- Repeat 5, 10 times per blade, keeping the angle consistent.
- Clean the scissors to remove metal dust after sharpening.
- Check sharpness by cutting thin paper or fabric.
Maintaining the sharpening angle matters a lot. Too steep or too shallow won’t sharpen properly.
Sharpening with Aluminum Foil and Other DIY Items
Aluminum foil doesn’t sharpen like sandpaper but can help remove buildup on blades. It’s a quick fix for slightly dull scissors.
Fold foil into several layers to make it thick enough for cutting. Other household good options include cutting through cardboard or rubber bands for mild sharpening.
- Fold aluminum foil into a thick strip, about five layers.
- Open the scissors fully and cut through the foil 10 times.
- Wipe the blades clean with a soft cloth.
- Try cutting paper afterward to test the edge.
Aluminum foil won’t fix very dull blades but removes light buildup that reduces sharpness.
Additional Methods: Glass Jar, Screwdriver, Nail File, Rotary Tools
A glass mason jar’s rim can be a surprising sharpening surface for scissors. Nail files and screwdrivers also work to touch-up dull edges.
Handheld rotary tools with abrasive stones sharpen scissors well. But avoid rotary wheels, which can damage blades quickly.
- For a glass jar, fully open scissors and cut along the jar’s rim several times.
- To use a nail file, rub the rough file along each blade’s edge gently and evenly.
- Press a flat screwdriver against the blade edge and scrape carefully to hone it.
- When using a rotary tool, attach an abrasive stone to it first. Hold the blade at the right angle. Sharpen the blades briefly for best results.
- Clean blades and test sharpness on paper after any sharpening.
Be careful with rotary tools. Too much heat can damage your scissors. Excessive speed will ruin the blade edges.
6. How to Remove Burrs and Reassemble Scissors After Sharpening
After sharpening, you’ll notice small, rough edges called burrs along the blade. Burrs are tiny metal bits left after sharpening your scissors. They stick out and can cause poor cutting.
You want to remove them to fix this. Removing burrs helps blades close cleanly.
This gives you a sharper cut. It also stops damage to your scissors.
Putting your scissors back together correctly matters. Don’t tighten the screw too much.
Over-tightening stops the blades from moving smoothly. Too loose, and the scissors will wobble, which feels awkward and can bend the blades.
Follow these steps to remove burrs and reassemble your scissors so they work like new:
- Wipe each blade with a damp cloth. Use a paper towel if you prefer. This removes metal dust and debris. This clears the sharpening residue and burrs.
- Feel the edge gently with your finger. Check for burrs after cleaning. Run the blunt blade side or a fine stone along the back edge. This removes any stuck-on burrs. Use light pressure and smooth strokes to knock off burrs without cutting yourself.
- Lay the two blades together, lining up the edges just as they were before disassembly.
- Insert the central screw or bolt that holds the blades together. Screw it in by hand until snug, but do not fully tighten yet.
- Open and close the scissors repeatedly to check how smoothly they move. Adjust the screw tension for smooth action, not too stiff or loose.
- Tighten the screw fully once the blades pivot easily without wobbling.
- Clean scissors again with a damp cloth. This gets rid of dirt or metal dust left behind. Make sure to wipe every part.
- Test cut on a scrap material to ensure the blades cut cleanly and scissors move comfortably.
Put the washer back if your scissors have one. Do this before reinserting the screw. It keeps blades working right.
Some scissors need a tiny drop of oil on the pivot for smooth motion. Avoid over-oiling, as this can attract dirt.
Reassembling carefully keeps your blades aligned and prevents dulling or damage. Burrs can ruin cuts and cause rough edges if left on. Taking these extra steps after sharpening usually adds months of smooth, sharp use.
7. When to Sharpen, Maintain, or Replace Your Scissors
Your scissors should be sharpened when fabric snags or tears instead of cutting. Try cutting paper or fabric; resistance or jagged edges mean dull blades.
Sharpen normal-use scissors every few months. Light users can sharpen twice a year.
Maintain scissors by cleaning them after use and oiling the pivot every month or so. This stops rust and keeps the blades moving smoothly.
Store scissors dry and away from harsh chemicals to prevent damage. Regular maintenance slows dulling and helps keep scissors sharp longer.
Special scissors, like hair cutting or fine crafting scissors, usually need professional sharpening. They require precise angles and care to avoid damage. Notice chips, bent tips, or persistent dullness?
Seek professional sharpening help. The cost for professional sharpening runs about $10 to $20, depending on location and scissor type.
Replacement is better when scissors have deep blade damage, loose pivot screws, or broken handles. Kitchen scissors that cut bones or poultry shears often can’t be fixed by sharpening. These usually need replacing.
Sharpening won’t restore their cutting edge. Check for these signs: wobbling blades, broken grips, or no improvement after sharpening efforts. Replacing often costs $10 to $25 for basic scissors.
Decide using a simple step-by-step check: first, try cleaning and oiling. Next, test cutting a few materials. When scissors don’t cut cleanly, give them a sharpening session.
Replacing or professional sharpening is best if scissors won’t cut cleanly or have damage. Doing this avoids wasted effort on scissors that can’t work properly again.
8. Common Sharpening Mistakes and How to Avoid Them
Using the wrong tools can damage your scissors permanently. For example, sharpening on a glass bottle can chip the blade edges slightly. You want to avoid tools that don’t create a smooth, even surface for grinding the blade.
Keeping the blade angle steady is important. Scissors need blades to meet evenly along flat backs to cut well. Sharpening at a wrong or uneven angle can cause gaps and make your scissors dull faster.
Your edges may be uneven or blades misaligned after sharpening. You probably sharpened unevenly or bent a blade.
Fix this by realigning the blades at the pivot screw. Then, trim raised burrs with fine sandpaper or a honing stone.
- Never sharpen against curved or irregular surfaces to avoid uneven edges.
- Use smaller angles (around 15-20 degrees) for rigid or medical scissors.
- Check blade contact by slowly closing scissors; smooth edges should touch fully.
- Disassemble the scissors if sharpening causes misalignment, then reassemble tightly.
- Avoid excessive pressure during sharpening; this can bend blades or ruin angles.
- Use proper sharpening tools, costing under $20, for better precision and safety.
Burrs and small nicks can ruin the sharpness if left unattended. Smooth out all imperfections with a light, even stroke on an appropriate stone. This step helps your scissors maintain smooth, precise cuts longer.
Use slow, controlled strokes when sharpening to keep the angle consistent and avoid blade damage.
Step-by-Step Action Plan for Sharpening Scissors at Home
Follow these simple steps to get sharp scissors that work like new. Check each step carefully to see your results improve.
- Before you start: Gather your sharpening tools and set up a clean workspace. Make sure the scissors are clean and dry.
- Day 1: Disassemble your scissors if possible. This lets you sharpen each blade evenly and safely.
- Day 1: Pick a simple way to sharpen your scissors. Try a whetstone or use aluminum foil. Both are easy options for sharpening. Sharpen slowly and check blade smoothness.
- After sharpening: Remove burrs with a fine abrasive or cloth. Test the blades by cutting paper to check sharpness.
- Day 2: Reassemble the scissors carefully. Adjust the screw tightness so blades move smoothly without wobbling.
- Week 1: Use your scissors on regular materials like fabric or paper. Notice if cuts are clean and easy.
- After 2 weeks: Inspect scissors for dull spots or stiffness. Repeat sharpening if needed or get professional help for serious wear.
Frequently Asked Questions
Can I Use a Whetstone Instead of Sandpaper for Scissors?
Yes, a whetstone works well to sharpen scissors. This tool is traditional and often used for knives and garden shears. It works well on household scissors needing a quick touch-up.
How Often Should I Oil Scissors After Sharpening?
You should oil scissors after every few uses post-sharpening. This keeps the pivot smooth and prevents rust, which can dull the blades faster. Use a drop of light machine oil or sewing machine oil.
Can Sharpening Scissors Damage the Blade?
Sharpening scissors can damage blades if done incorrectly. Pressing too hard can damage the edge. Use the right angle.
Work slowly and keep the angle steady. Avoid sharpening if the blade has cracks.
What Is the Best Grit of Sandpaper to Sharpen Scissors?
A 150-200 grit sandpaper sheet is ideal for sharpening scissors. It’s coarse enough to remove dullness without ruining the blade, helping restore a sharp edge quickly. Do several passes to grind evenly.
Should I Sharpen Scissors Differently Based on Blade Type?
Yes, different blades need different angles when sharpening. Thinner blades require a smaller angle and thicker blades a steeper one. Match the original angle for the sharpest results and to avoid damage.
How Do I Test If My Scissors Are Sharp After Sharpening?
Test sharpness by cutting through a sheet of paper. The blades are sharp when they cut cleanly with little effort. Avoid cutting thick materials immediately after sharpening to keep them sharp longer.
Key Points to Remember
Your scissors will last longer and cut better with regular care and proper sharpening. Try sharpening one pair today using the steps above. Take good care of your tools, and they’ll repay you with smooth, easy cutting.